Xmind MCP サーバー
Xmind MCP Serverを使うと、AIアプリをXmindに接続できるため、AIエージェントを使って、シンプルな言葉だけでXmindのマインドマップを作成できます。

Xmind MCPとは?
Xmind MCP Serverを使うと、AIアプリをXmindに接続できるため、AIアシスタントがXmindのマインドマップを作成、閲覧、編集できるようになります。
Xmind MCP ServerをClaude、Claude Code、Codex、ChatGPTなどのMCP互換クライアントに接続すると、自然言語で会話、メモ、調査内容、プロジェクトのアイデアを、構造化された編集可能なXmindマインドマップに変換できます。さらに、アシスタントに既存のマップを読み取らせ、その構造を要約したり、チャットで内容を洗練させたりすることもできます。
アイデア、議論、計画がすでに行われているAIアプリに、ビジュアル思考を取り入れたいときにXmind MCPを活用してください。
XmindをAIアプリに接続する理由
会話が行われる場所で作業する — ツールを切り替えたり、内容を往復でコピーしたりせずに、Claude、ChatGPT、CodexなどのAIアプリからXmindを使えます。
アイデアを視覚的な構造に変える — 散らばったメモ、プロンプト、会議での議論、調査内容を、複雑な情報を理解しやすくする明確で編集可能なマインドマップに変換します。
既存のマインドマップを文脈として活用する — アシスタントに既存のXmindマインドマップを読み取らせ、要約、計画、執筆、調査、またはフォローアップ作業に活用できます。
会話を通じてマップを洗練させる — 追加したいトピック、修正したい表現、広げたいブランチ、再編成したいアイデアを伝えるだけで調整できます。
アイデアを編集可能な資産として保存する — AI支援の作業を、見直し、洗練、共有、継続的な発展ができるXmindマインドマップとして保存します。
Xmind MCP Serverで何ができますか?
会話からマインドマップを作成する — ブレインストーミング、調査メモ、会議での議論、またはプロジェクトのアイデアを、構造化されたXmindマインドマップに変換します。
最近のマインドマップを一覧表示する — ワークスペースで最近開いたXmindマインドマップを見つけ、作業を続けたいものを開くようアシスタントに依頼できます。
既存のマインドマップを読み取る — マインドマップを読み取り、その内容を構造化された要約またはMarkdownアウトラインとして返すようアシスタントに依頼できます。
マップから洞察を得る — 既存のマインドマップに基づいて、要点を抽出し、構造を要約し、アクション項目を特定し、次のステップを提案します。
チャットでマインドマップを編集する — レイアウトとビジュアルスタイルを維持しながら、新しいトピックを追加し、既存の内容を更新し、ブランチを拡張し、アイデアを再編成できます。
前の作業を継続する — 最近のXmindマップを起点に、計画、執筆、調査、意思決定の基盤として活用します。
アイデアを再利用可能な資産として保存する — 出力を、後から開き、磨き上げ、共有し、発展させられる編集可能なXmindマインドマップとして保持します。
Xmind MCP Serverを追加する方法?
接続して認証する
Claudeの場合
1️⃣ Open Claude Desktop and go to Settings > Developer > Connectors
2️⃣ [Add custom connector]を選択し、名前を設定してサーバーURLを入力し、[Add]をクリックします。
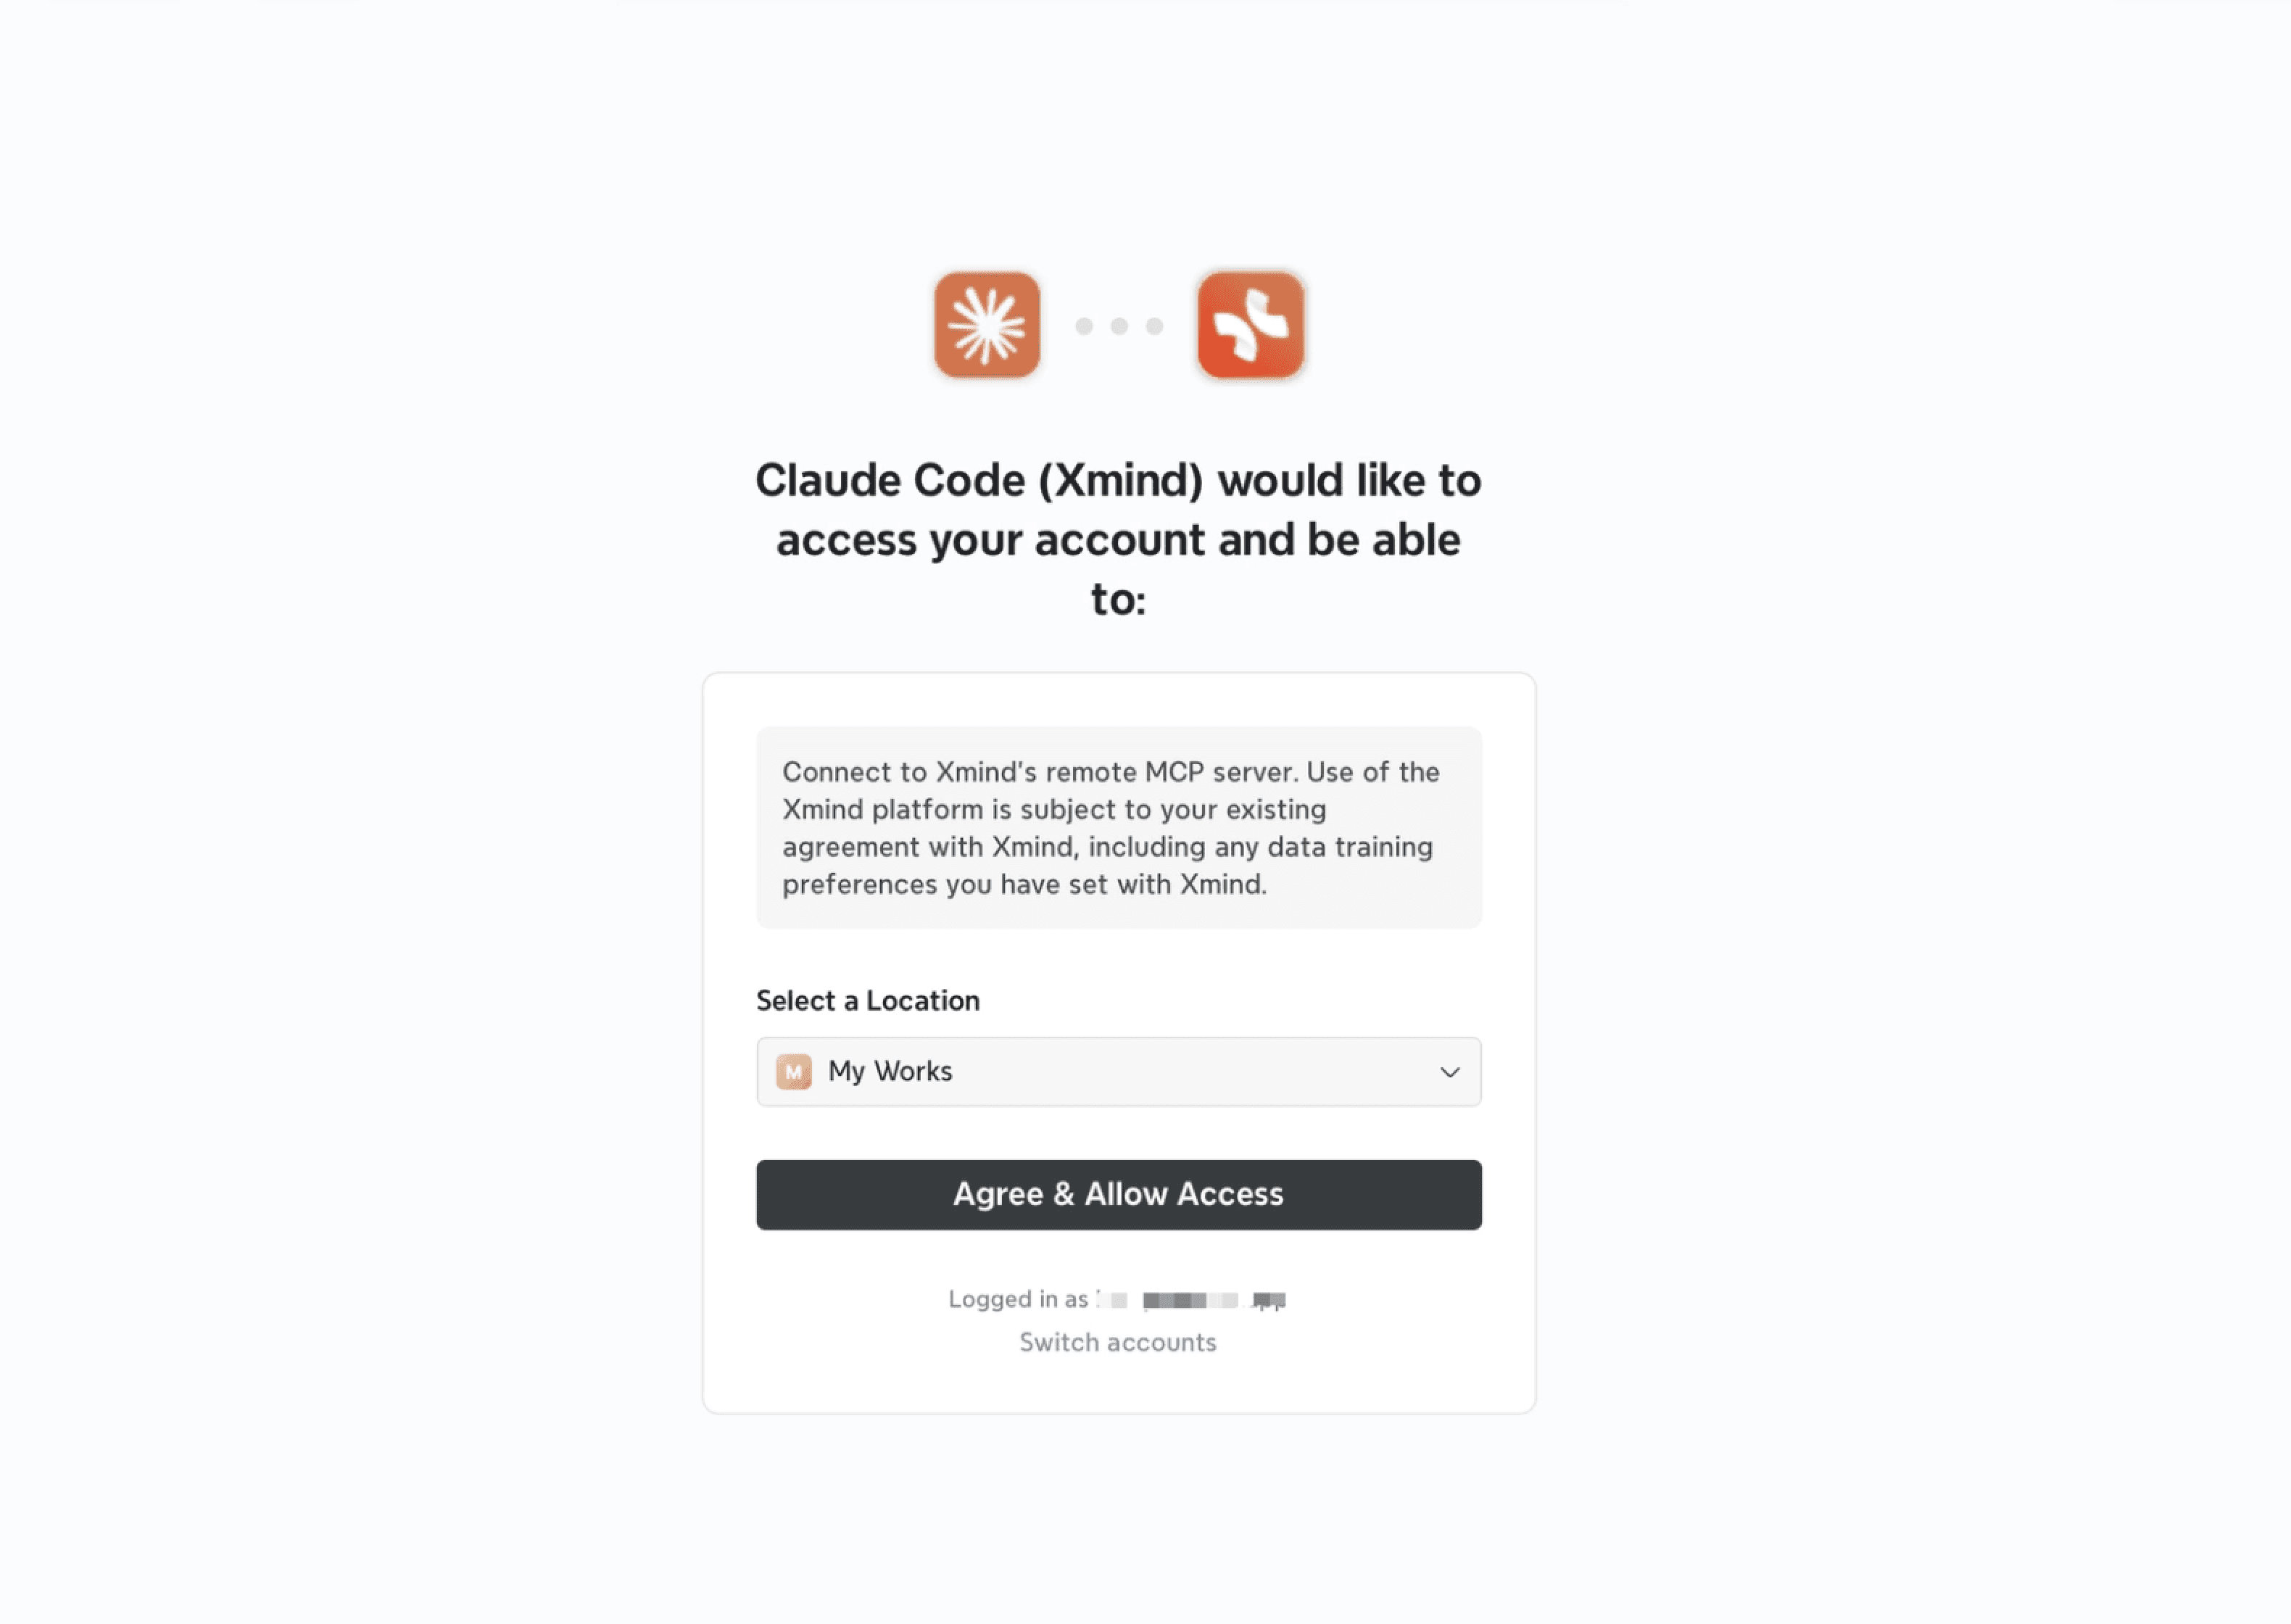
3️⃣ [Connect]をクリックし、開いたブラウザウィンドウでXmindアカウントを使って認証します。
4️⃣ Claudeに戻り、Xmind MCP Serverが利用可能であることを確認します。

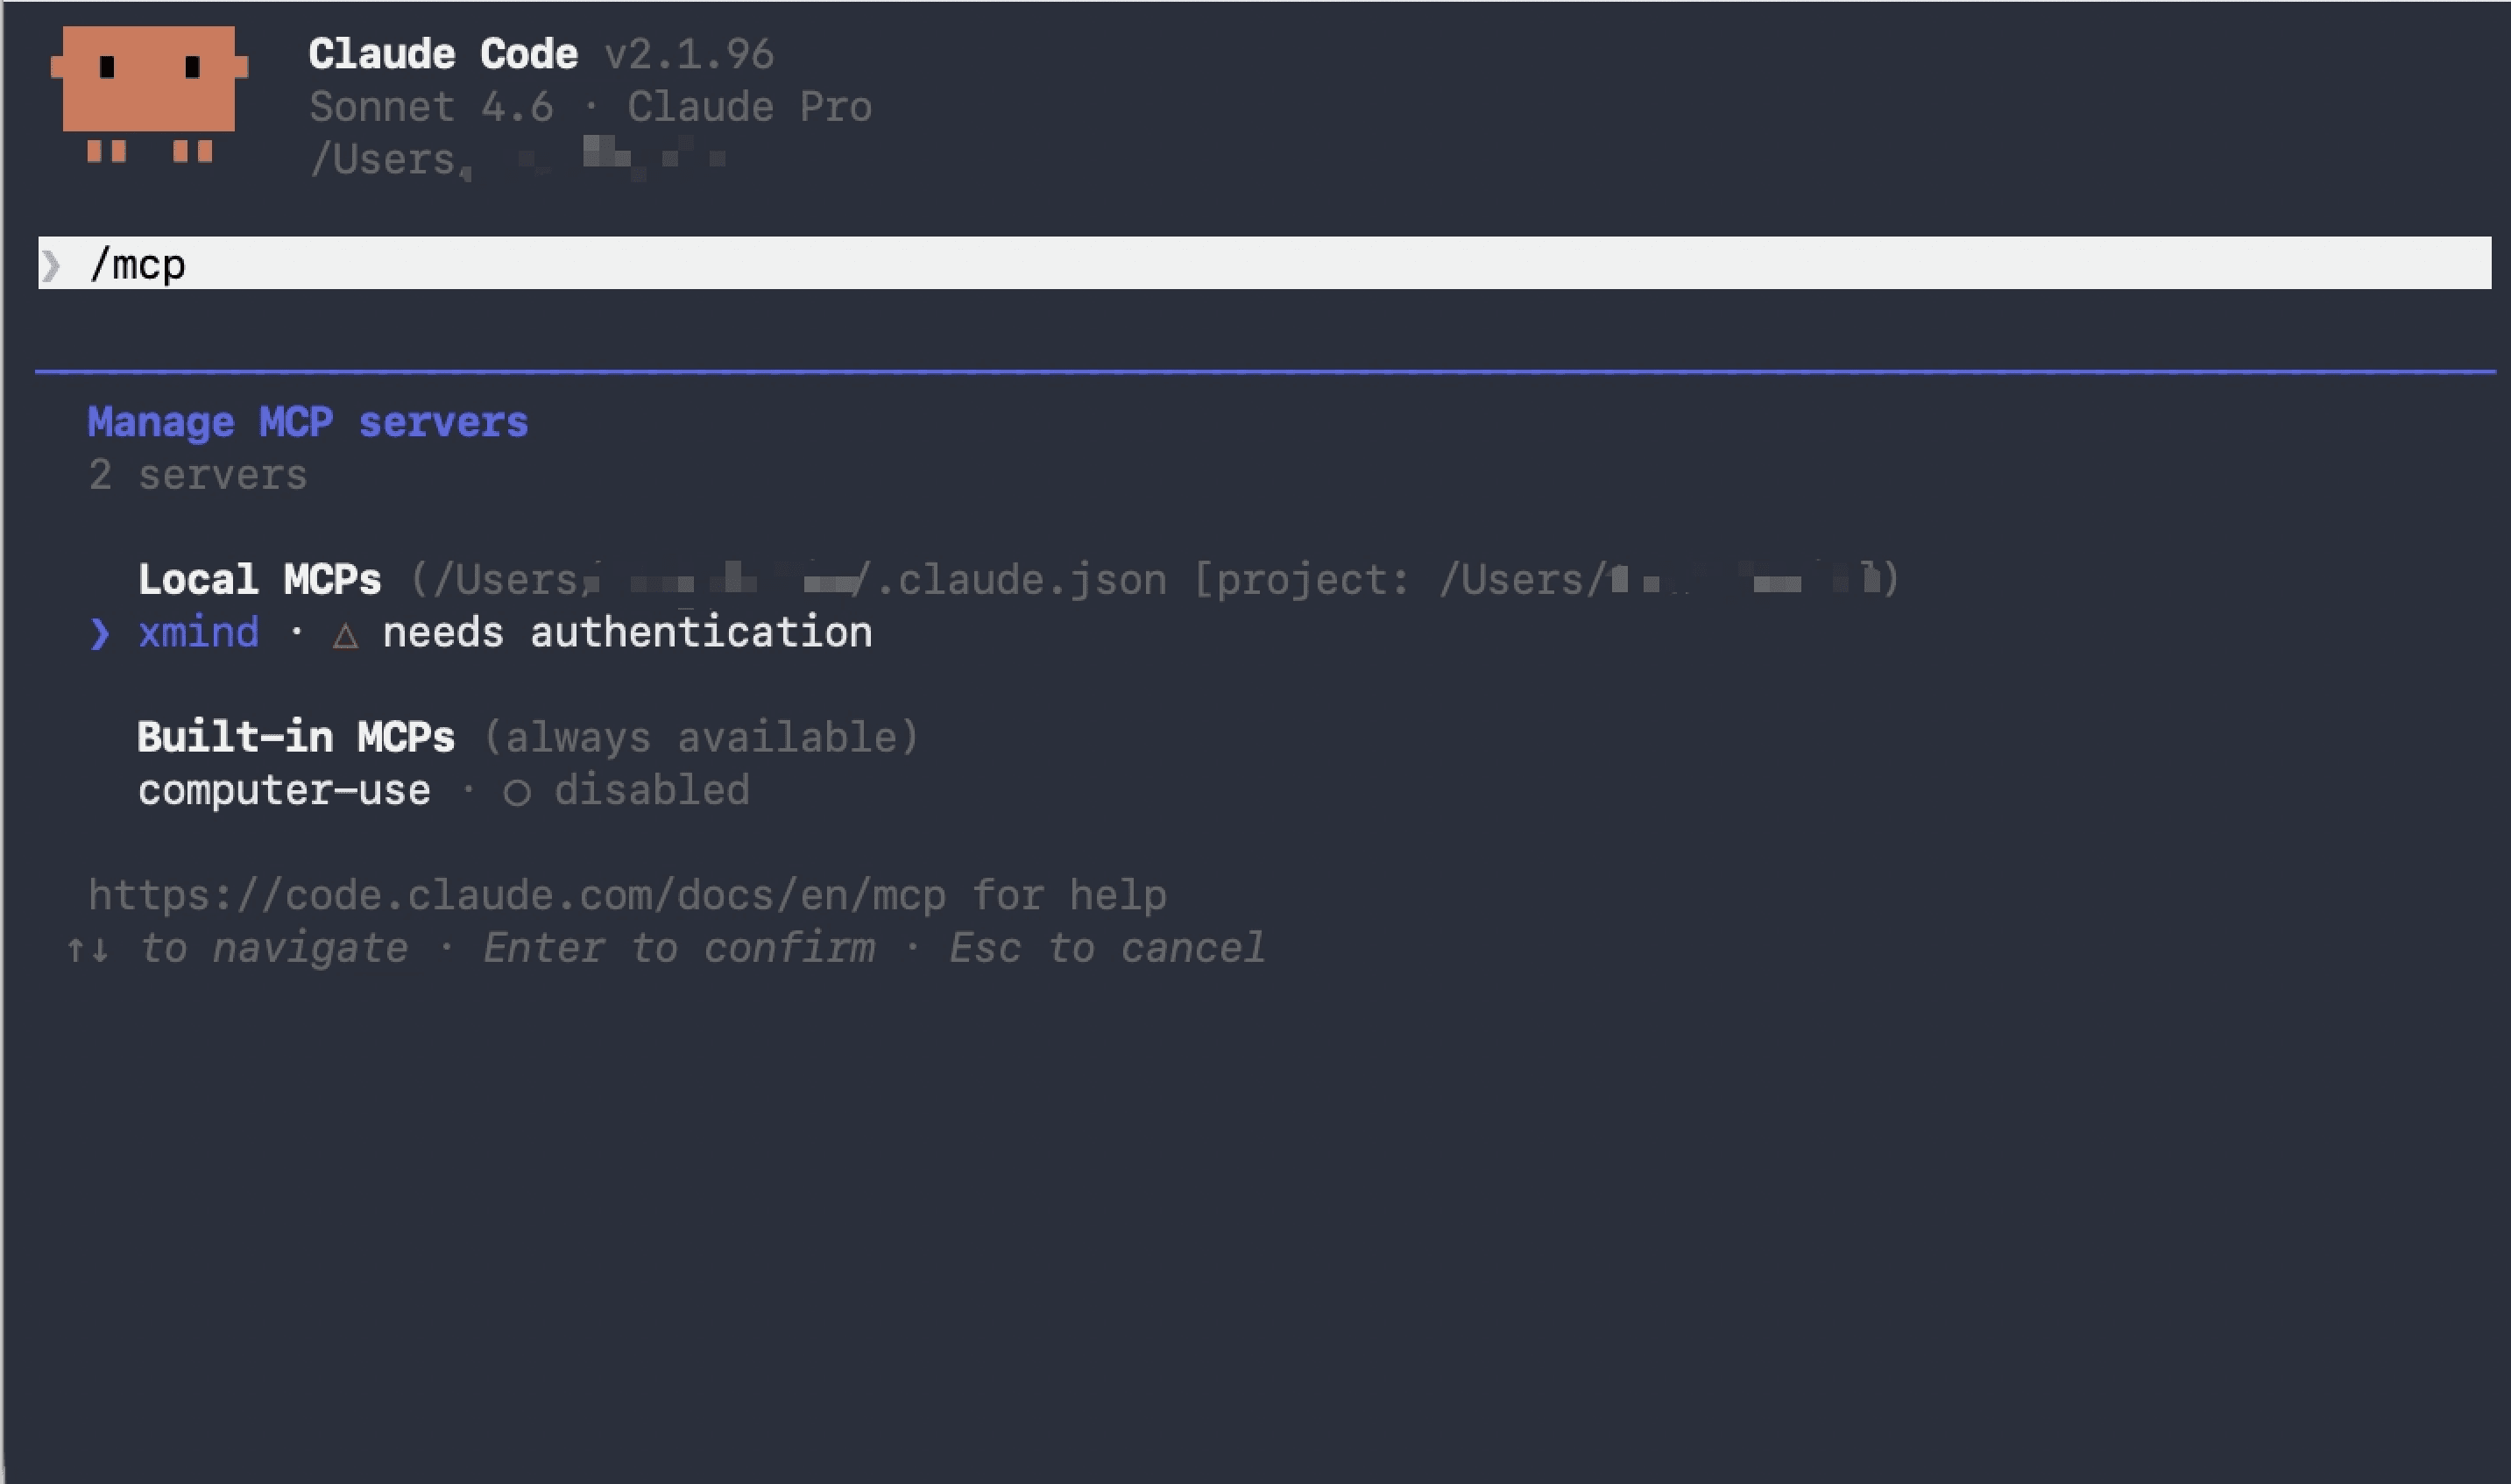
On Claude Code
1️⃣ ターミナルで次のコマンドを実行します:
2️⃣ Claude Codeを起動し、/mcp と入力して、認証するために xmind を選択します。
3️⃣ 開いたブラウザウィンドウでXmindアカウントを使って認証します。
On Codex Desktop
1️⃣ Codexを開き、Settings > MCP servers に移動します。
2️⃣ [Add server]をクリックし、サーバー名を付け、[Streamable HTTP]を選択してサーバーURLを入力し、[Save]をクリックします。
3️⃣ [Authenticate, and complete the authentication ]をクリックし、プロンプトが表示されたらXmindアカウントで認証を完了します。
On other MCP-compatible clients
任意のMCP互換クライアントは、Streamable HTTPトランスポートを使用してXmindに接続できます。
1️⃣ クライアントのMCP設定を開きます。
2️⃣ Xmind MCP ServerのURLを追加します:
3️⃣ 開いたブラウザウィンドウでOAuth認証フローを完了します。
4️⃣ サーバーを有効にし、クライアントで利用可能であることを確認します。
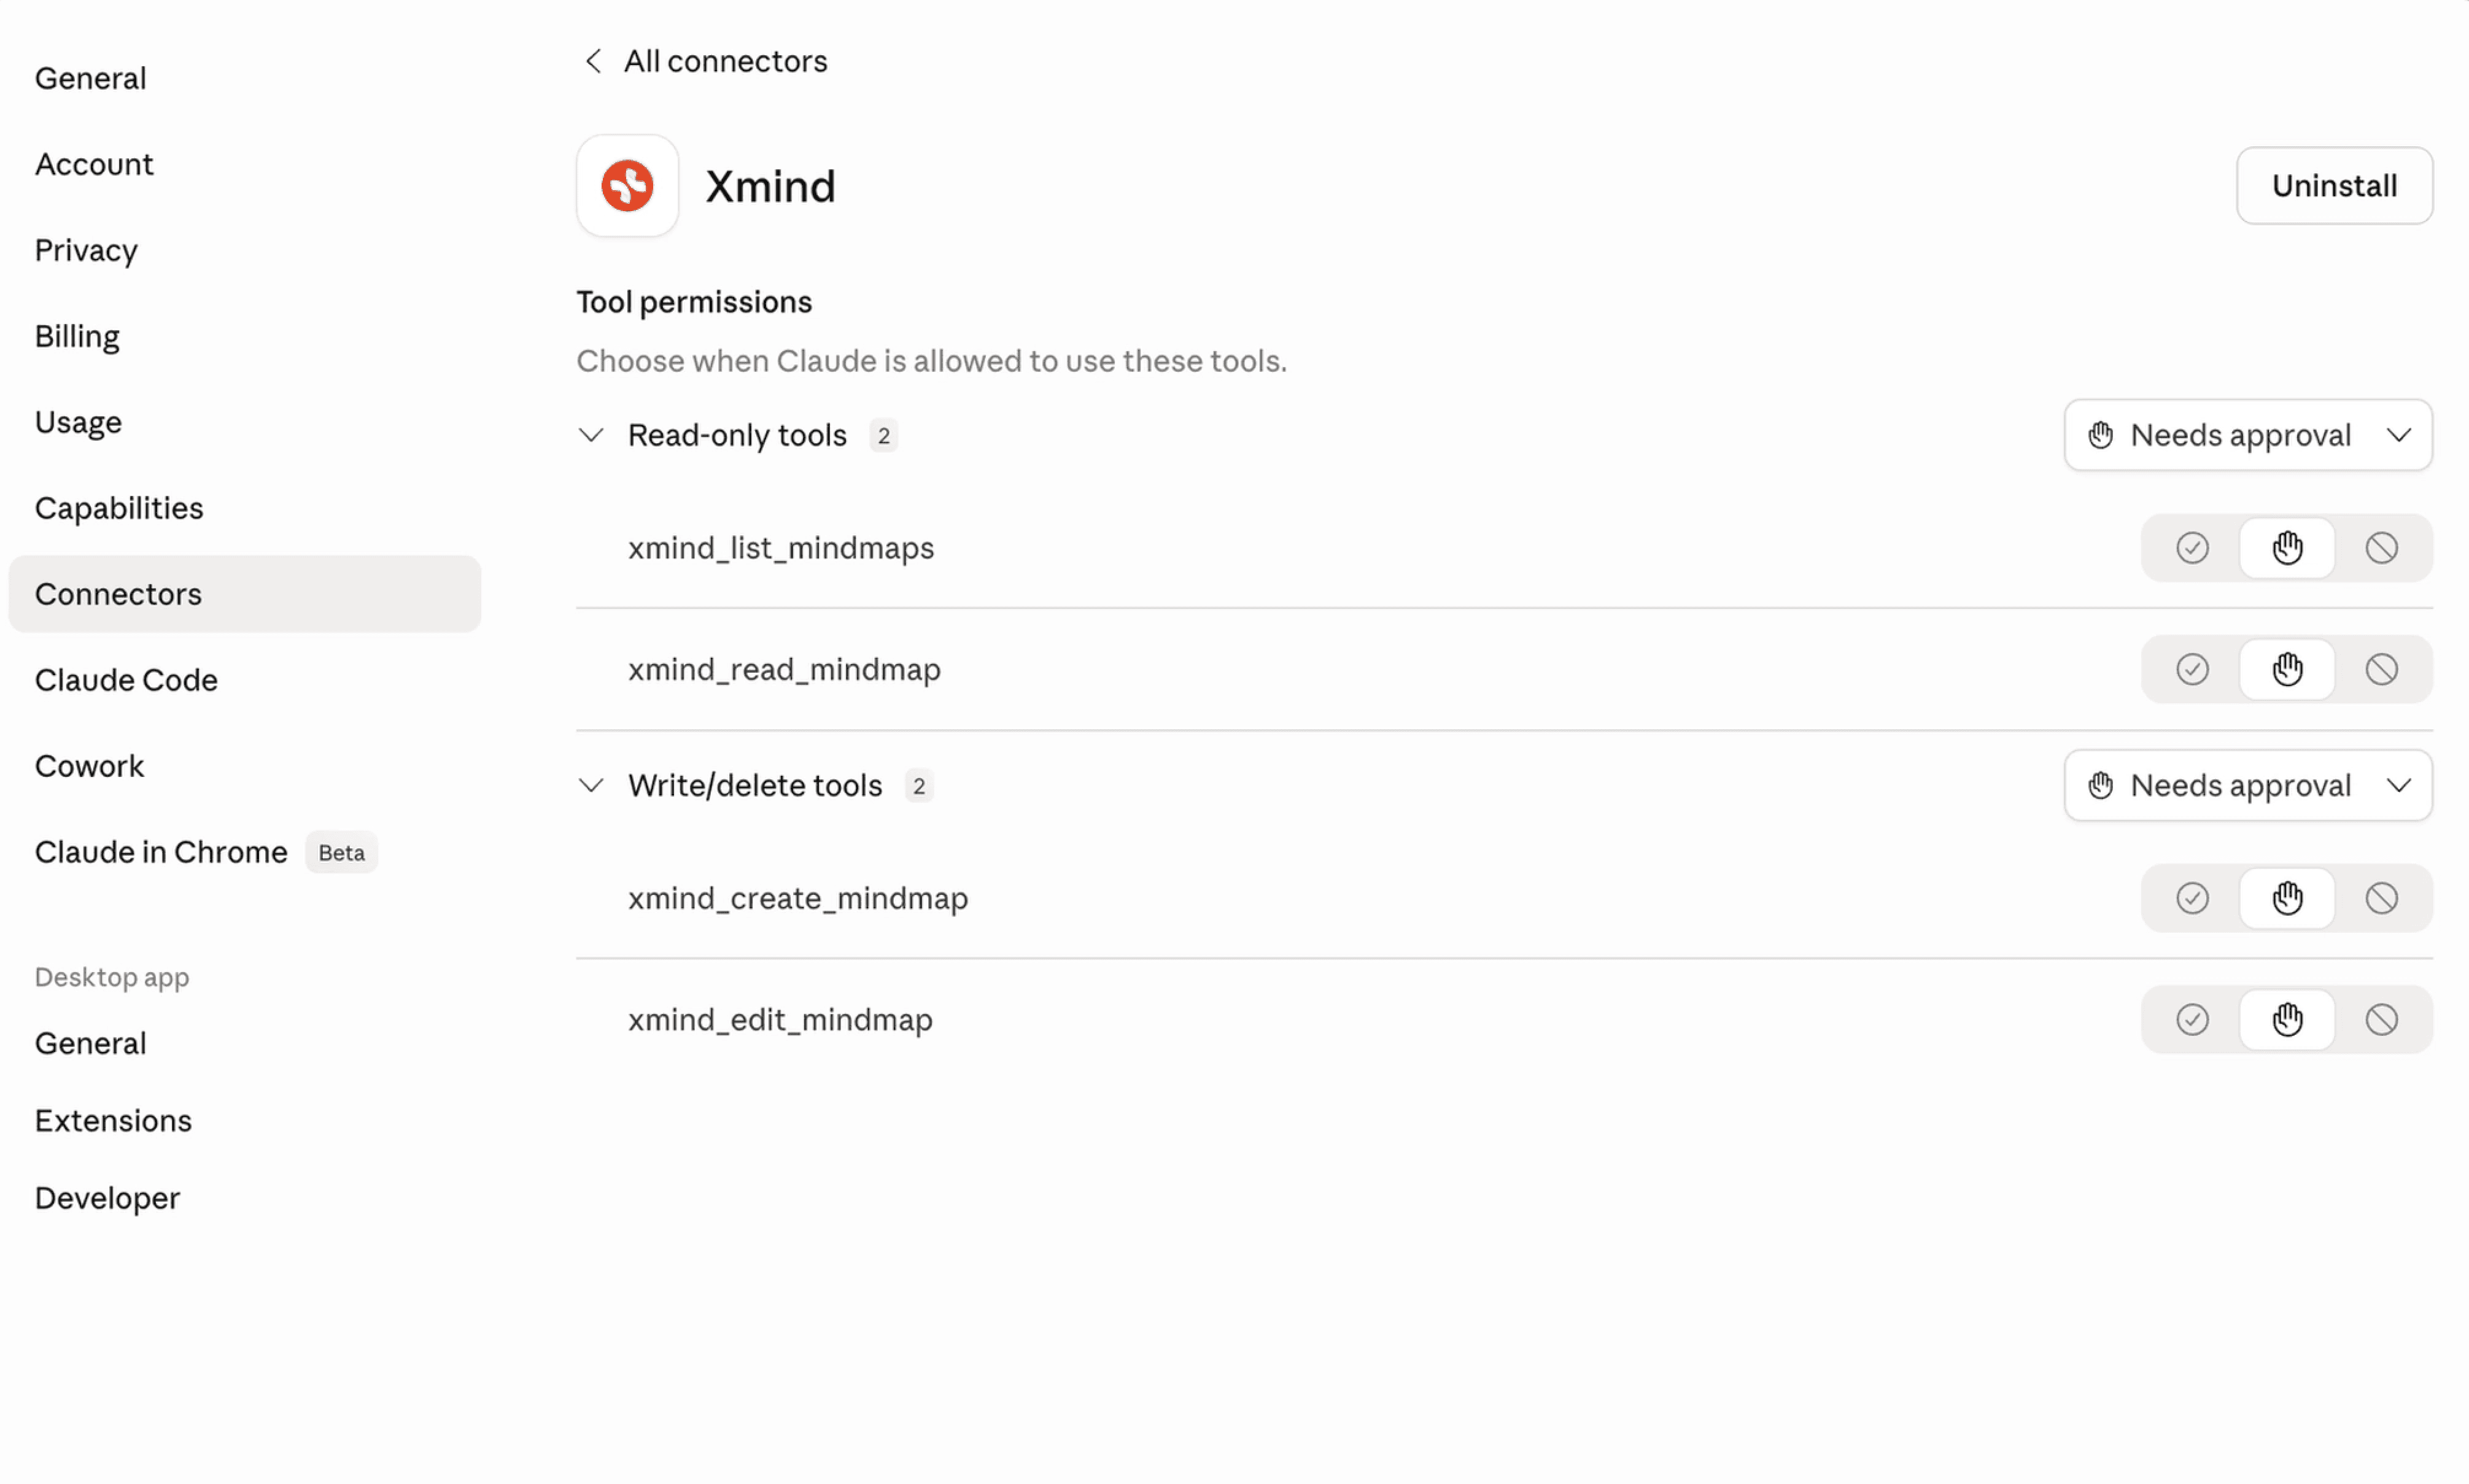
Xmind MCPの設定
Claudeの場合
1️⃣ Settings > Connectors > Xmind > Configure に移動します
2️⃣ 以下の機能の権限を調整できます:
読み取り専用ツール
書き込みツール
ClaudeでXmind MCPを使う
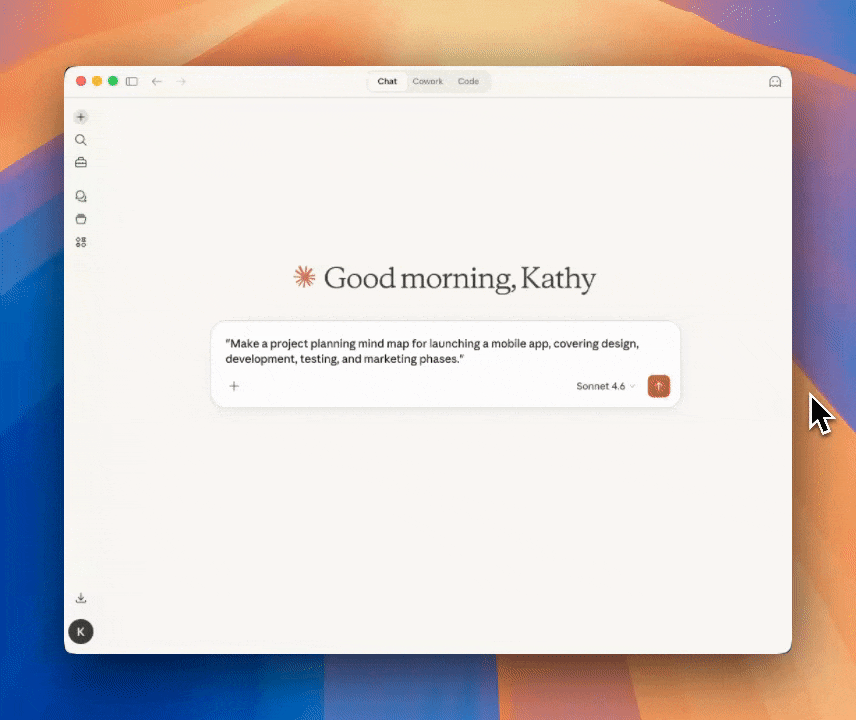
Xmind MCPでマインドマップを作成する
1️⃣ アイデアを自然言語で説明し、AIアシスタントに、Xmindアカウントに保存される構造化されたマインドマップを生成するよう依頼します。
2️⃣ 初めて使用する場合、権限の確認画面が表示されることがあります。続行するにはAlways allowをクリックします。
3️⃣ Open in Xmindをクリックして、マインドマップを確認・編集します。
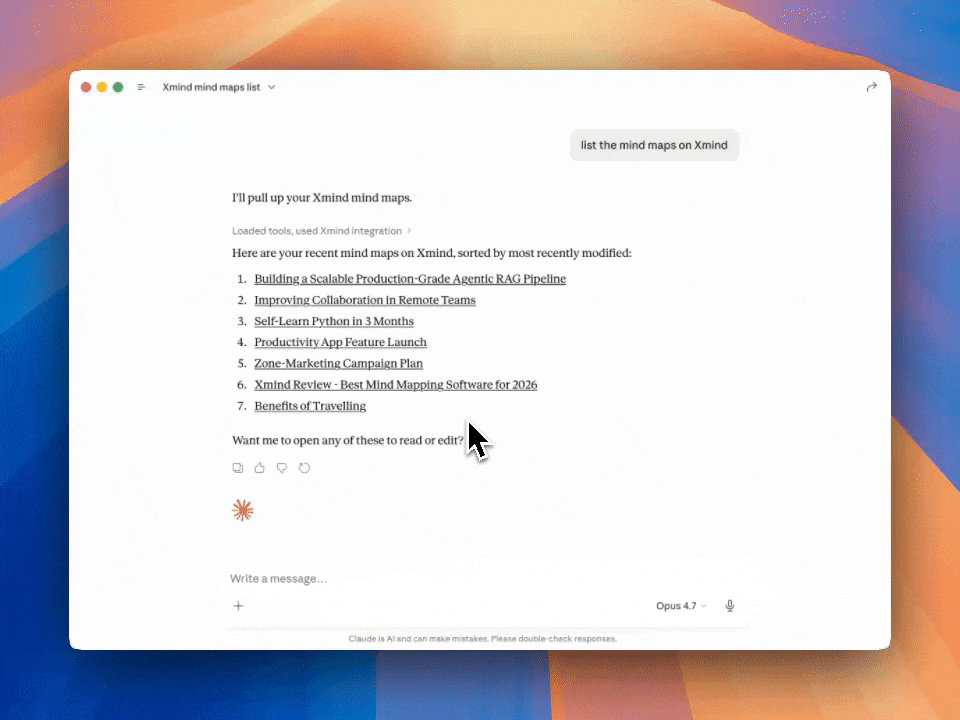
Xmind MCPでマインドマップを一覧表示する
Xmind上のマインドマップを一覧表示したい旨を伝えてください。すると、最近開いたすべてのマインドマップが表示されます。タイトルをクリックすると、Xmindでそのマインドマップを開くためのリンクが表示されます。
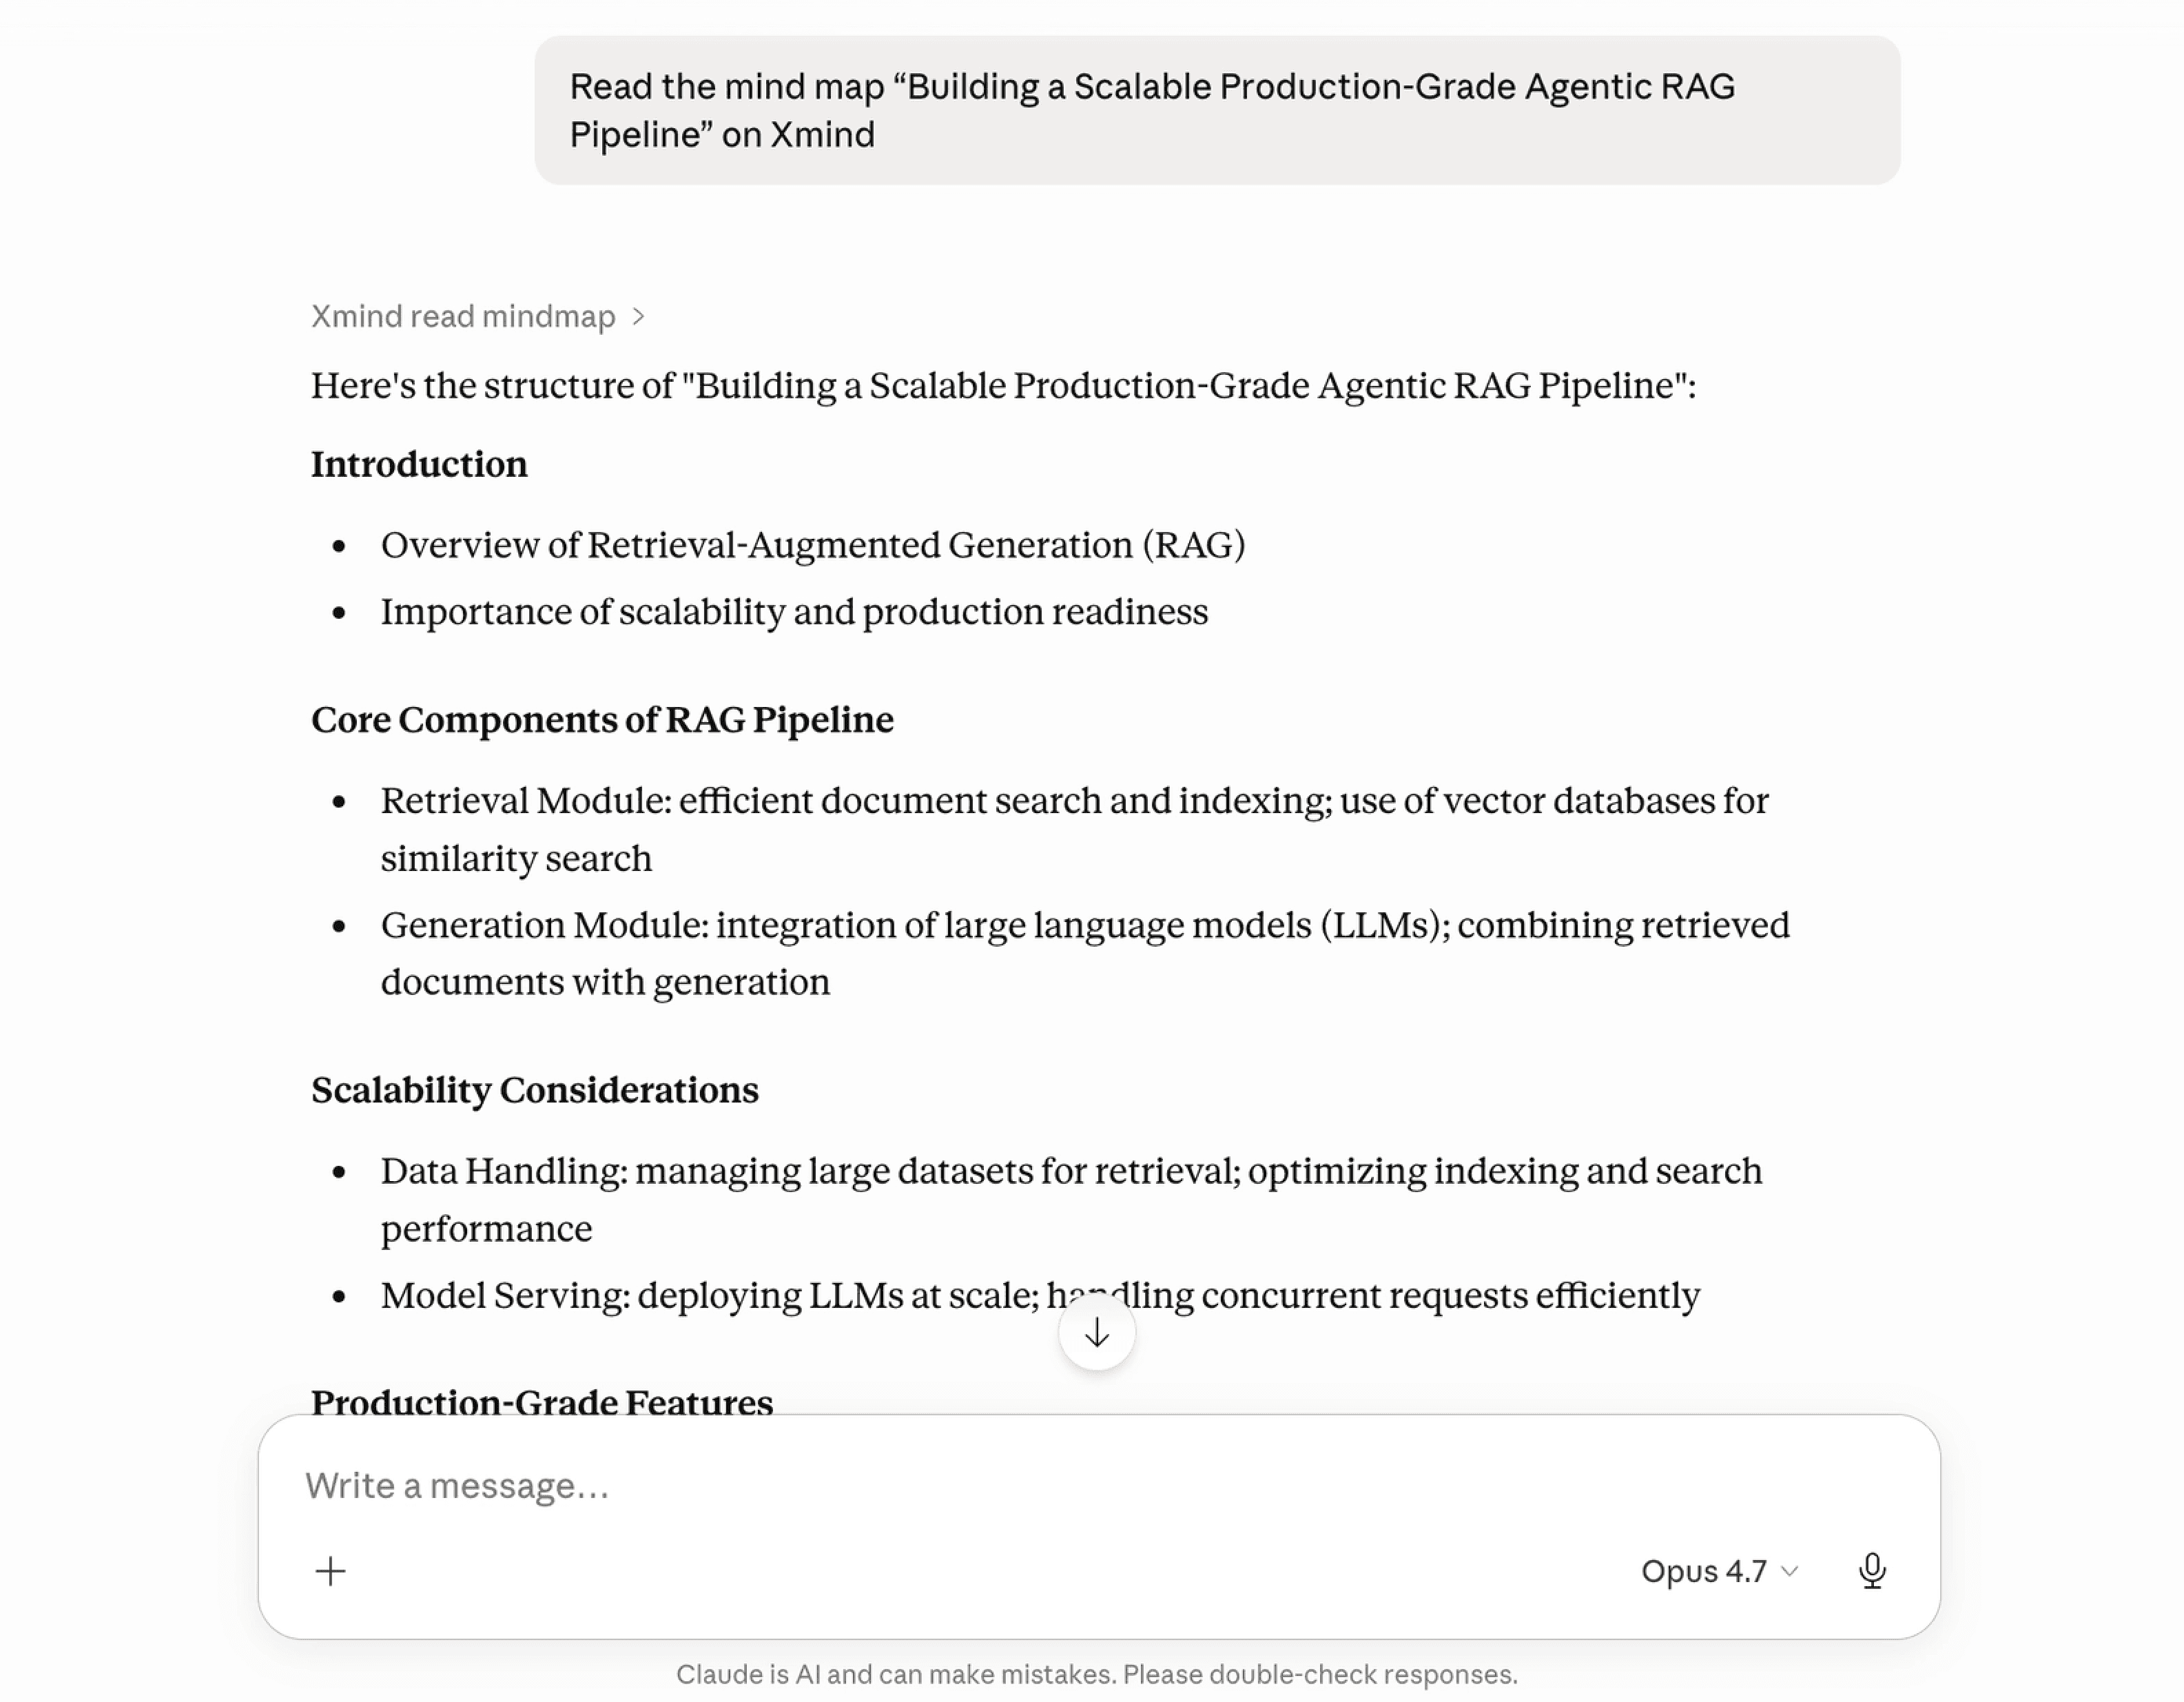
Xmind MCPでマインドマップを読み取る
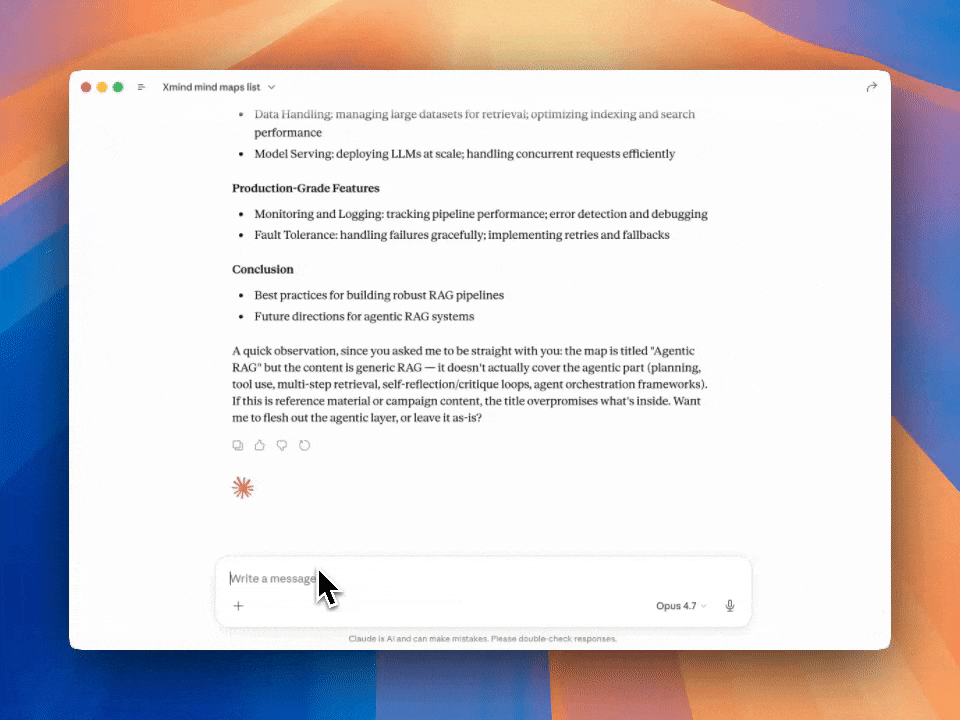
Xmindでマインドマップを読み取りたい旨を伝えると、AIアシスタントが既存のマインドマップを読み取り、その内容をmarkdownとして返します。
Xmind MCPでマインドマップを編集する
1️⃣ 編集したいマインドマップを読み取るようAIアシスタントに依頼します;
2️⃣ マインドマップに加えたい変更を説明します。レイアウトとビジュアルテーマを維持したまま、トピックの内容を調整したり追加したりできます。