How to manage an Xmind Business team plan?
Xmind Business enables seamless collaboration through a shared Team Space. Below is an overview of how to invite team members and manage team settings.
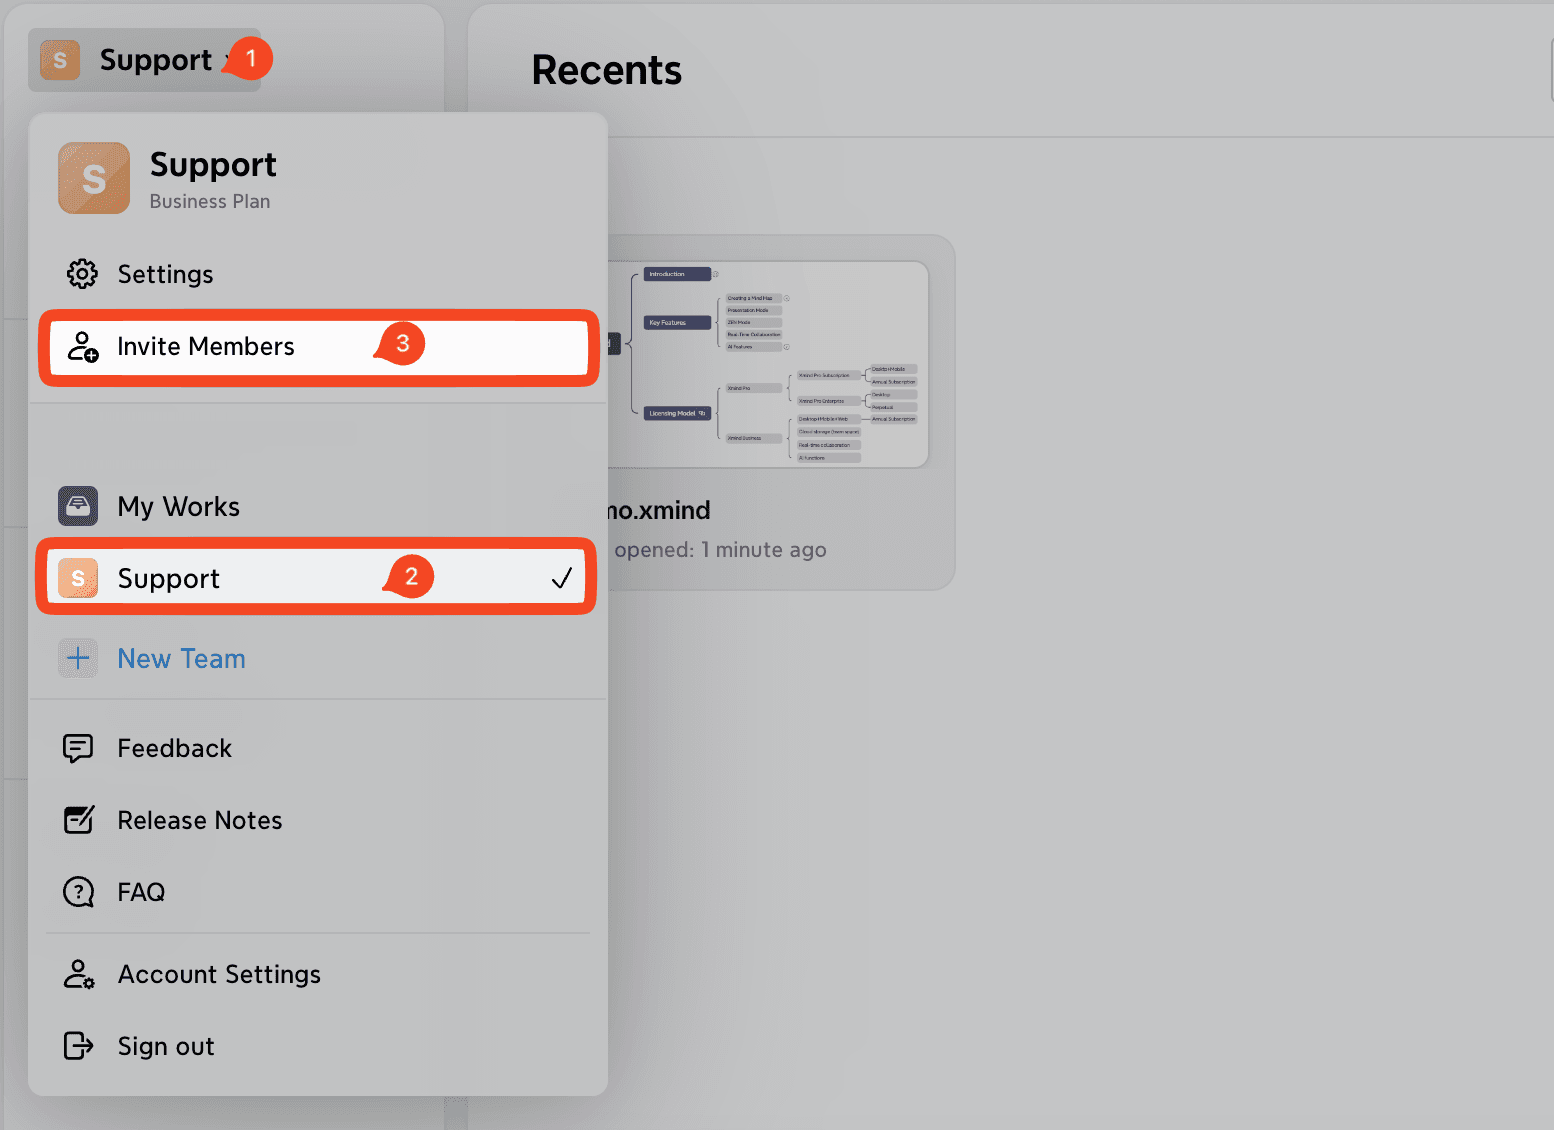
1. Invite Users to Your Team
To start collaborating, you can invite members in two ways:
Log in to your Xmind account.
Navigate to your Team Space from the left sidebar.
Click the Invite Members button in the upper-right corner.
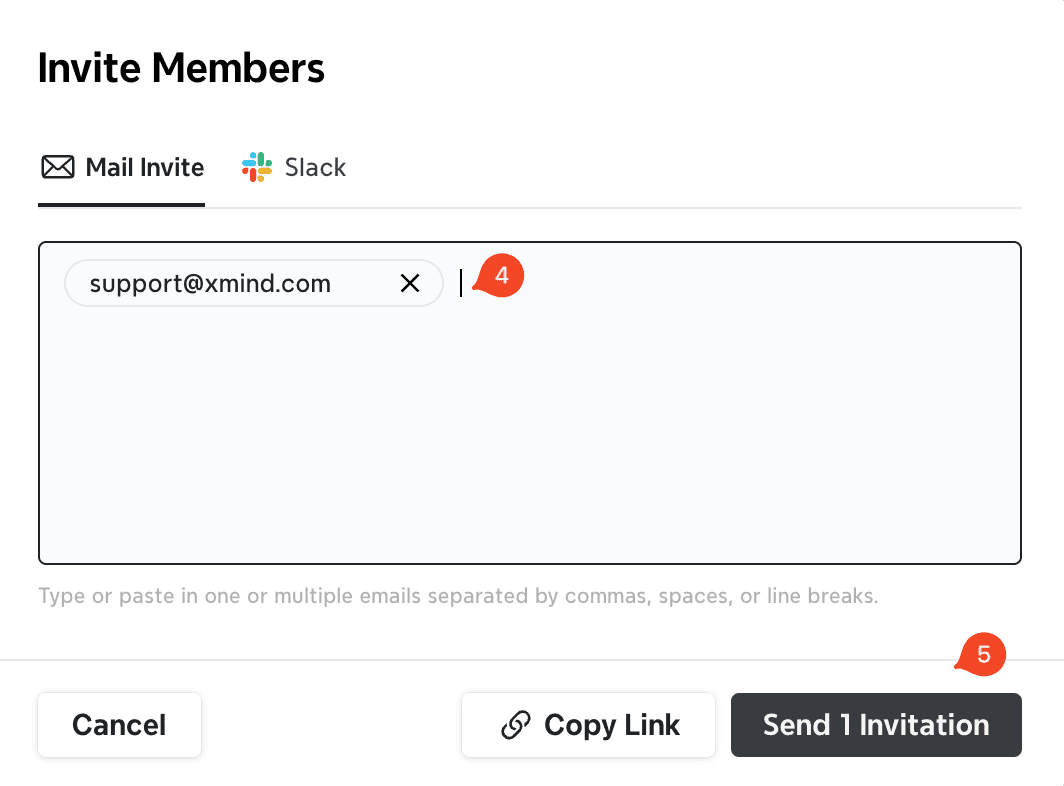
Choose one of the following options:
- Enter teammates’ email addresses, or
- Copy and share the invitation link directly
Once invited, team members will receive a notification and can sign up/sign in their own Xmind accounts to join your team.
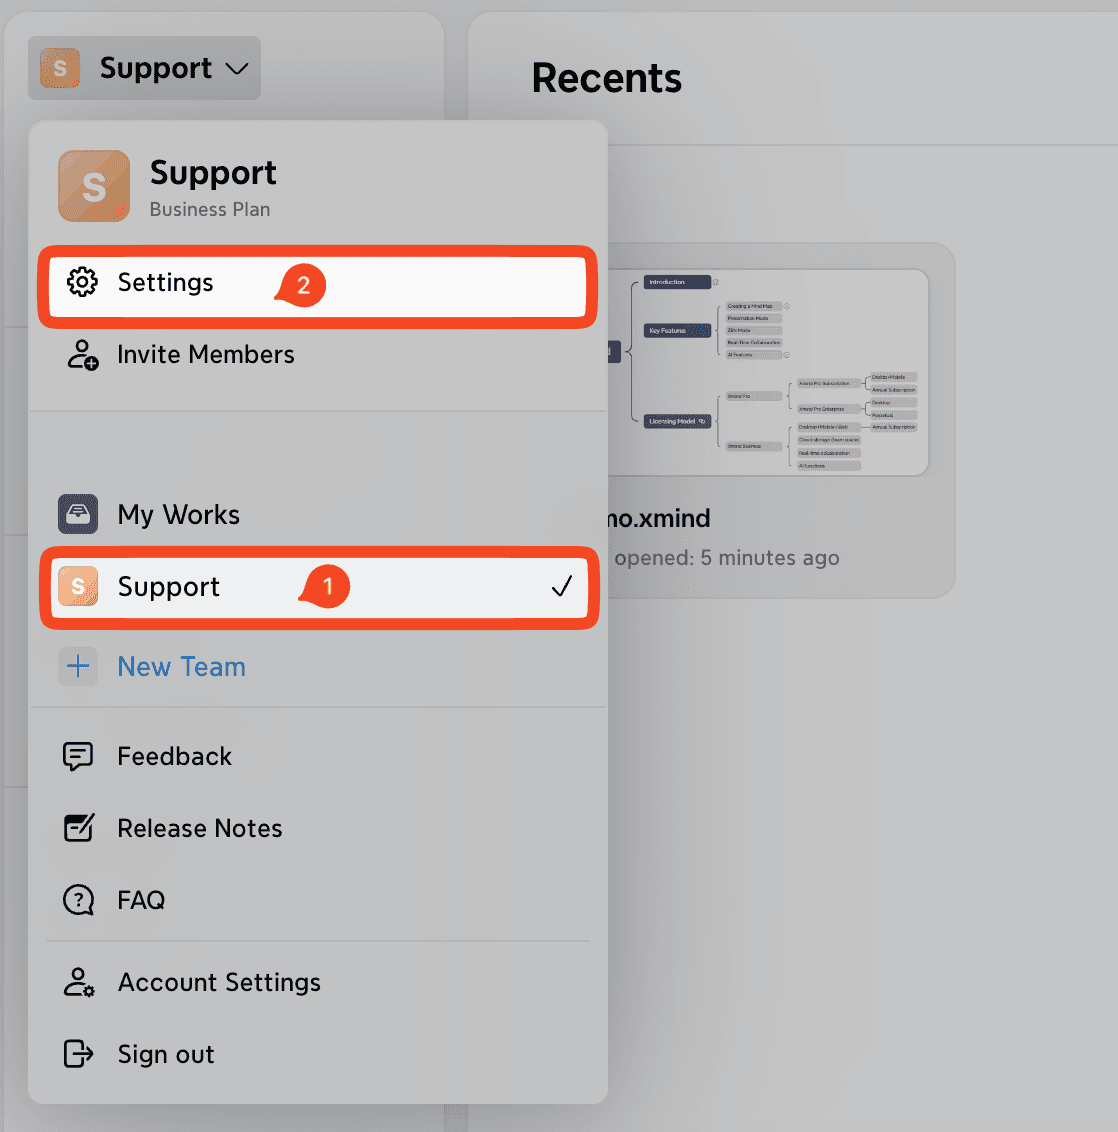
2. Accessing Team Settings
To manage your team settings:
Log in to your account.
Open your Team Space from the sidebar.
Click Settings.
All team-related configurations can be adjusted from this section.
3. Team Settings Overview
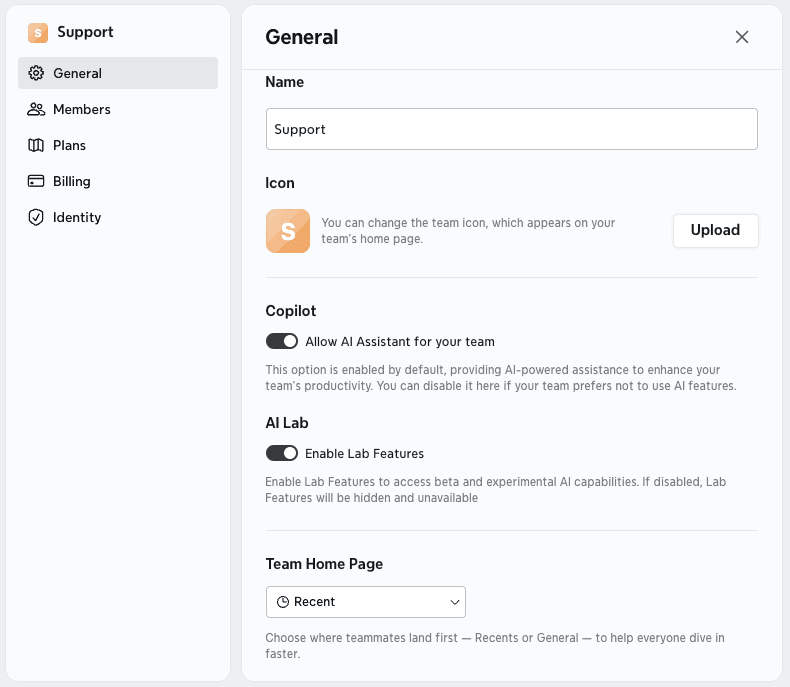
3.1 General
In General, the team owner can:
Rename the team and change the icon
Enable or disable Copilot (AI assistant)
Enable or disable AI Lab
Manage the default team home page
Manage team invitation permissions
Delete the team if necessary
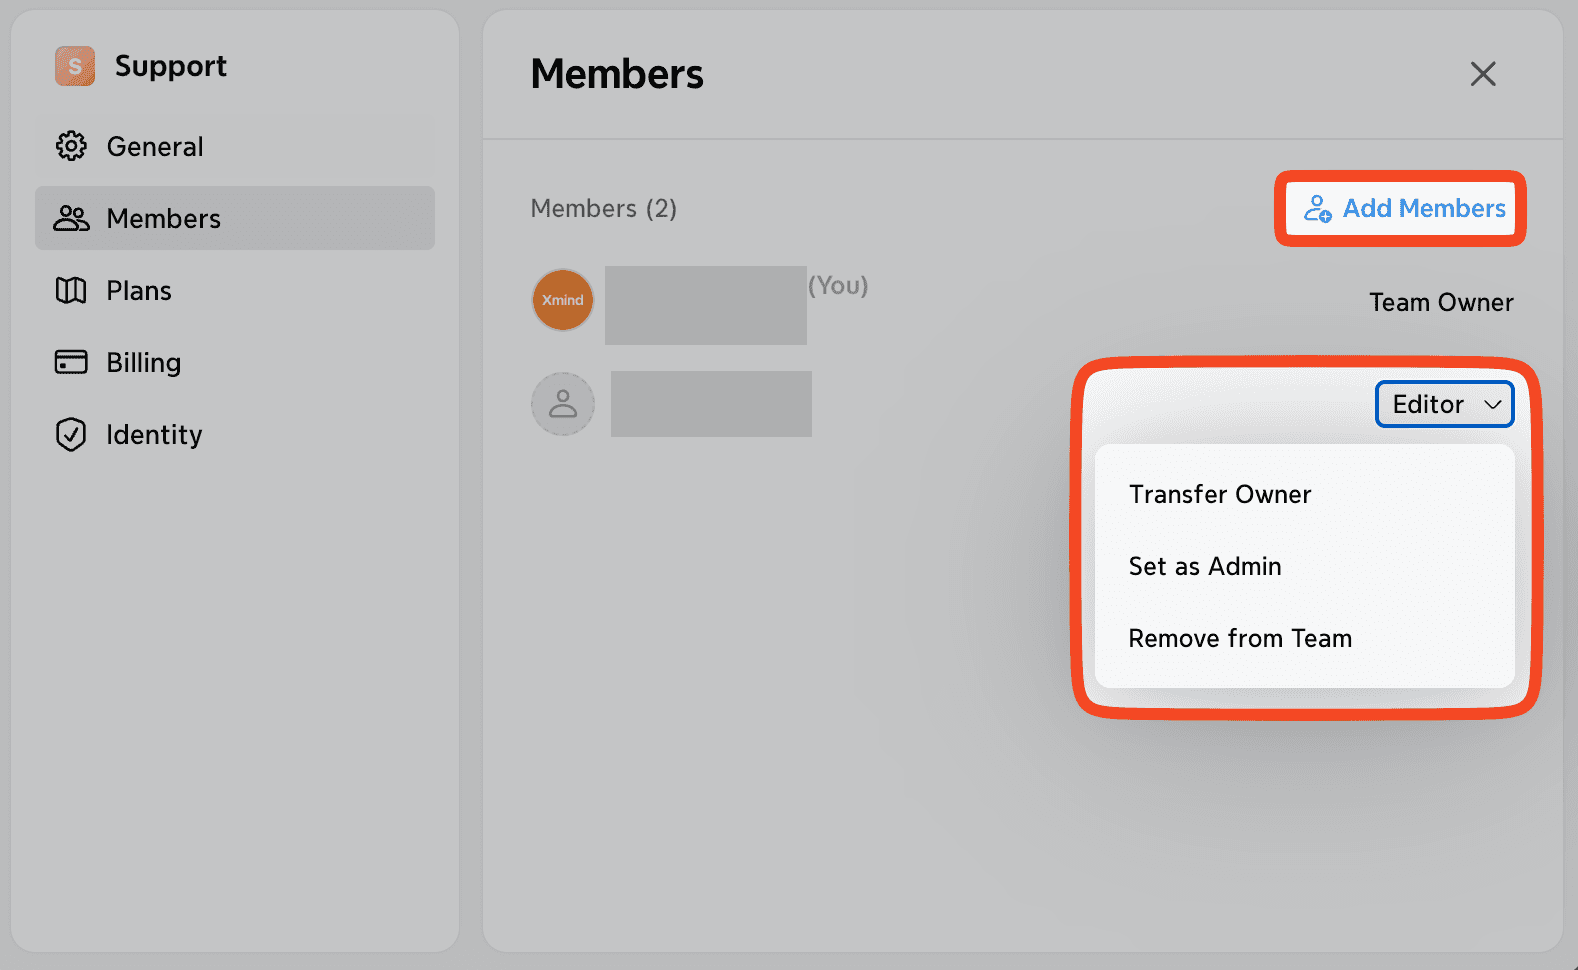
3.2 Members
In the Members section, the team owner can:
Add new members
Transfer ownership to another member
Assign admin roles
Remove existing members
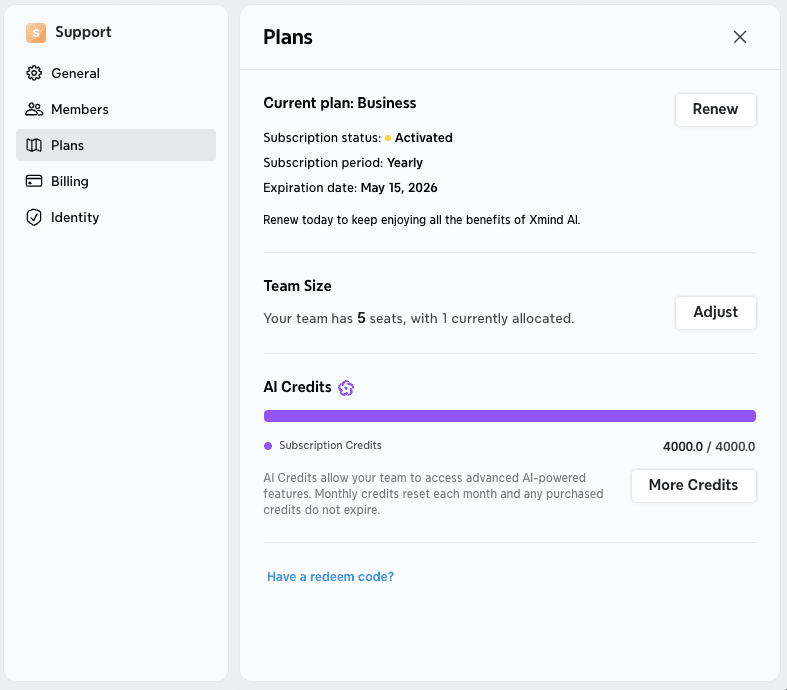
3.3 Plan
In Plans, the team owner can:
View subscription status, billing cycle, and expiration date
Adjust team size:
- Increase or decrease the number of seats at any time
- Added seats are billed prorated
- Note: Removed seats are not refundable
Monitor the team’s AI credit usage
Purchase extra credits through Credits Add-ons, if needed
3.4 Billing
In Billing, the team owner can:
Cancel the current subscription plan
View the team’s payment history


