Team Management
Teams provide a dedicated environment where you can create maps, collaborate with others, or structure and organize your own work. You can create or join multiple teams from a single Xmind account.

Create teams
On desktop app
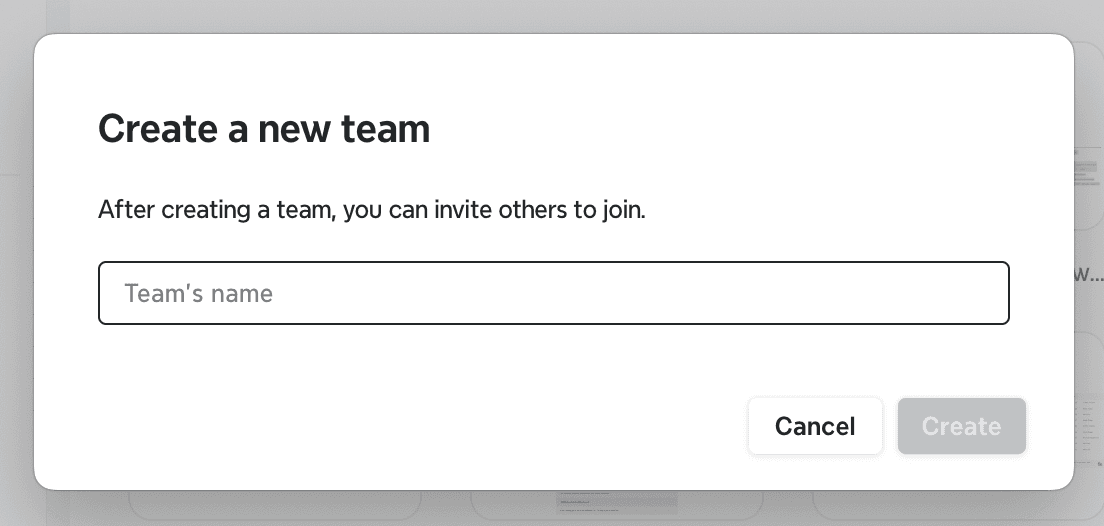
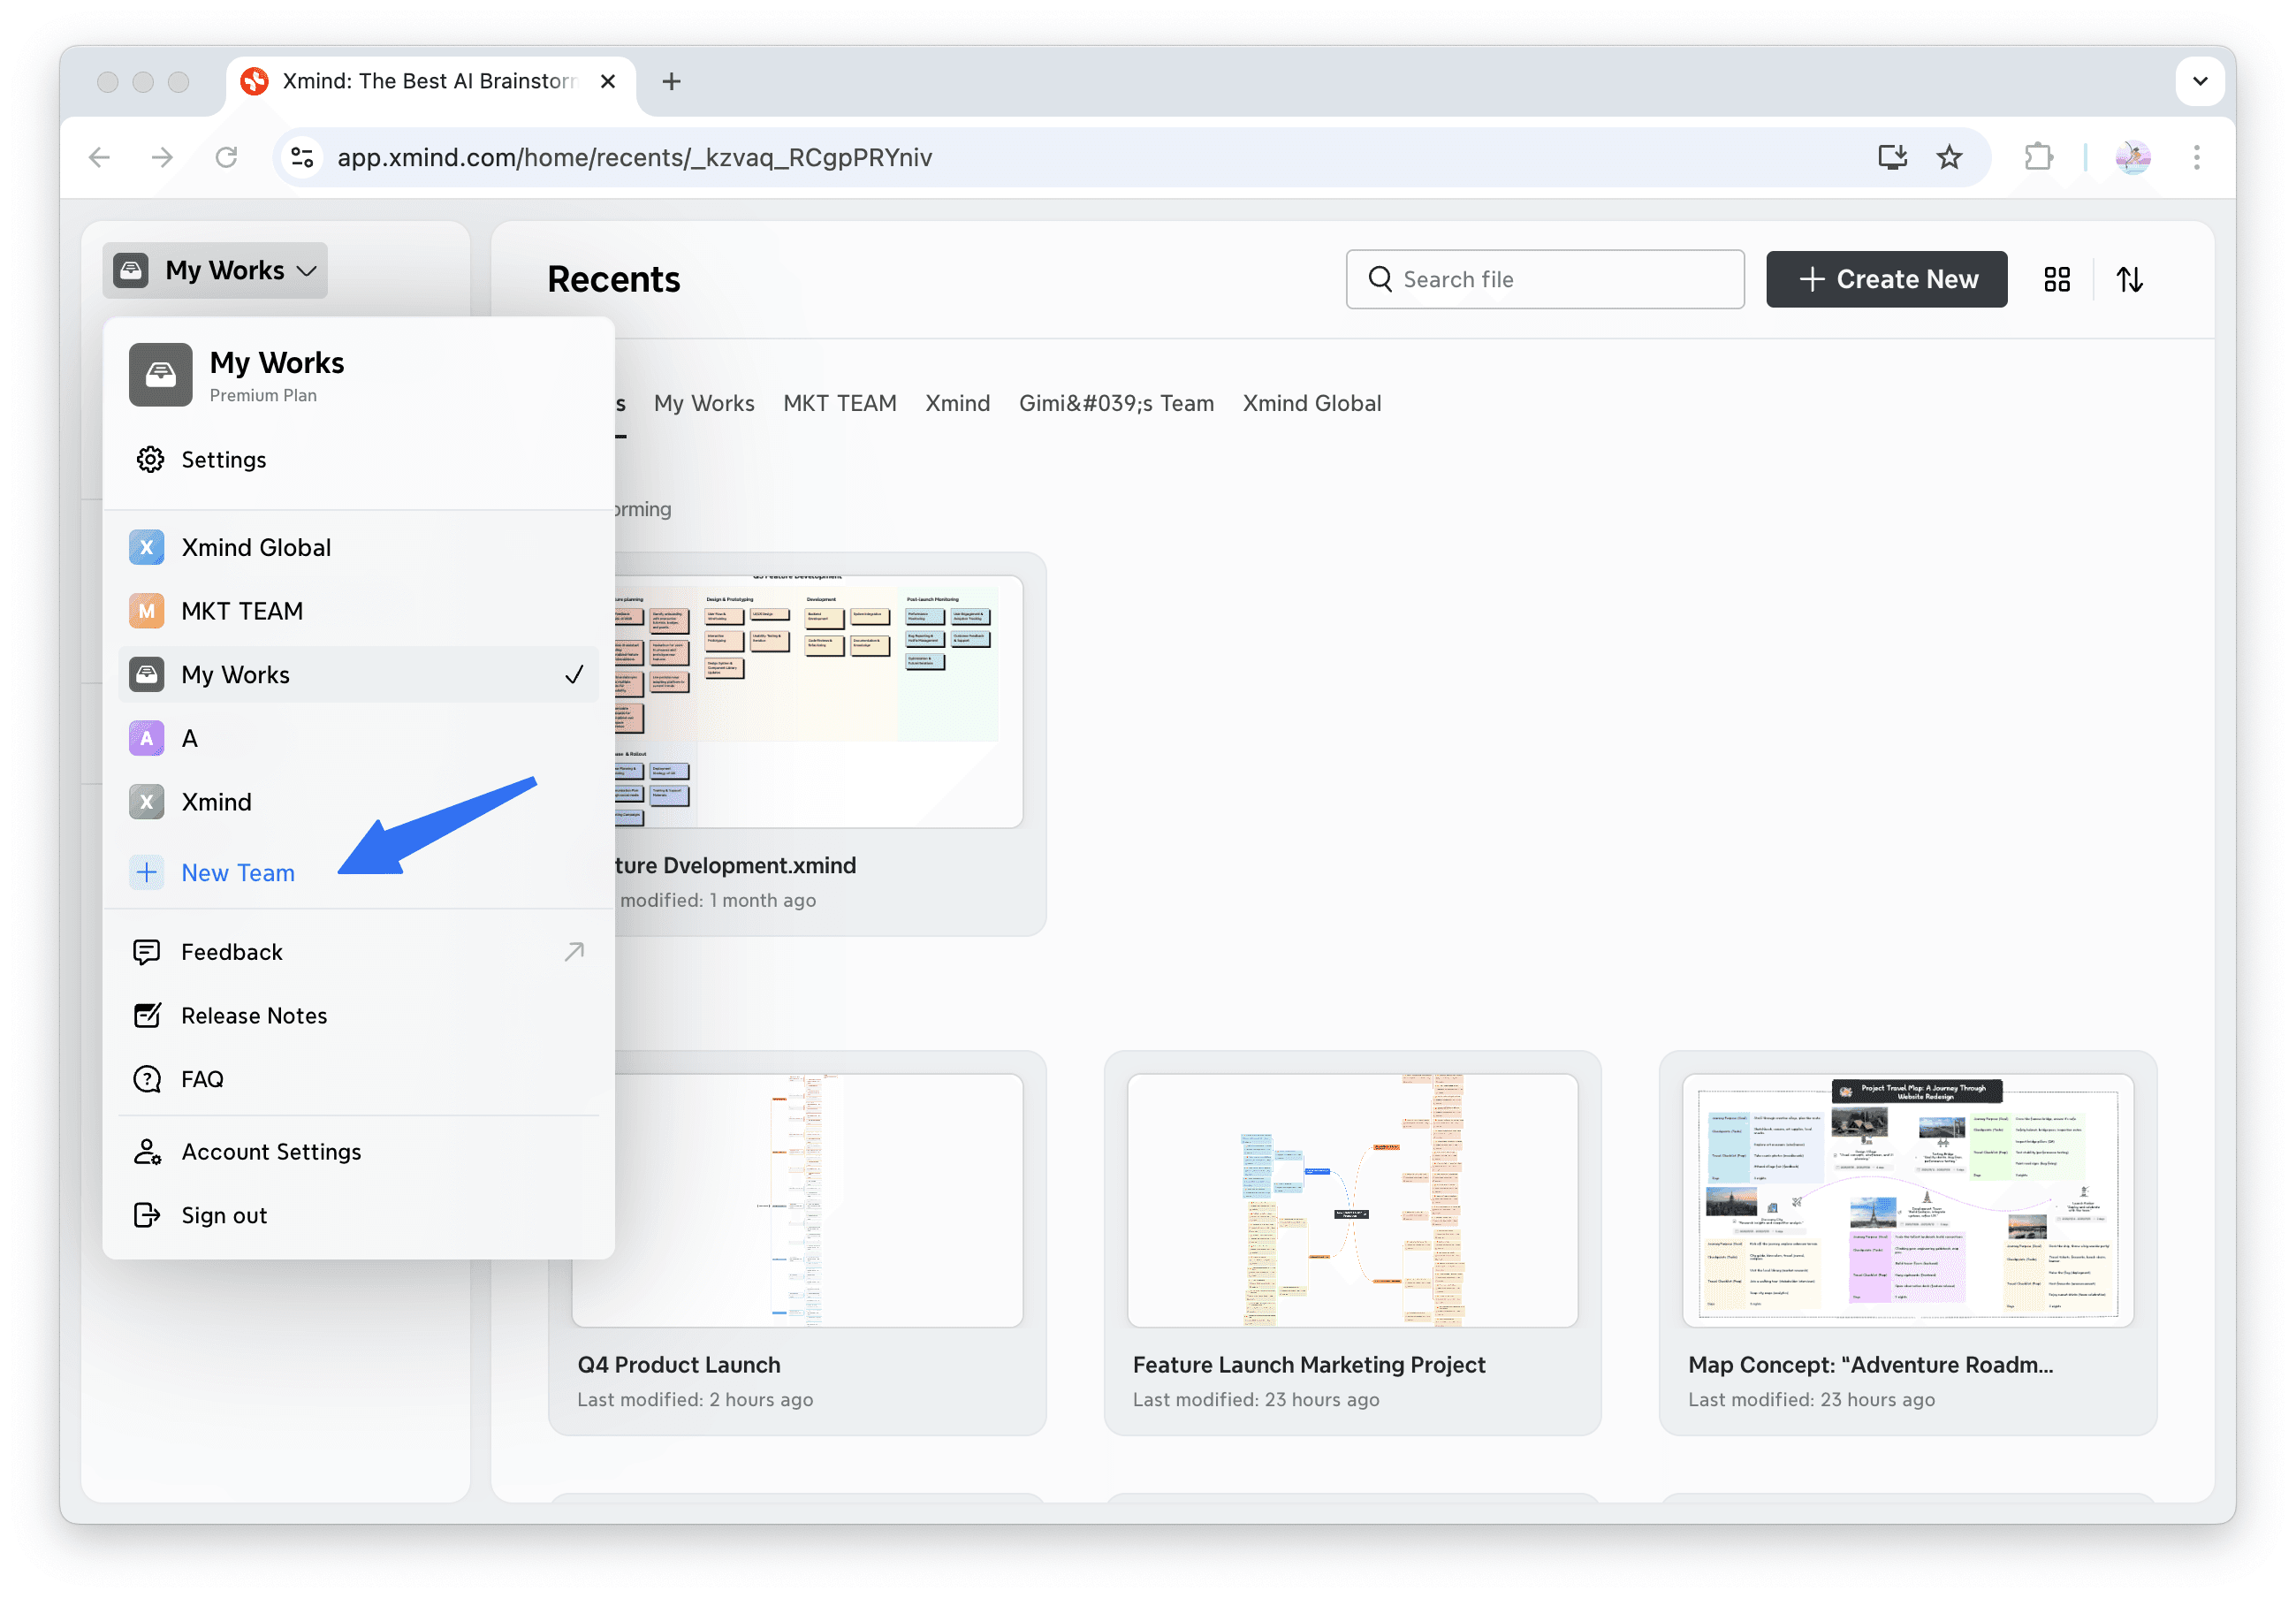
1️⃣ Click the New Team button in the left sidebar.
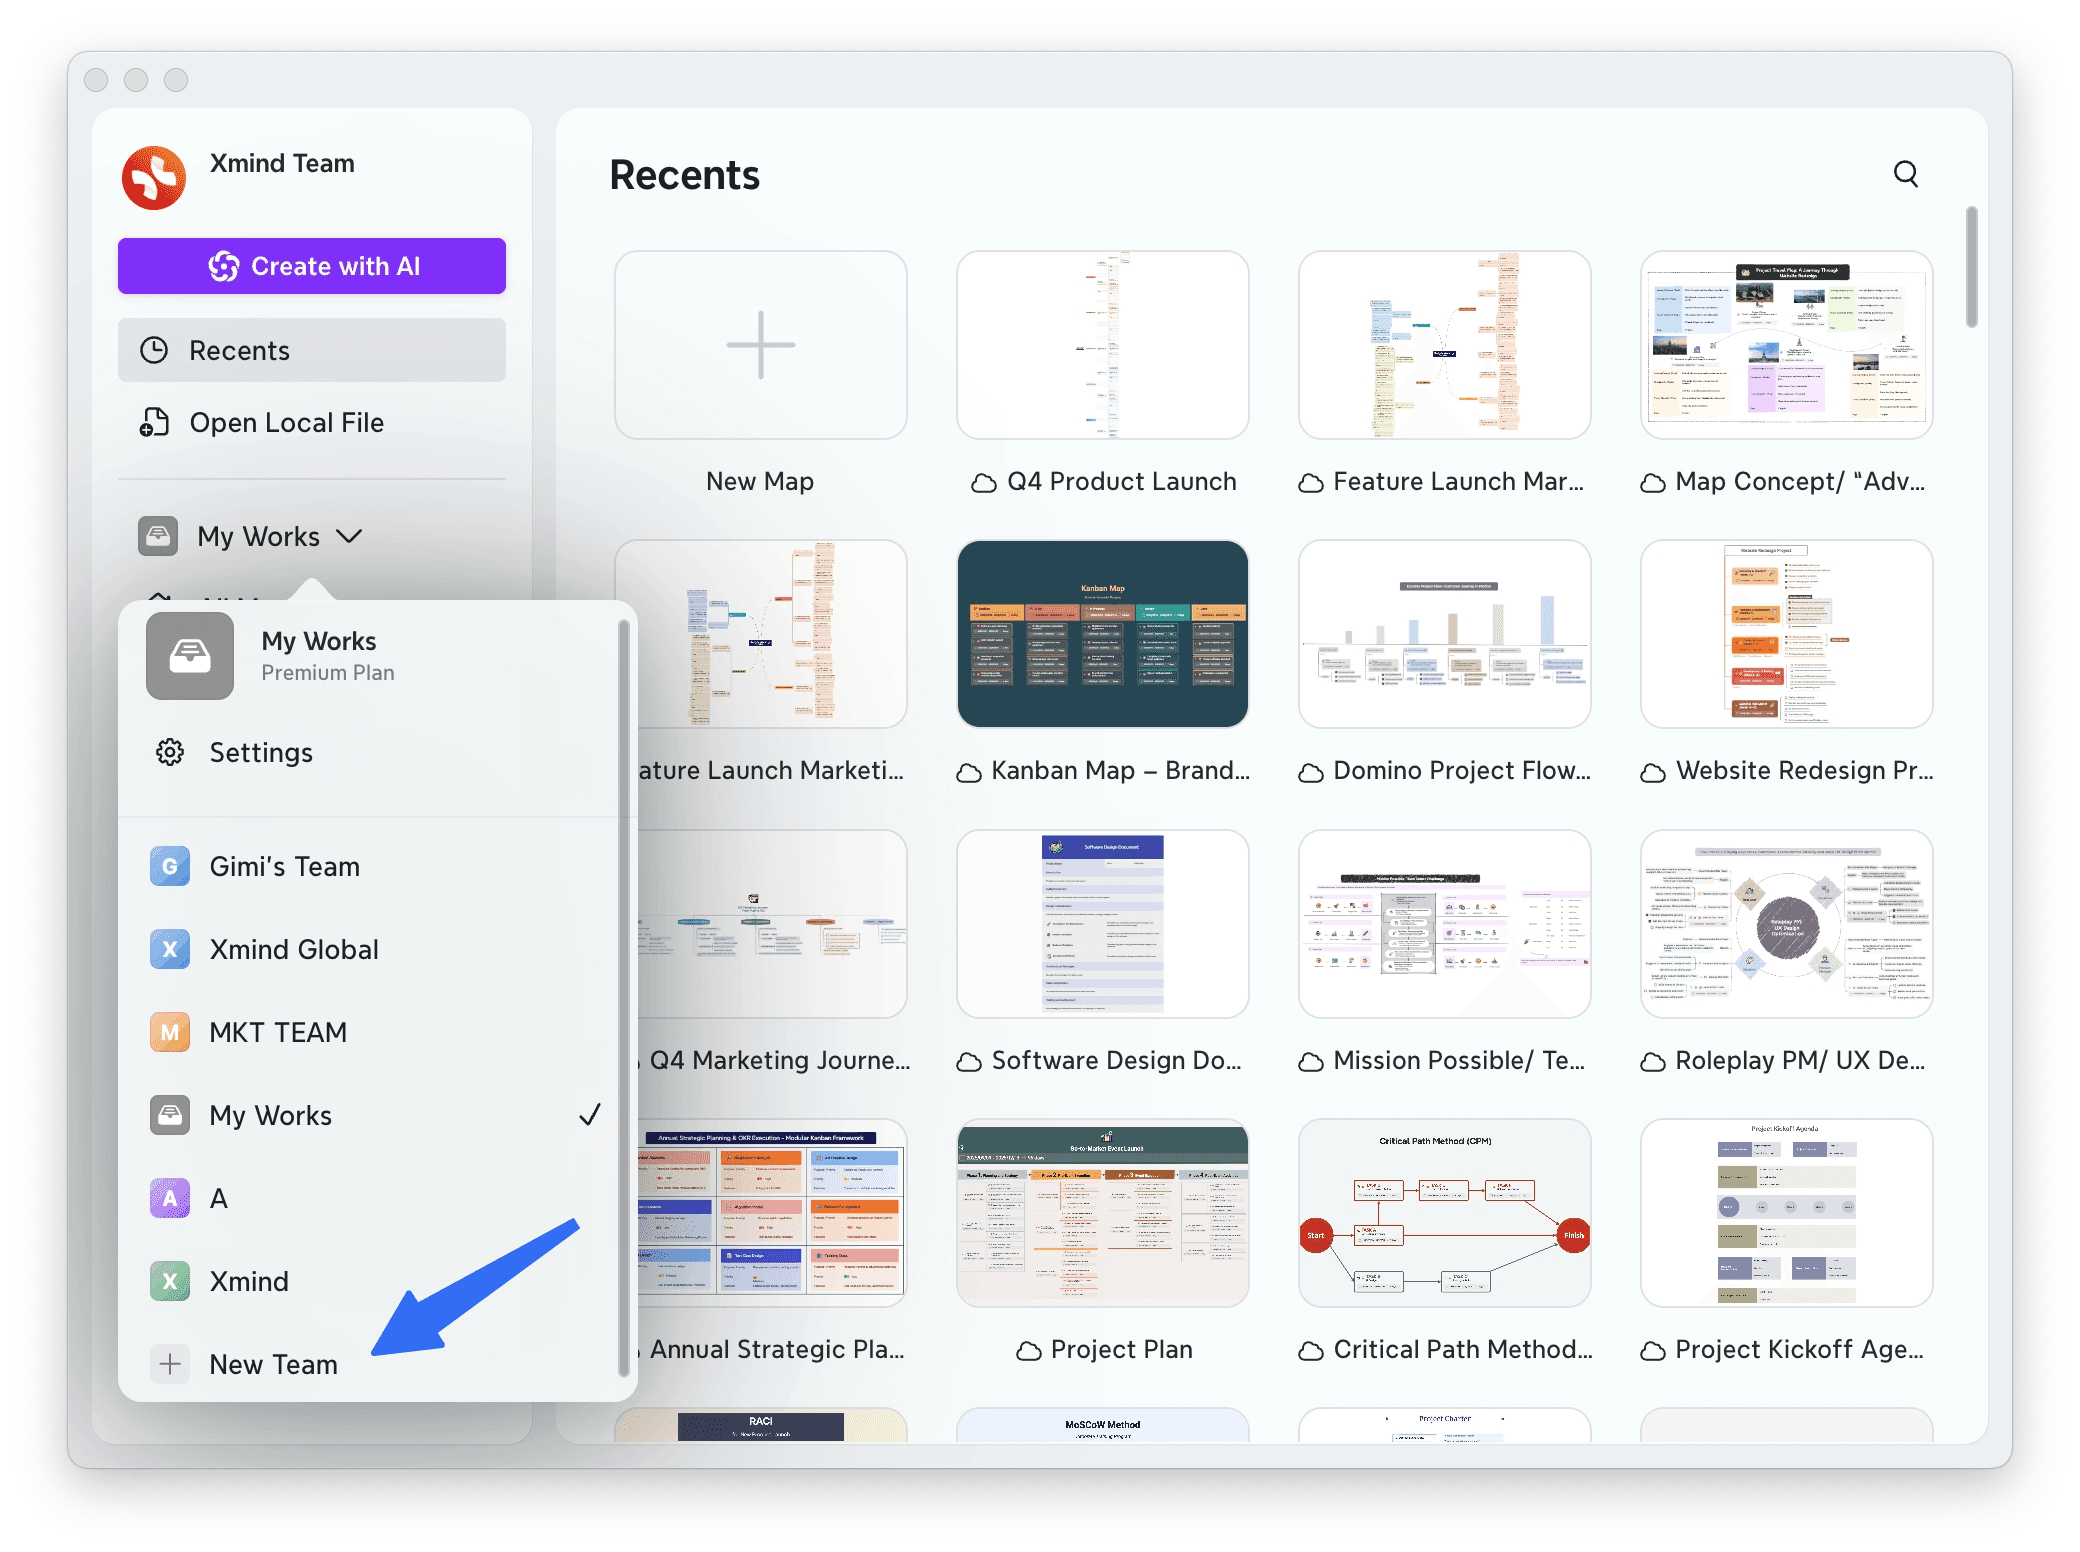
2️⃣ Enter team name and click Create.
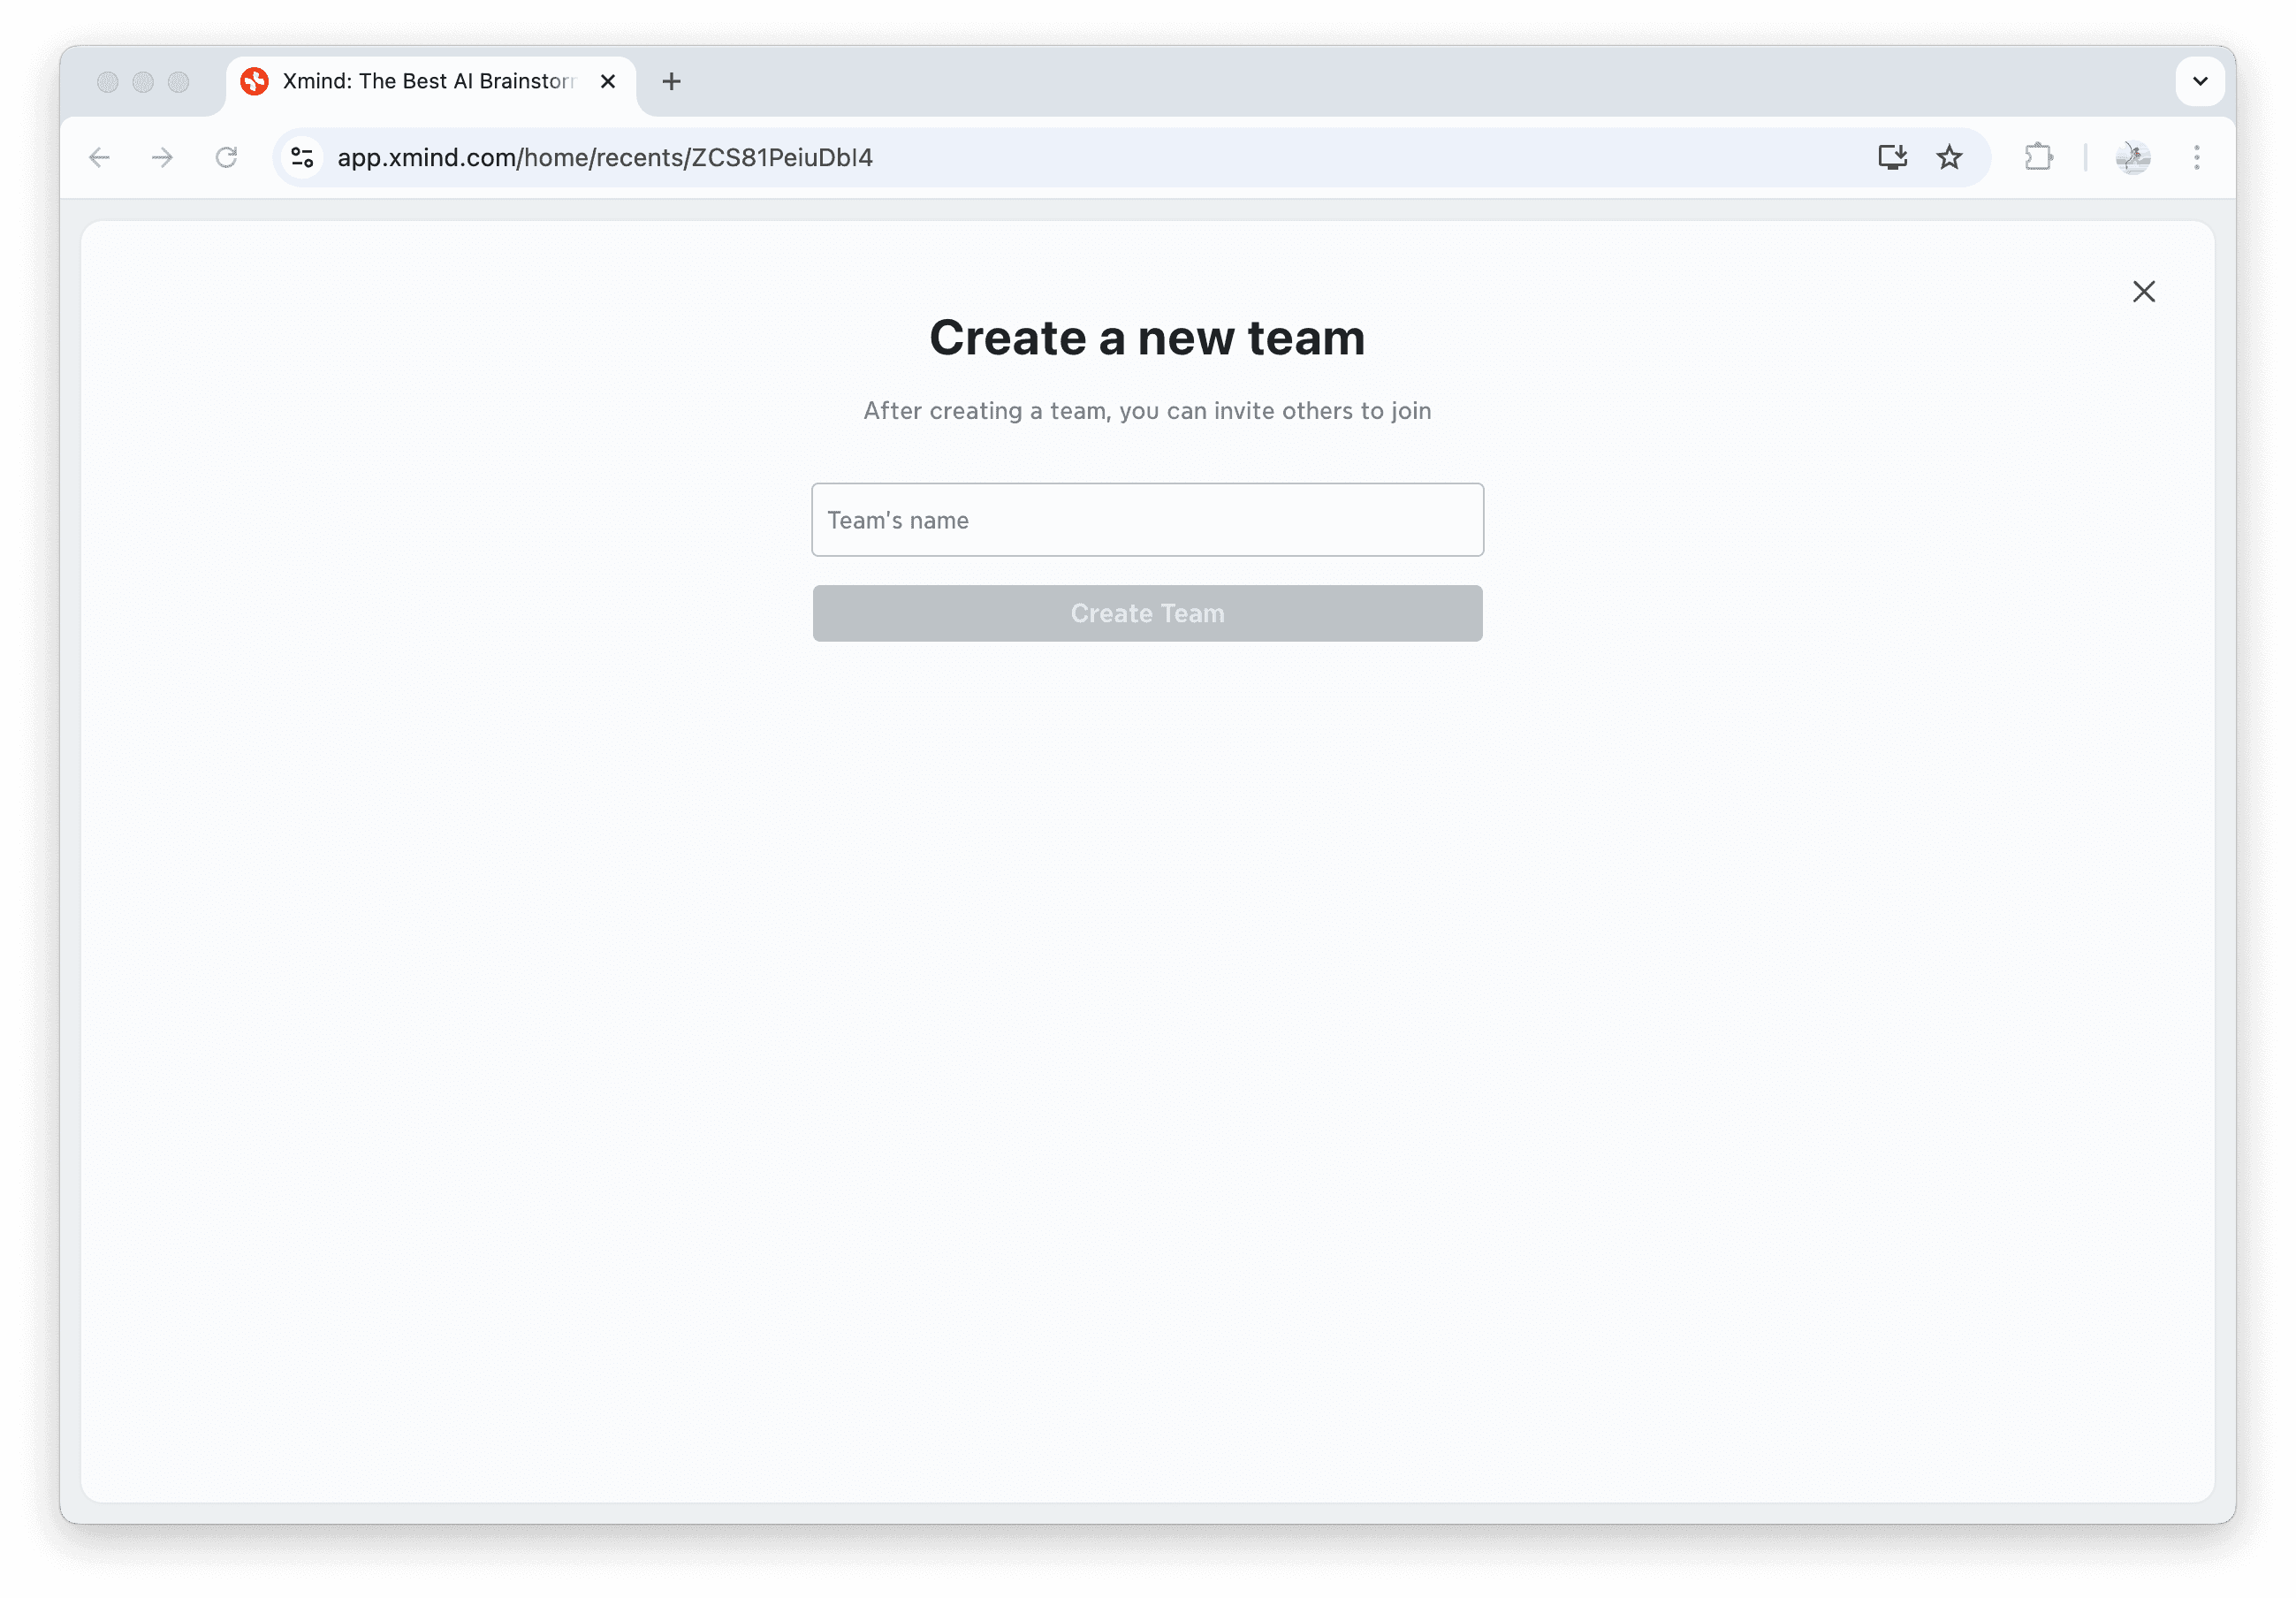
On web
1️⃣ Click the New Team.
2️⃣ Enter team name and click Create Team.
3️⃣ Xmind will prompt you to invite team members. Simply enter their email addresses to send invitations.
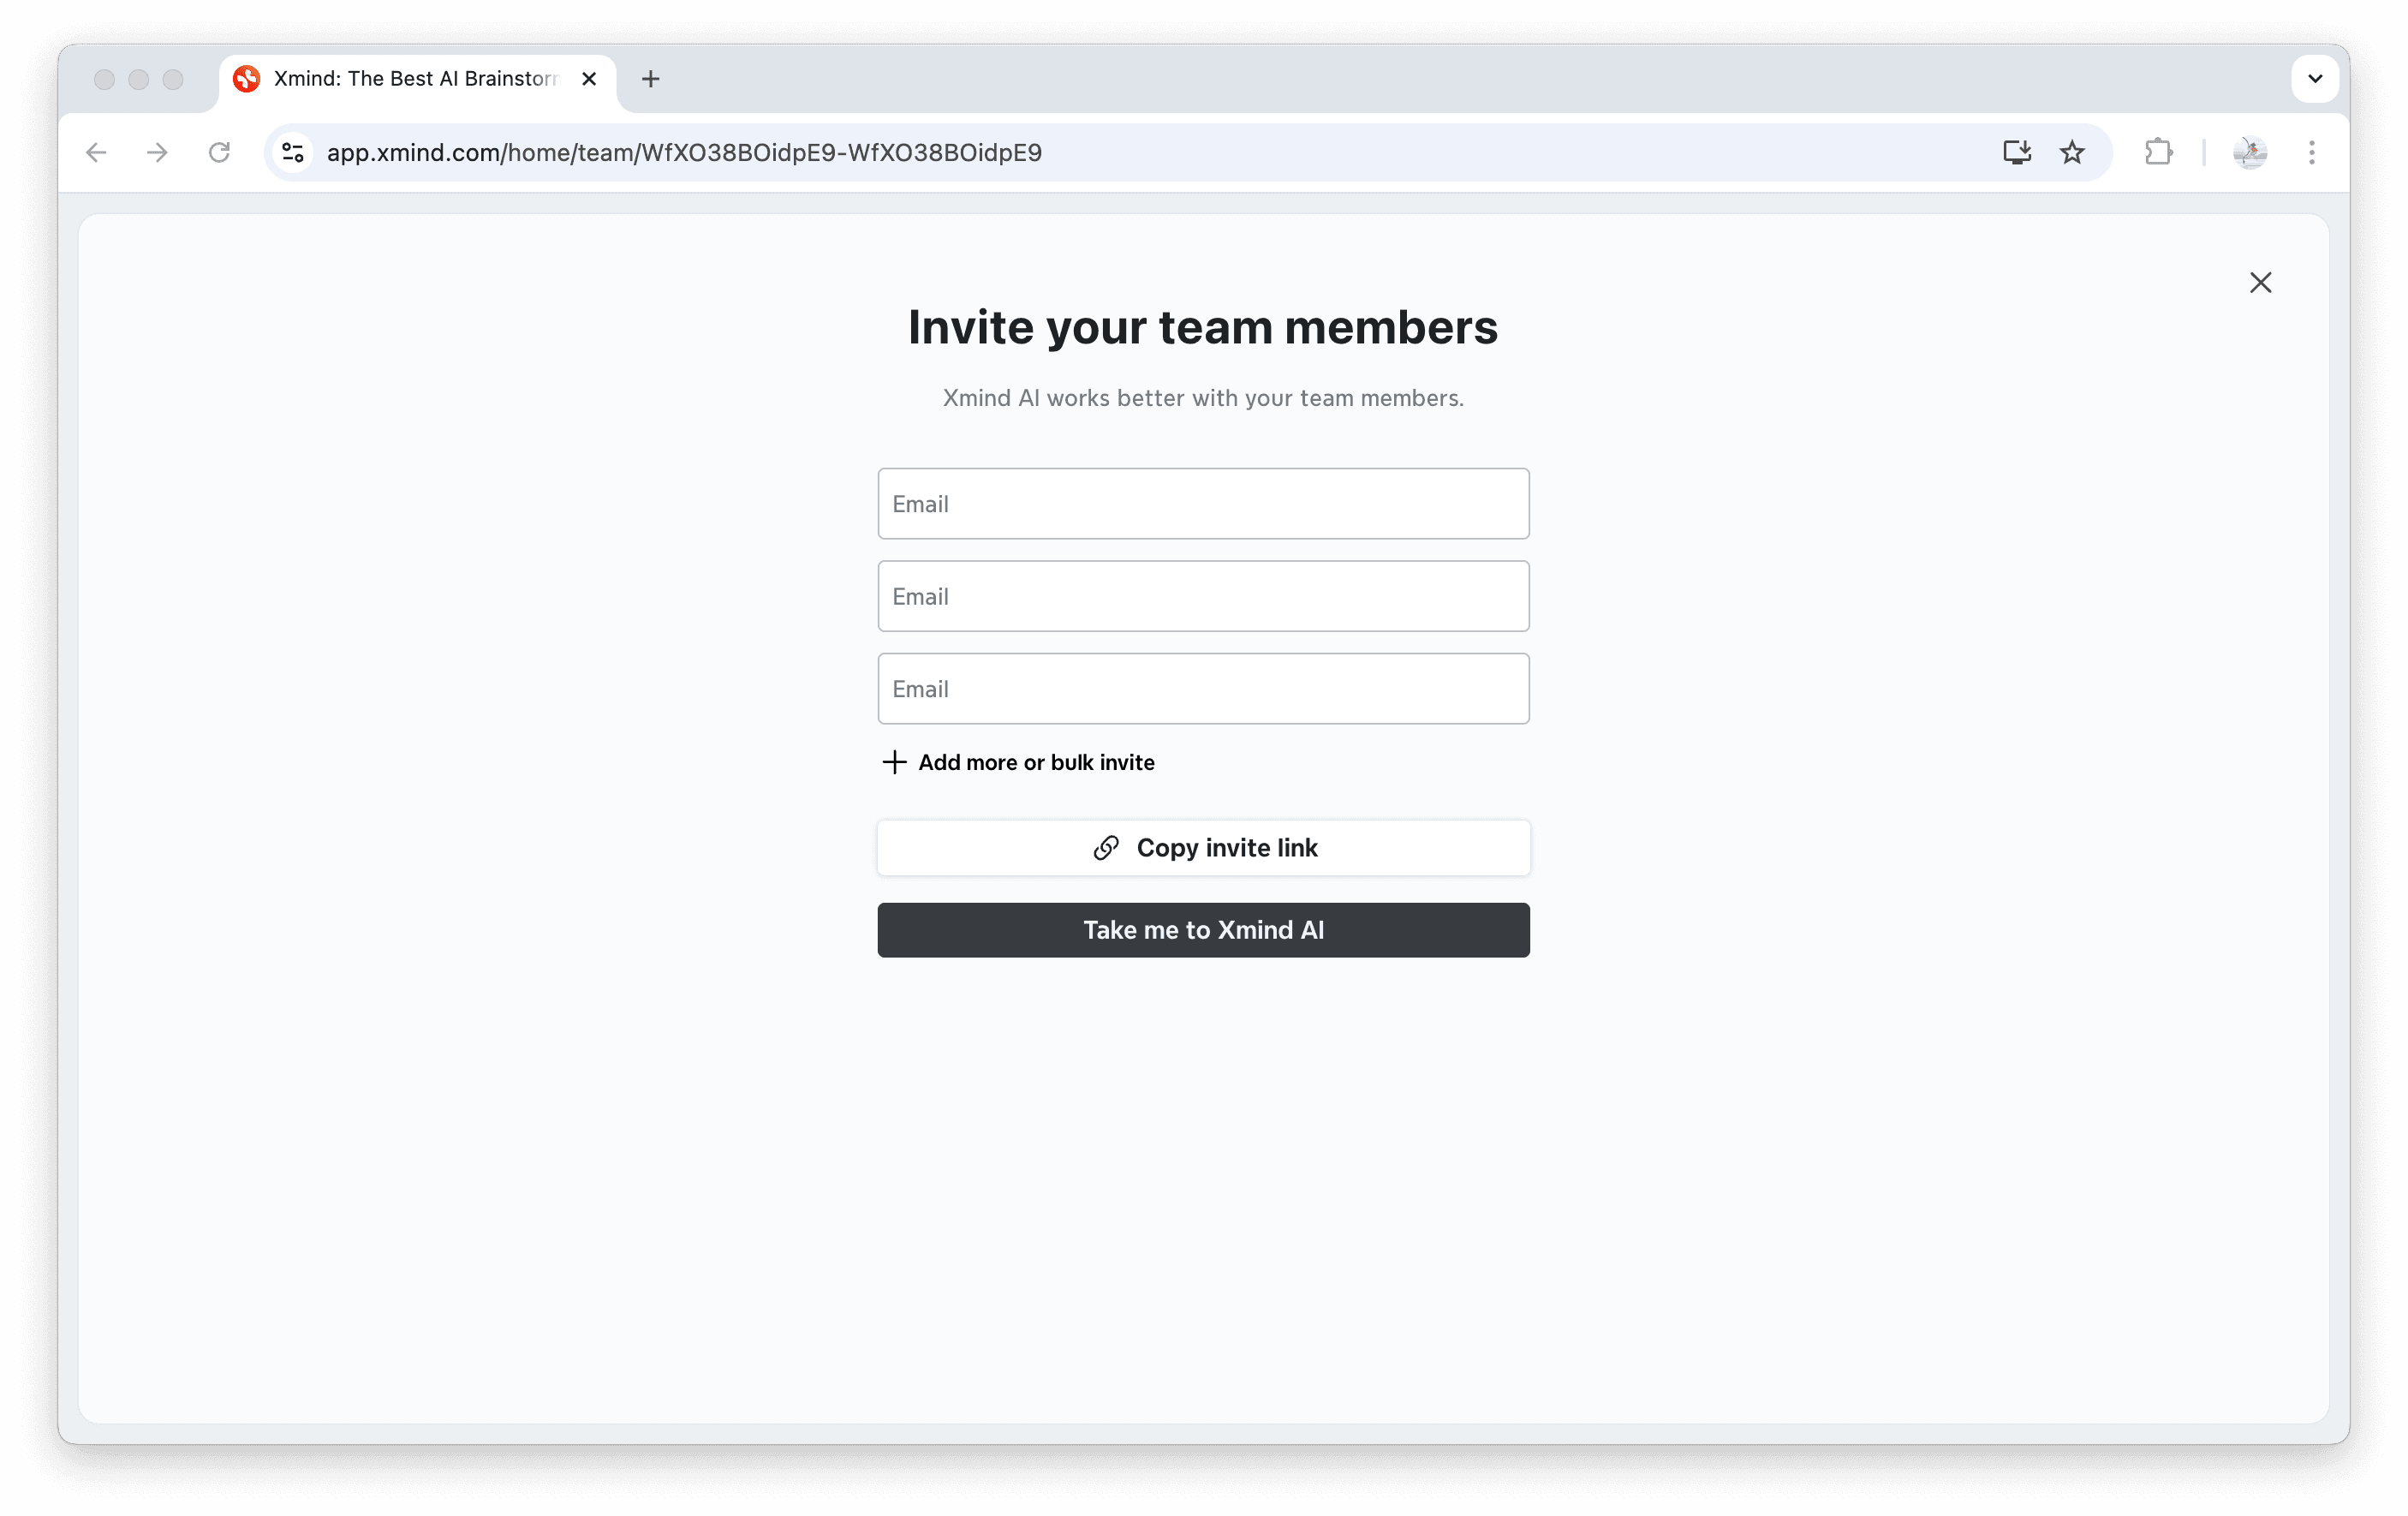
4️⃣ Click Invite and take me to Xmind AI to proceed.
Manage Teams
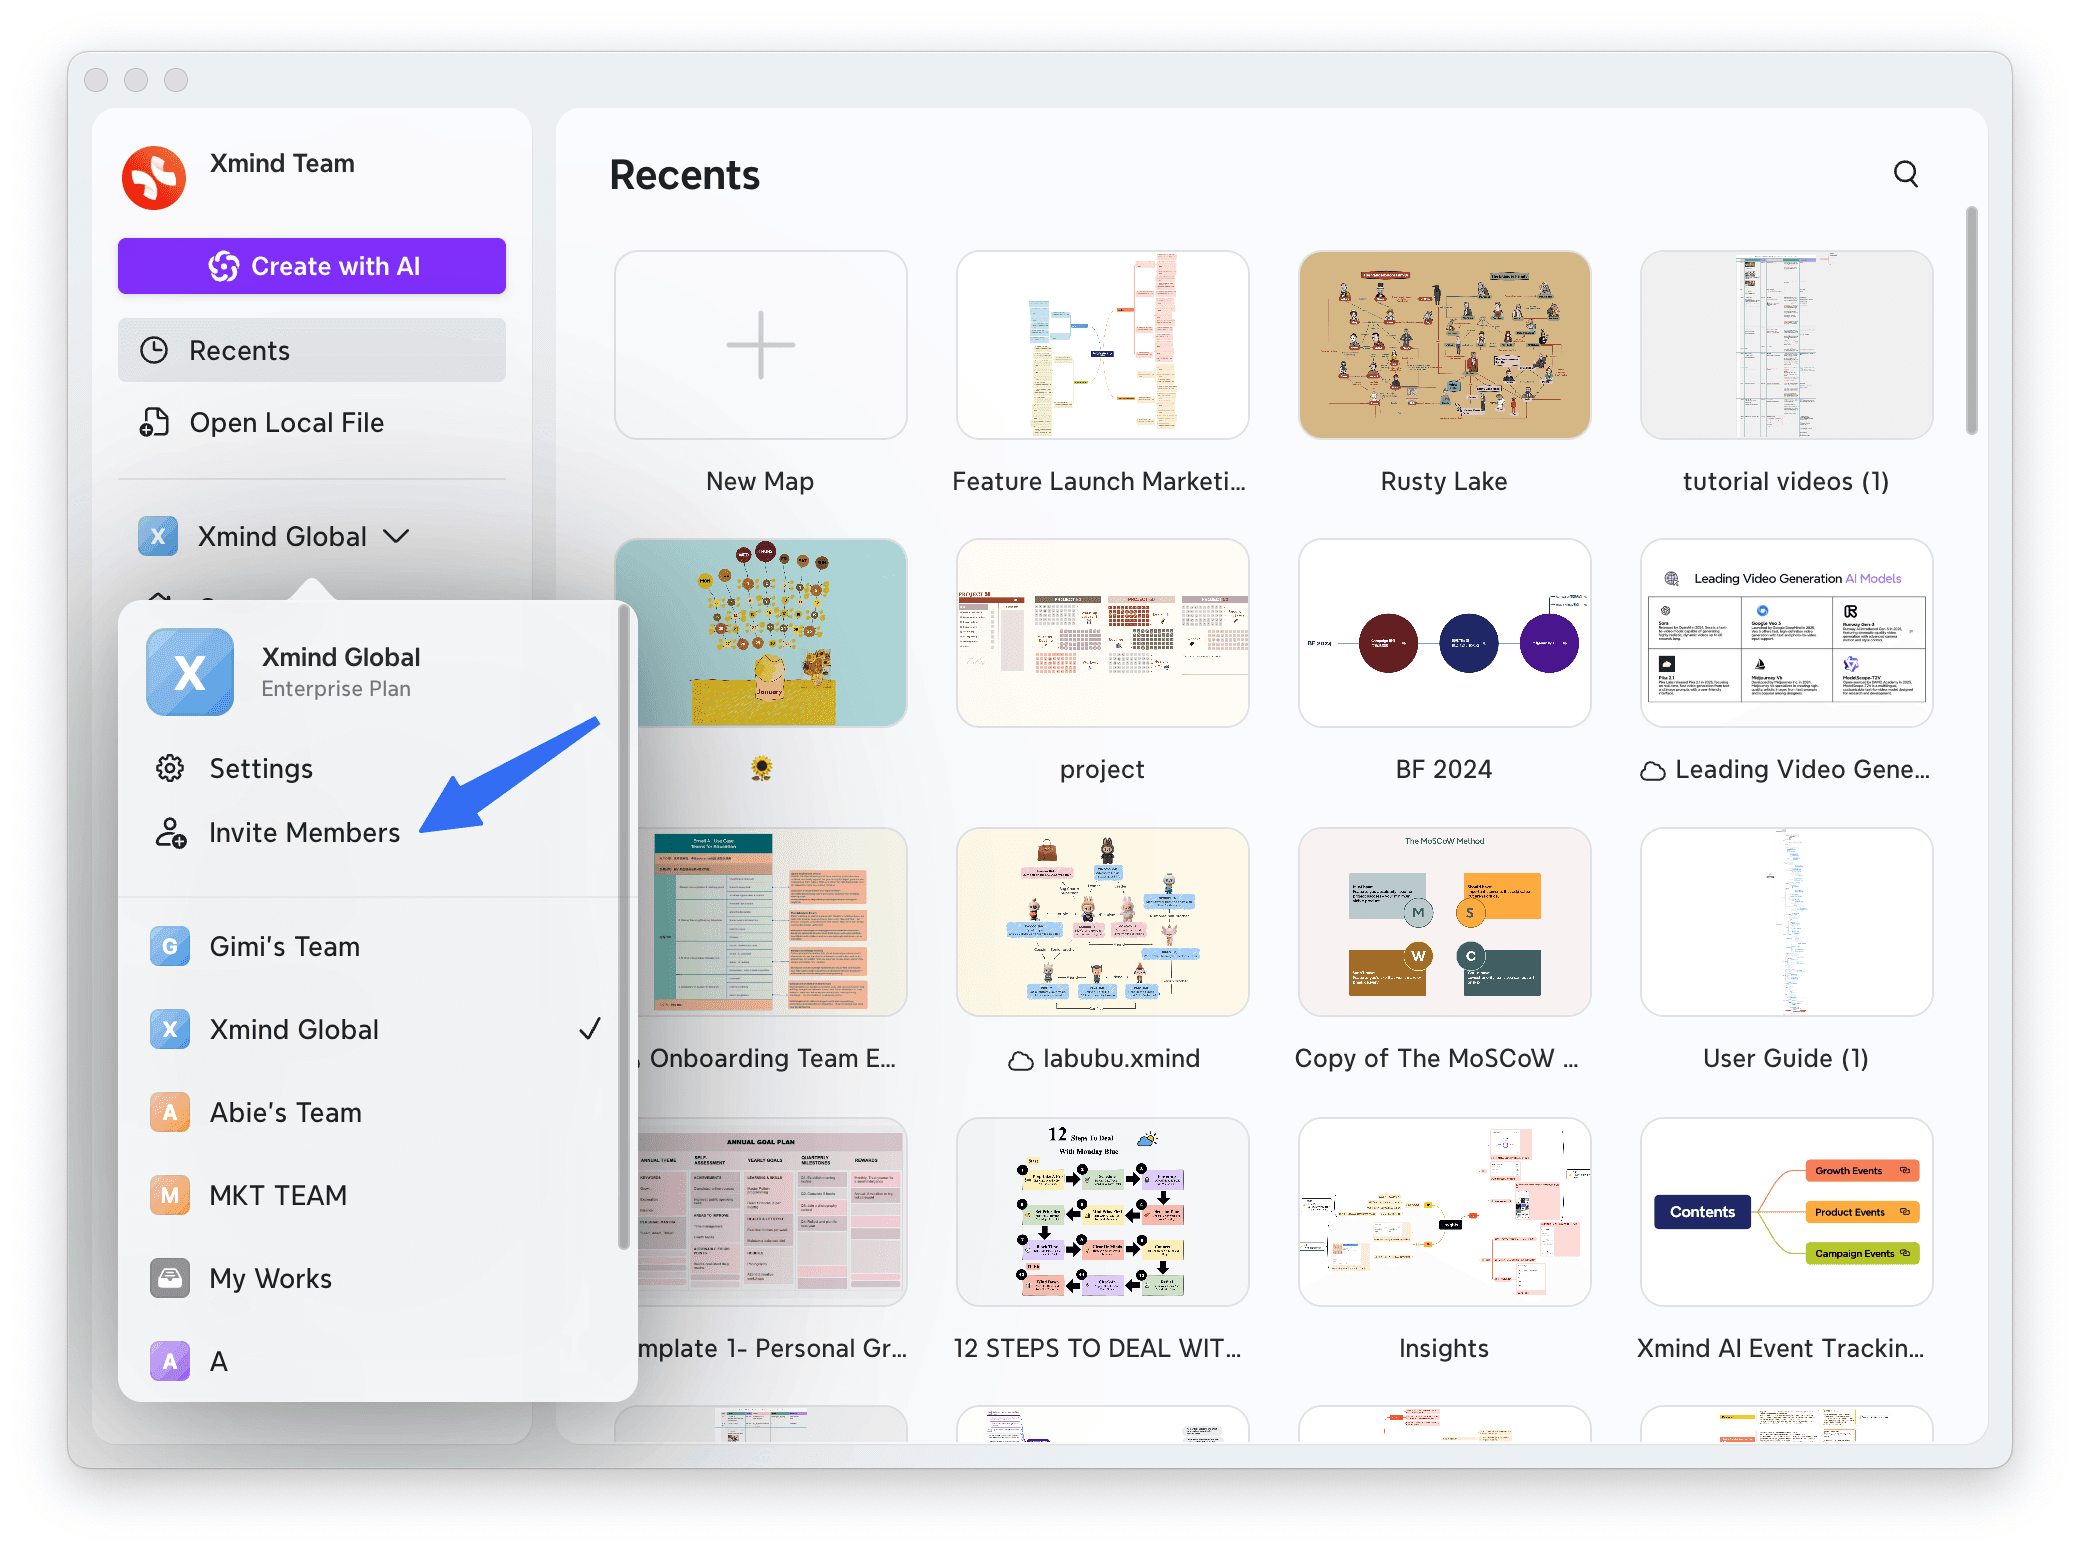
Invite Team members
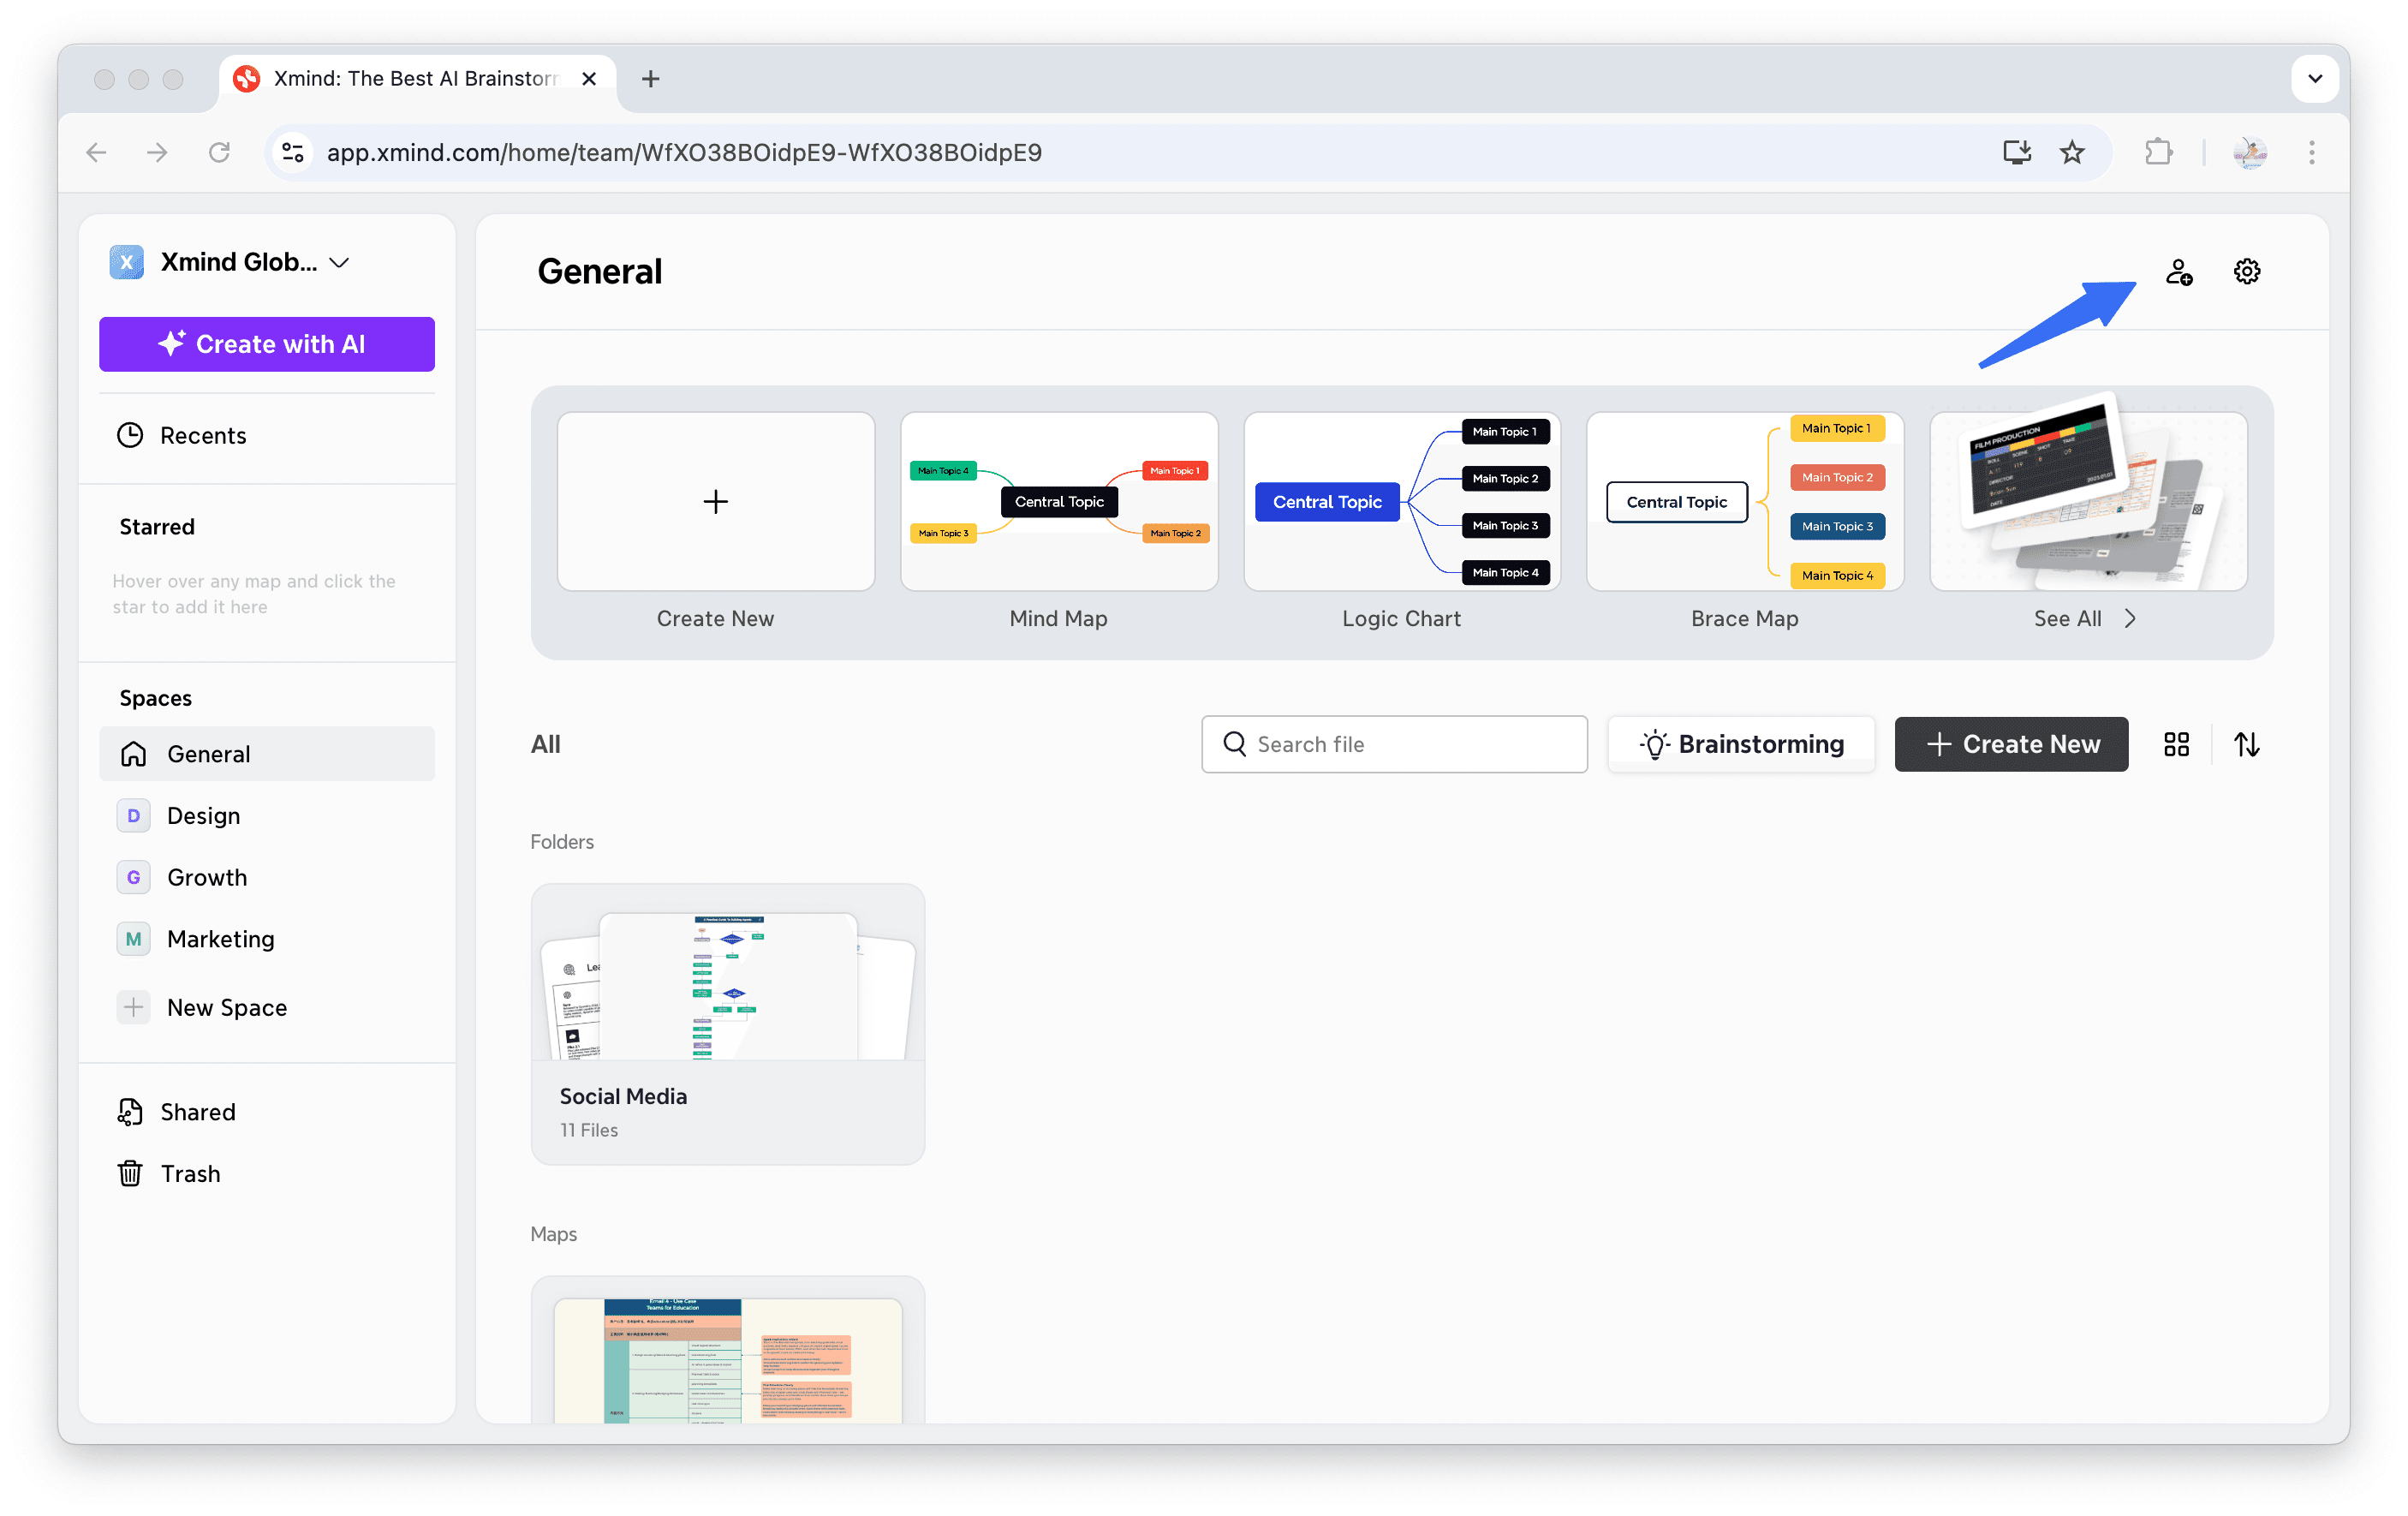
As a team owner, you can quickly invite new members to join your team using email invitations or shareable links.
1️⃣ Navigate to your team space in the sidebar.
2️⃣ Click Invite in the top-right corner.
3️⃣ Type an email to invite directly, or copy the link to share it with others.
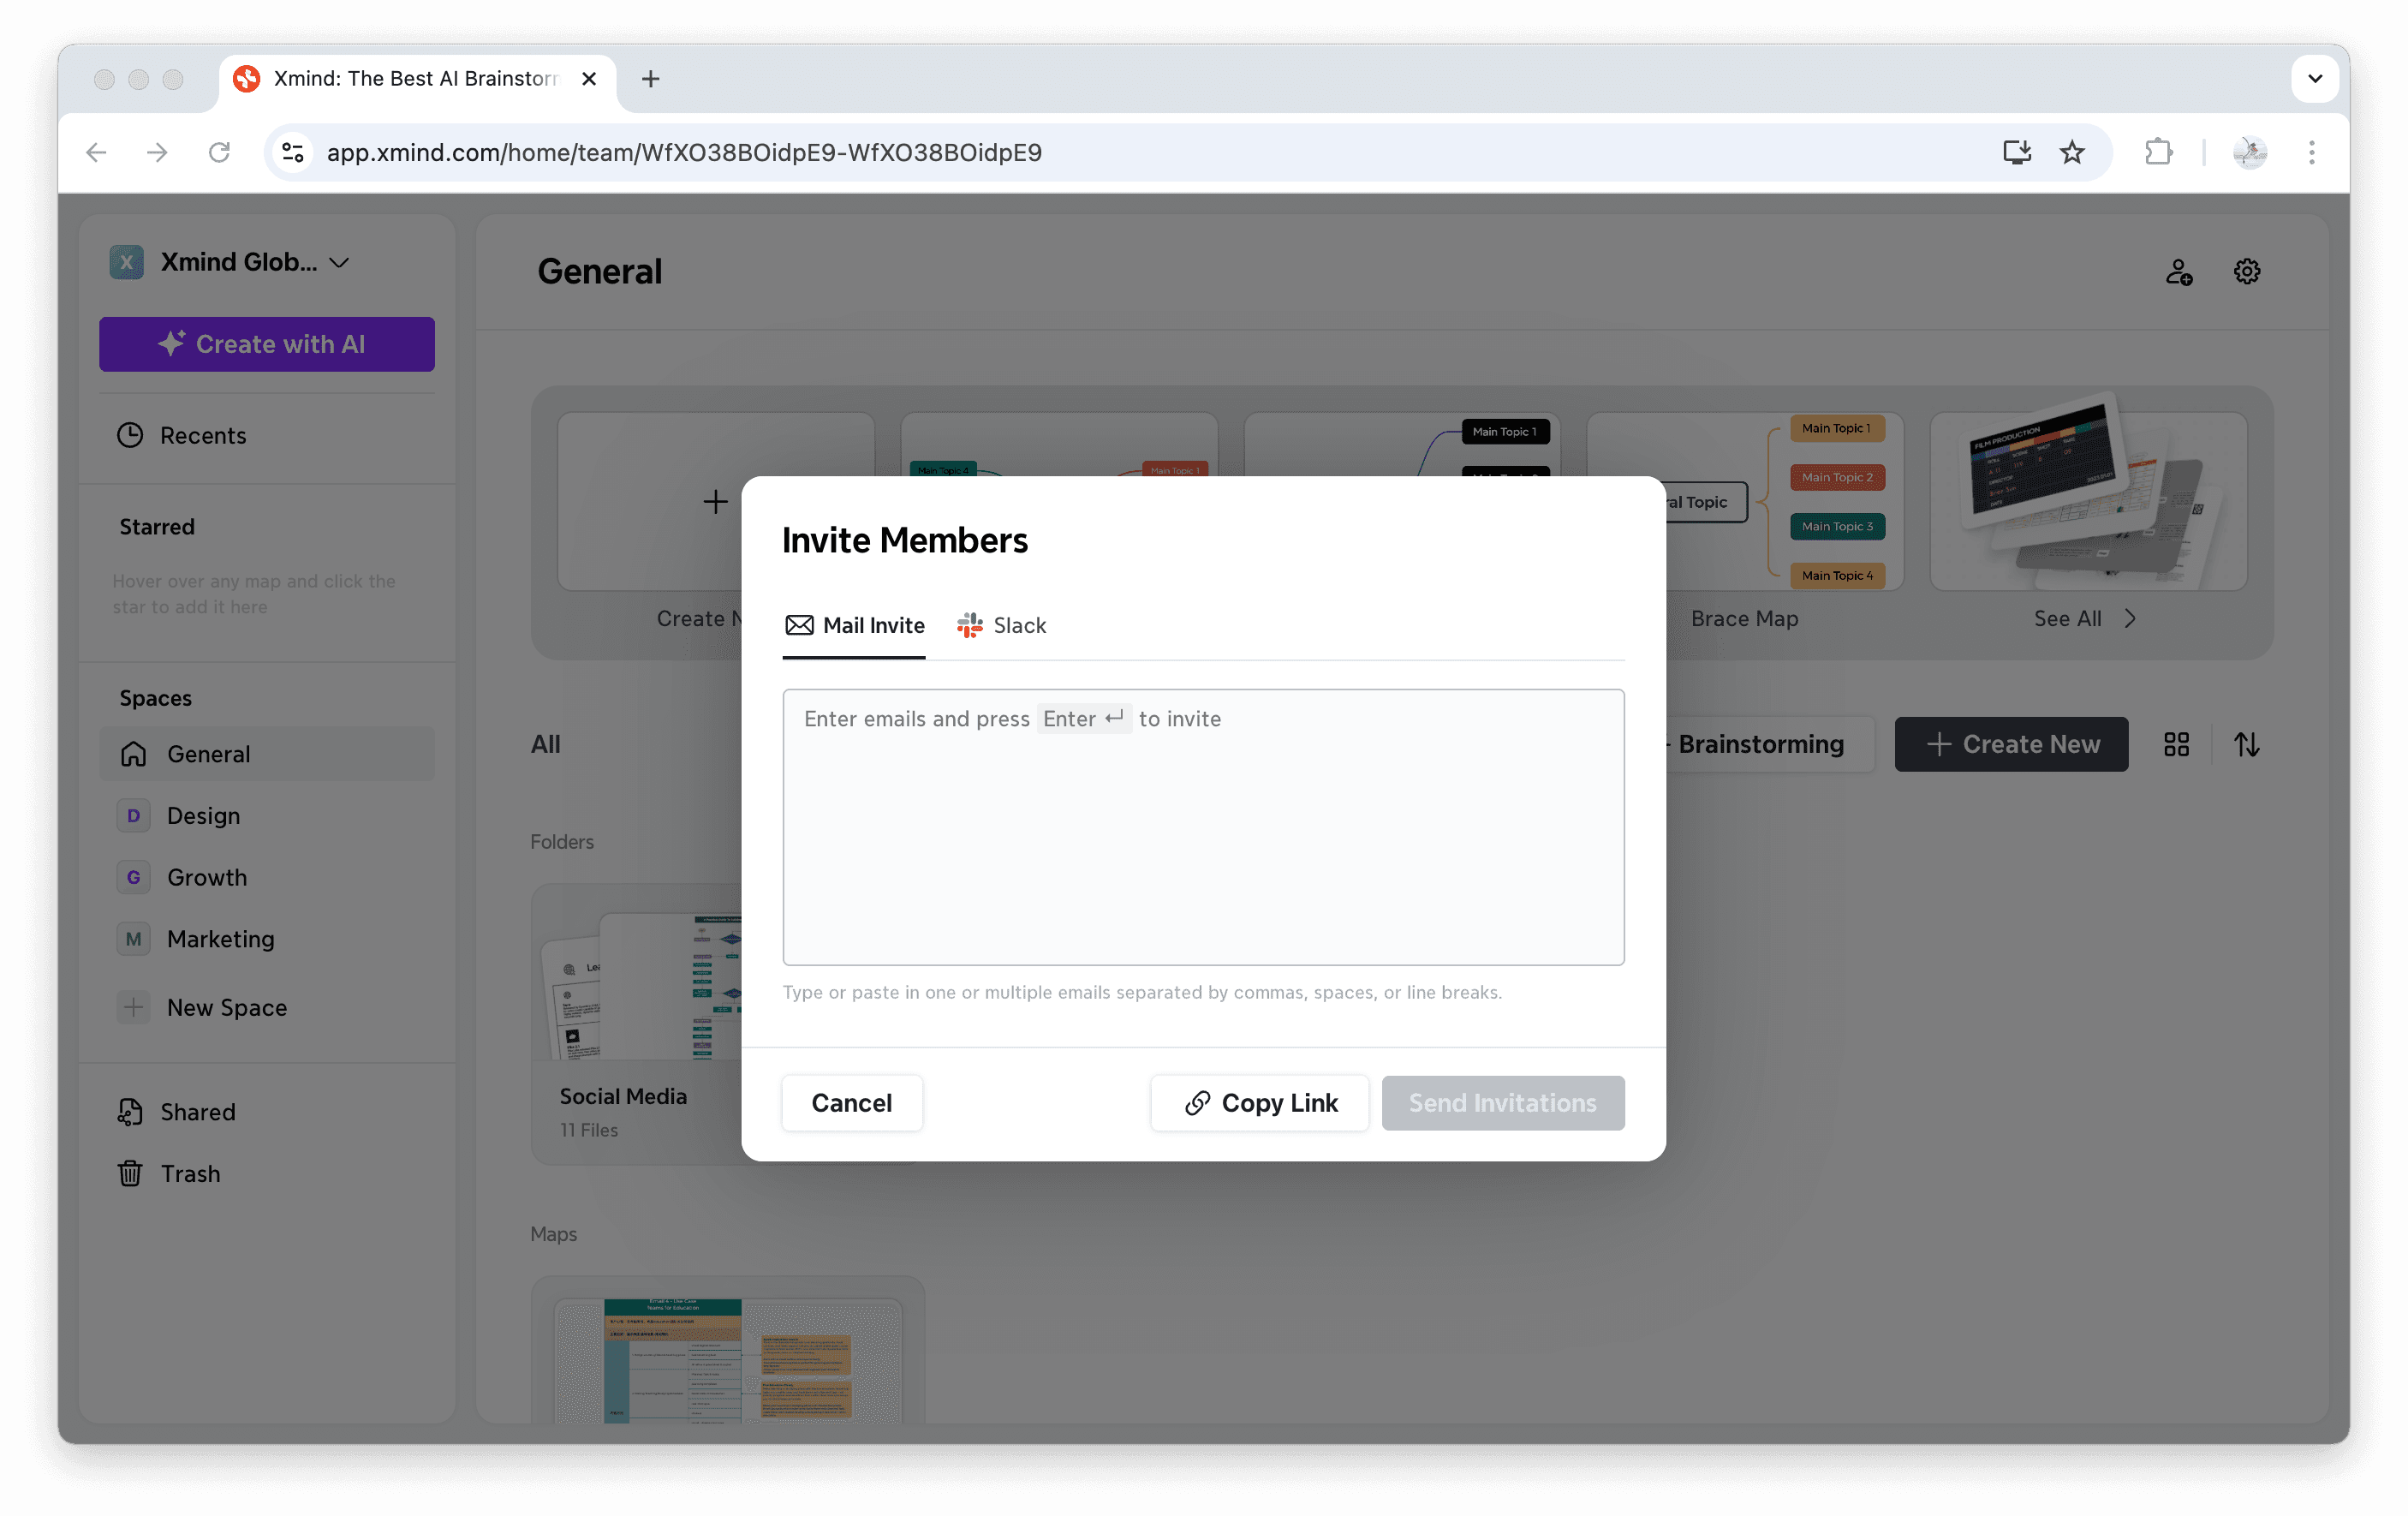
4️⃣ Click Send Invitation.
To accept an invitation
Via invitation email: Click the Accept & Join button to accept the invitation.
Via invitation link: Click the link and accept the invitation.
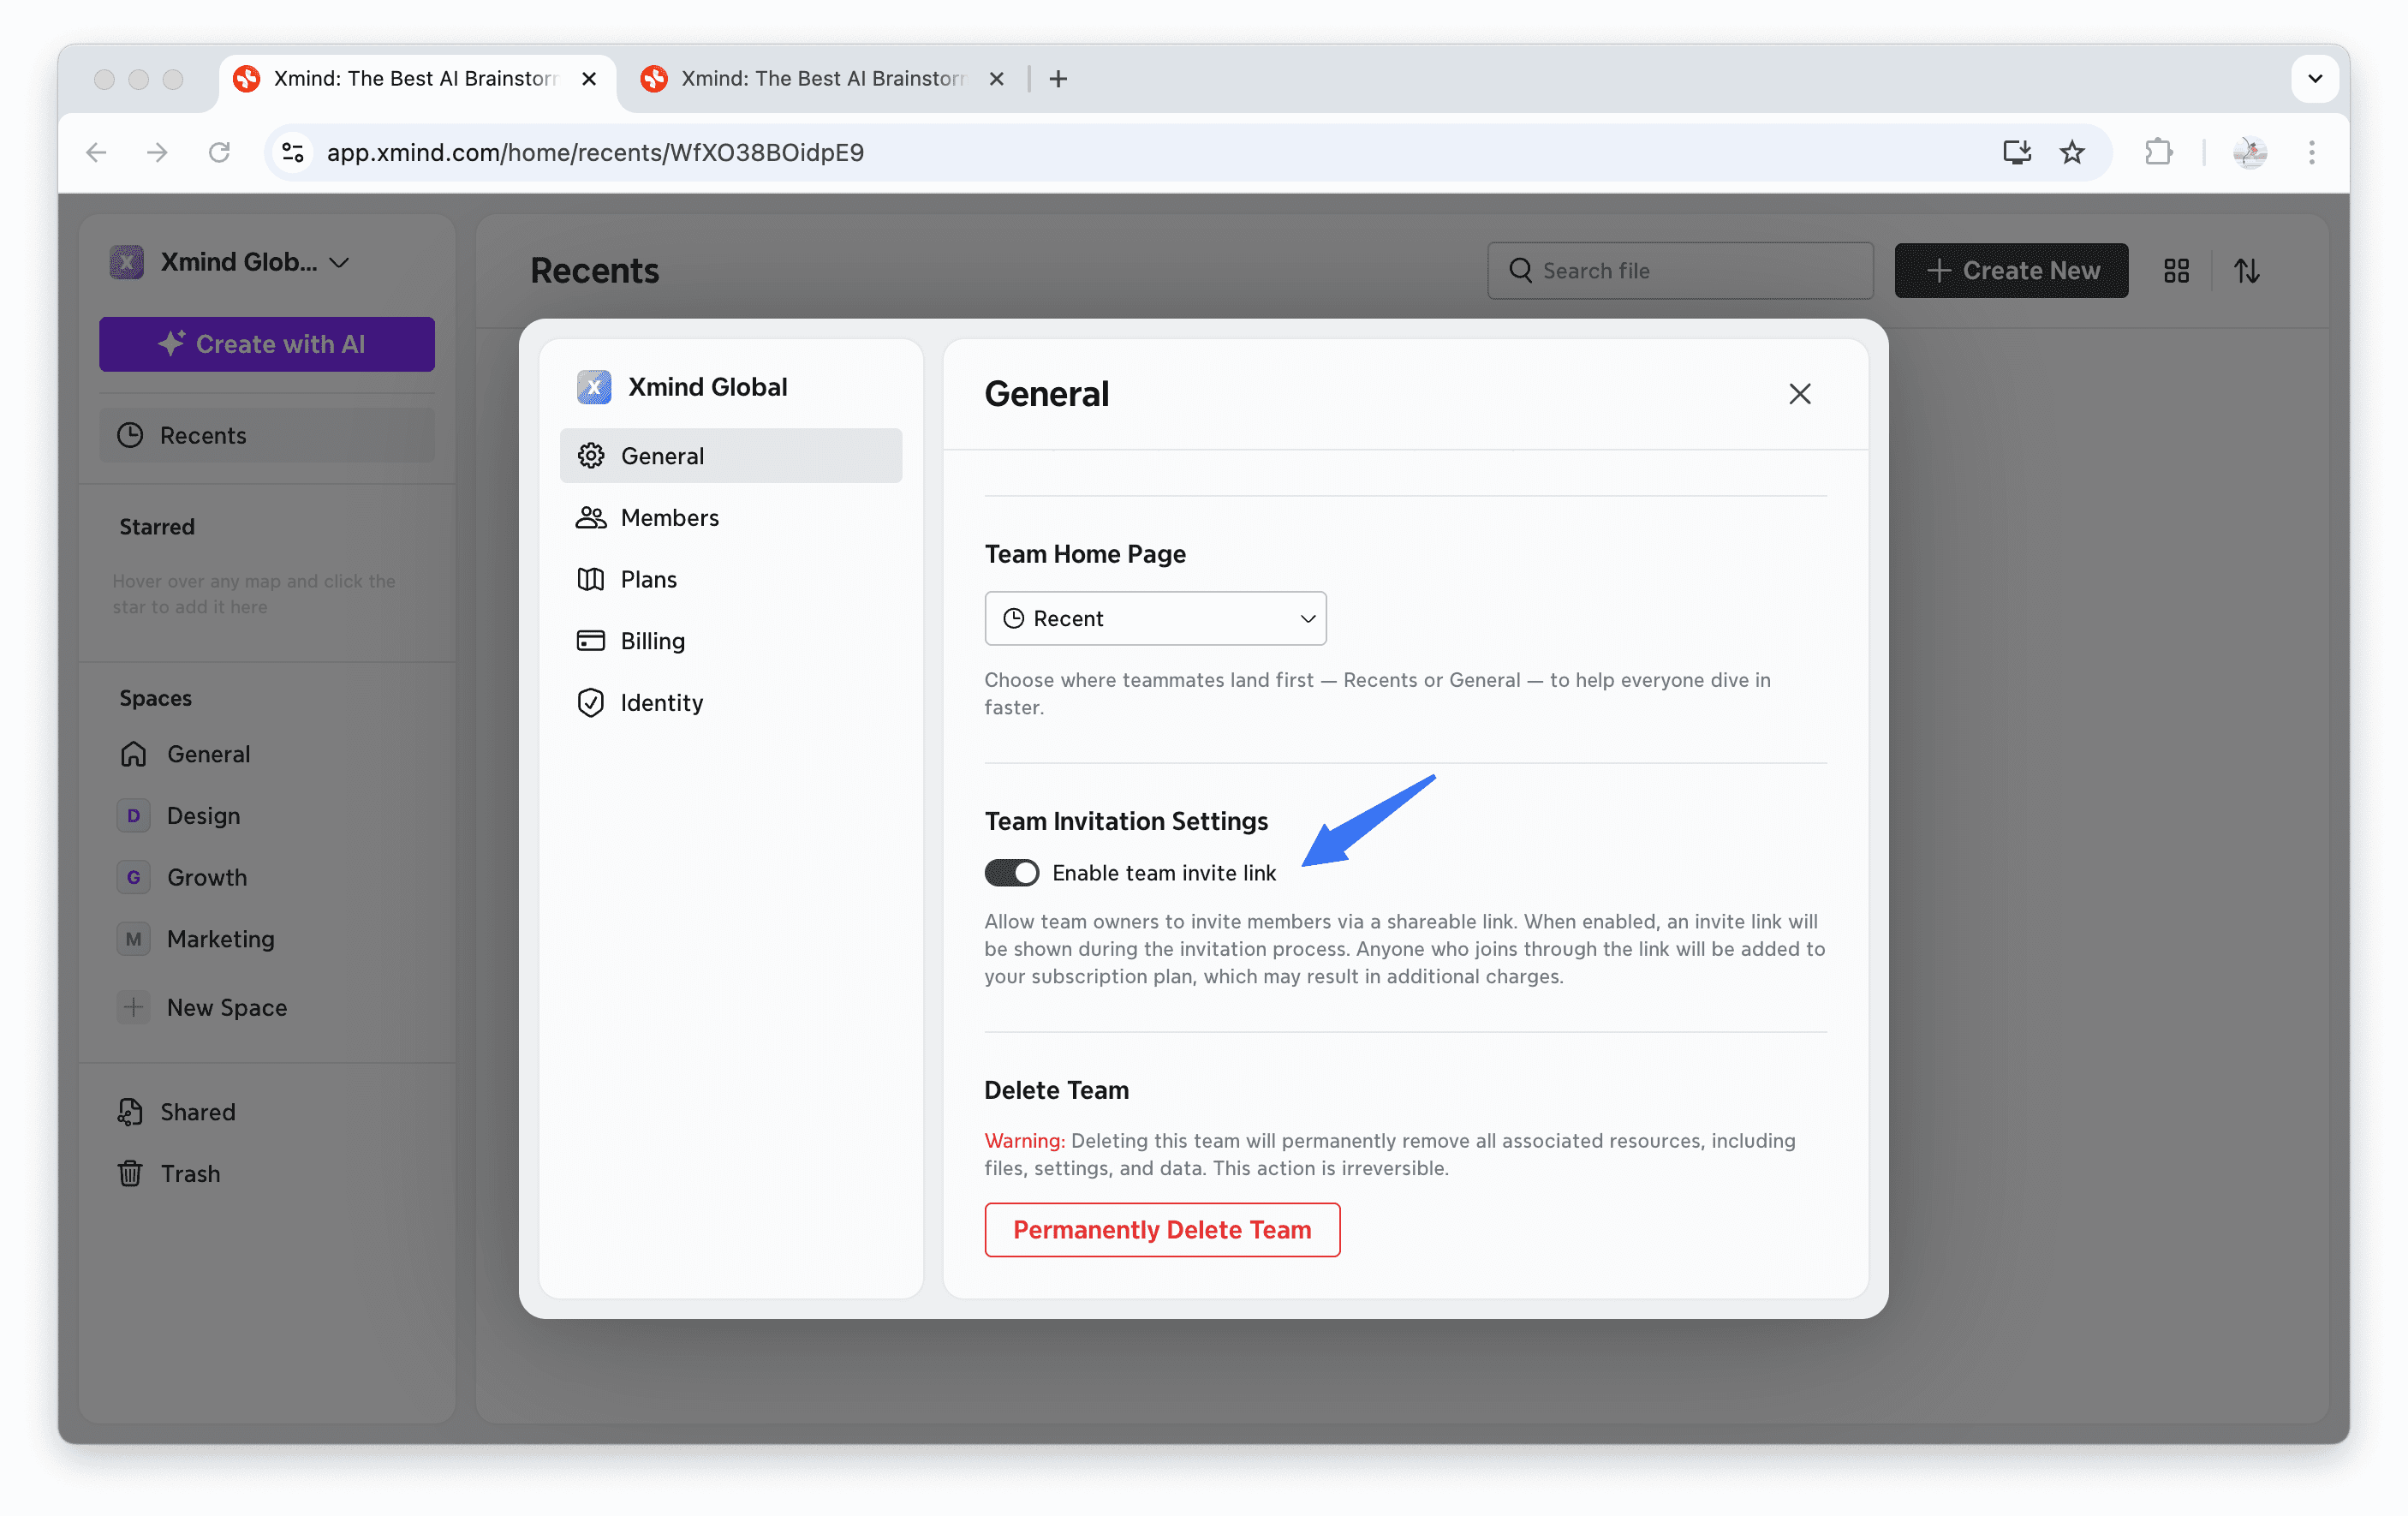
Manage Team Invitation Settings
On desktop app
1️⃣ Go to your team via the sidebar.
2️⃣ Click the dropdown menu next to the team name and select the Settings icon, then navigate to app.xmind.com
On web
Team owners can toggle invite links on and off.
1️⃣ Navigate to your team space in the sidebar.
2️⃣ Open the team page > Select the Settings icon.
3️⃣Toggle off Enable team invite link to disable link invitations.
Join Teams
To join a team, you must be invited and have an Xmind account.
View Team Members List
1️⃣ Open the team page > Select Settings icon.
2️⃣ Switch to the Members tab to see all invited team members.
Remove a Team Member
1️⃣ Open the team page > Select the Settings icon.
2️⃣ Switch to the Members tab.
3️⃣ Find the member, open the dropdown next to their name, and select Remove from Team.
Manage Seats on the Business Plan
1️⃣ Open the team page > Select the Settings icon.
2️⃣ Go to Plans > Team Size > Adjust.
3️⃣ Adjust the number of seats.
4️⃣ Click Confirm.
Manage Billing
Upgrade to a Paid Plan
1️⃣ Select the Settings icon > Plans tab and click the Upgrade button.
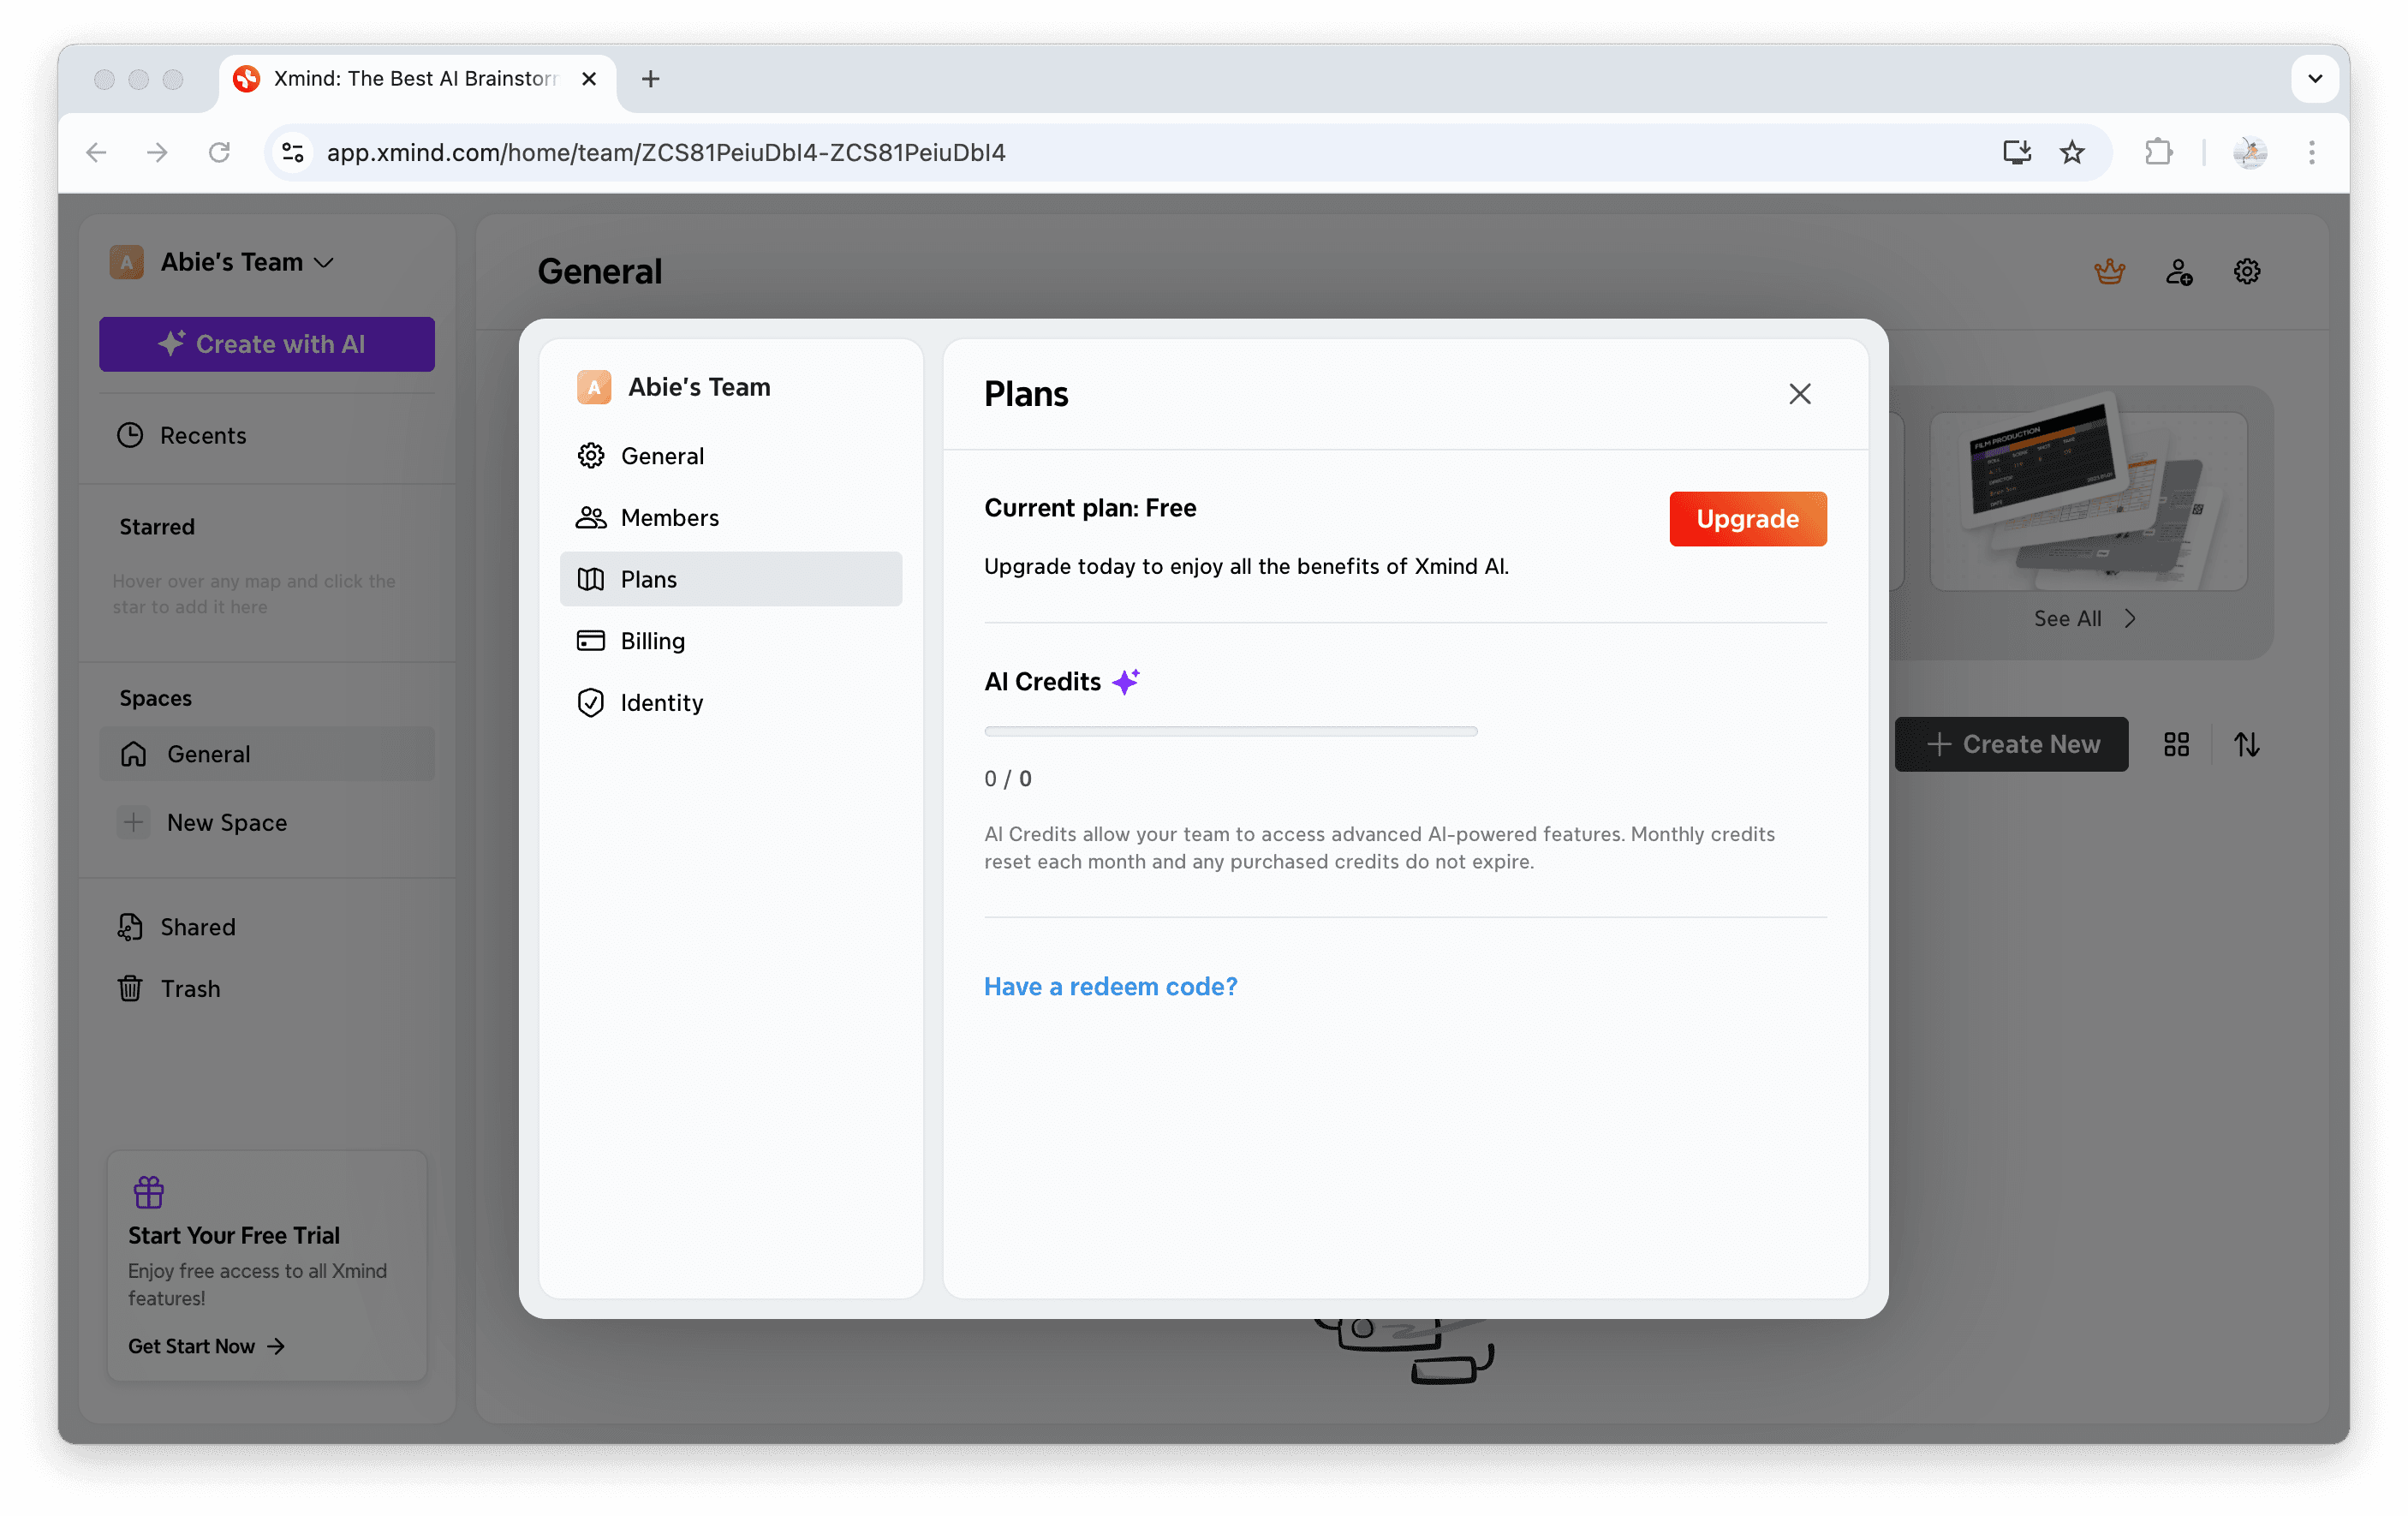
2️⃣ Navigate to the Plans page to view your current plan details, explore upgrade options, and see the benefits included.
3️⃣ Choose a plan, complete the Order Summary and payment information, then submit your payment.
Upgrade to a Business Plan
To enjoy all paid features and collaborate with your team members, you can upgrade your team to our Business Plan.
1️⃣ Select the Settings icon > Plans tab and click the Upgrade button.
2️⃣ Choose your plan and confirm the number of paid seats and billing period.
3️⃣ Enter payment details and click.
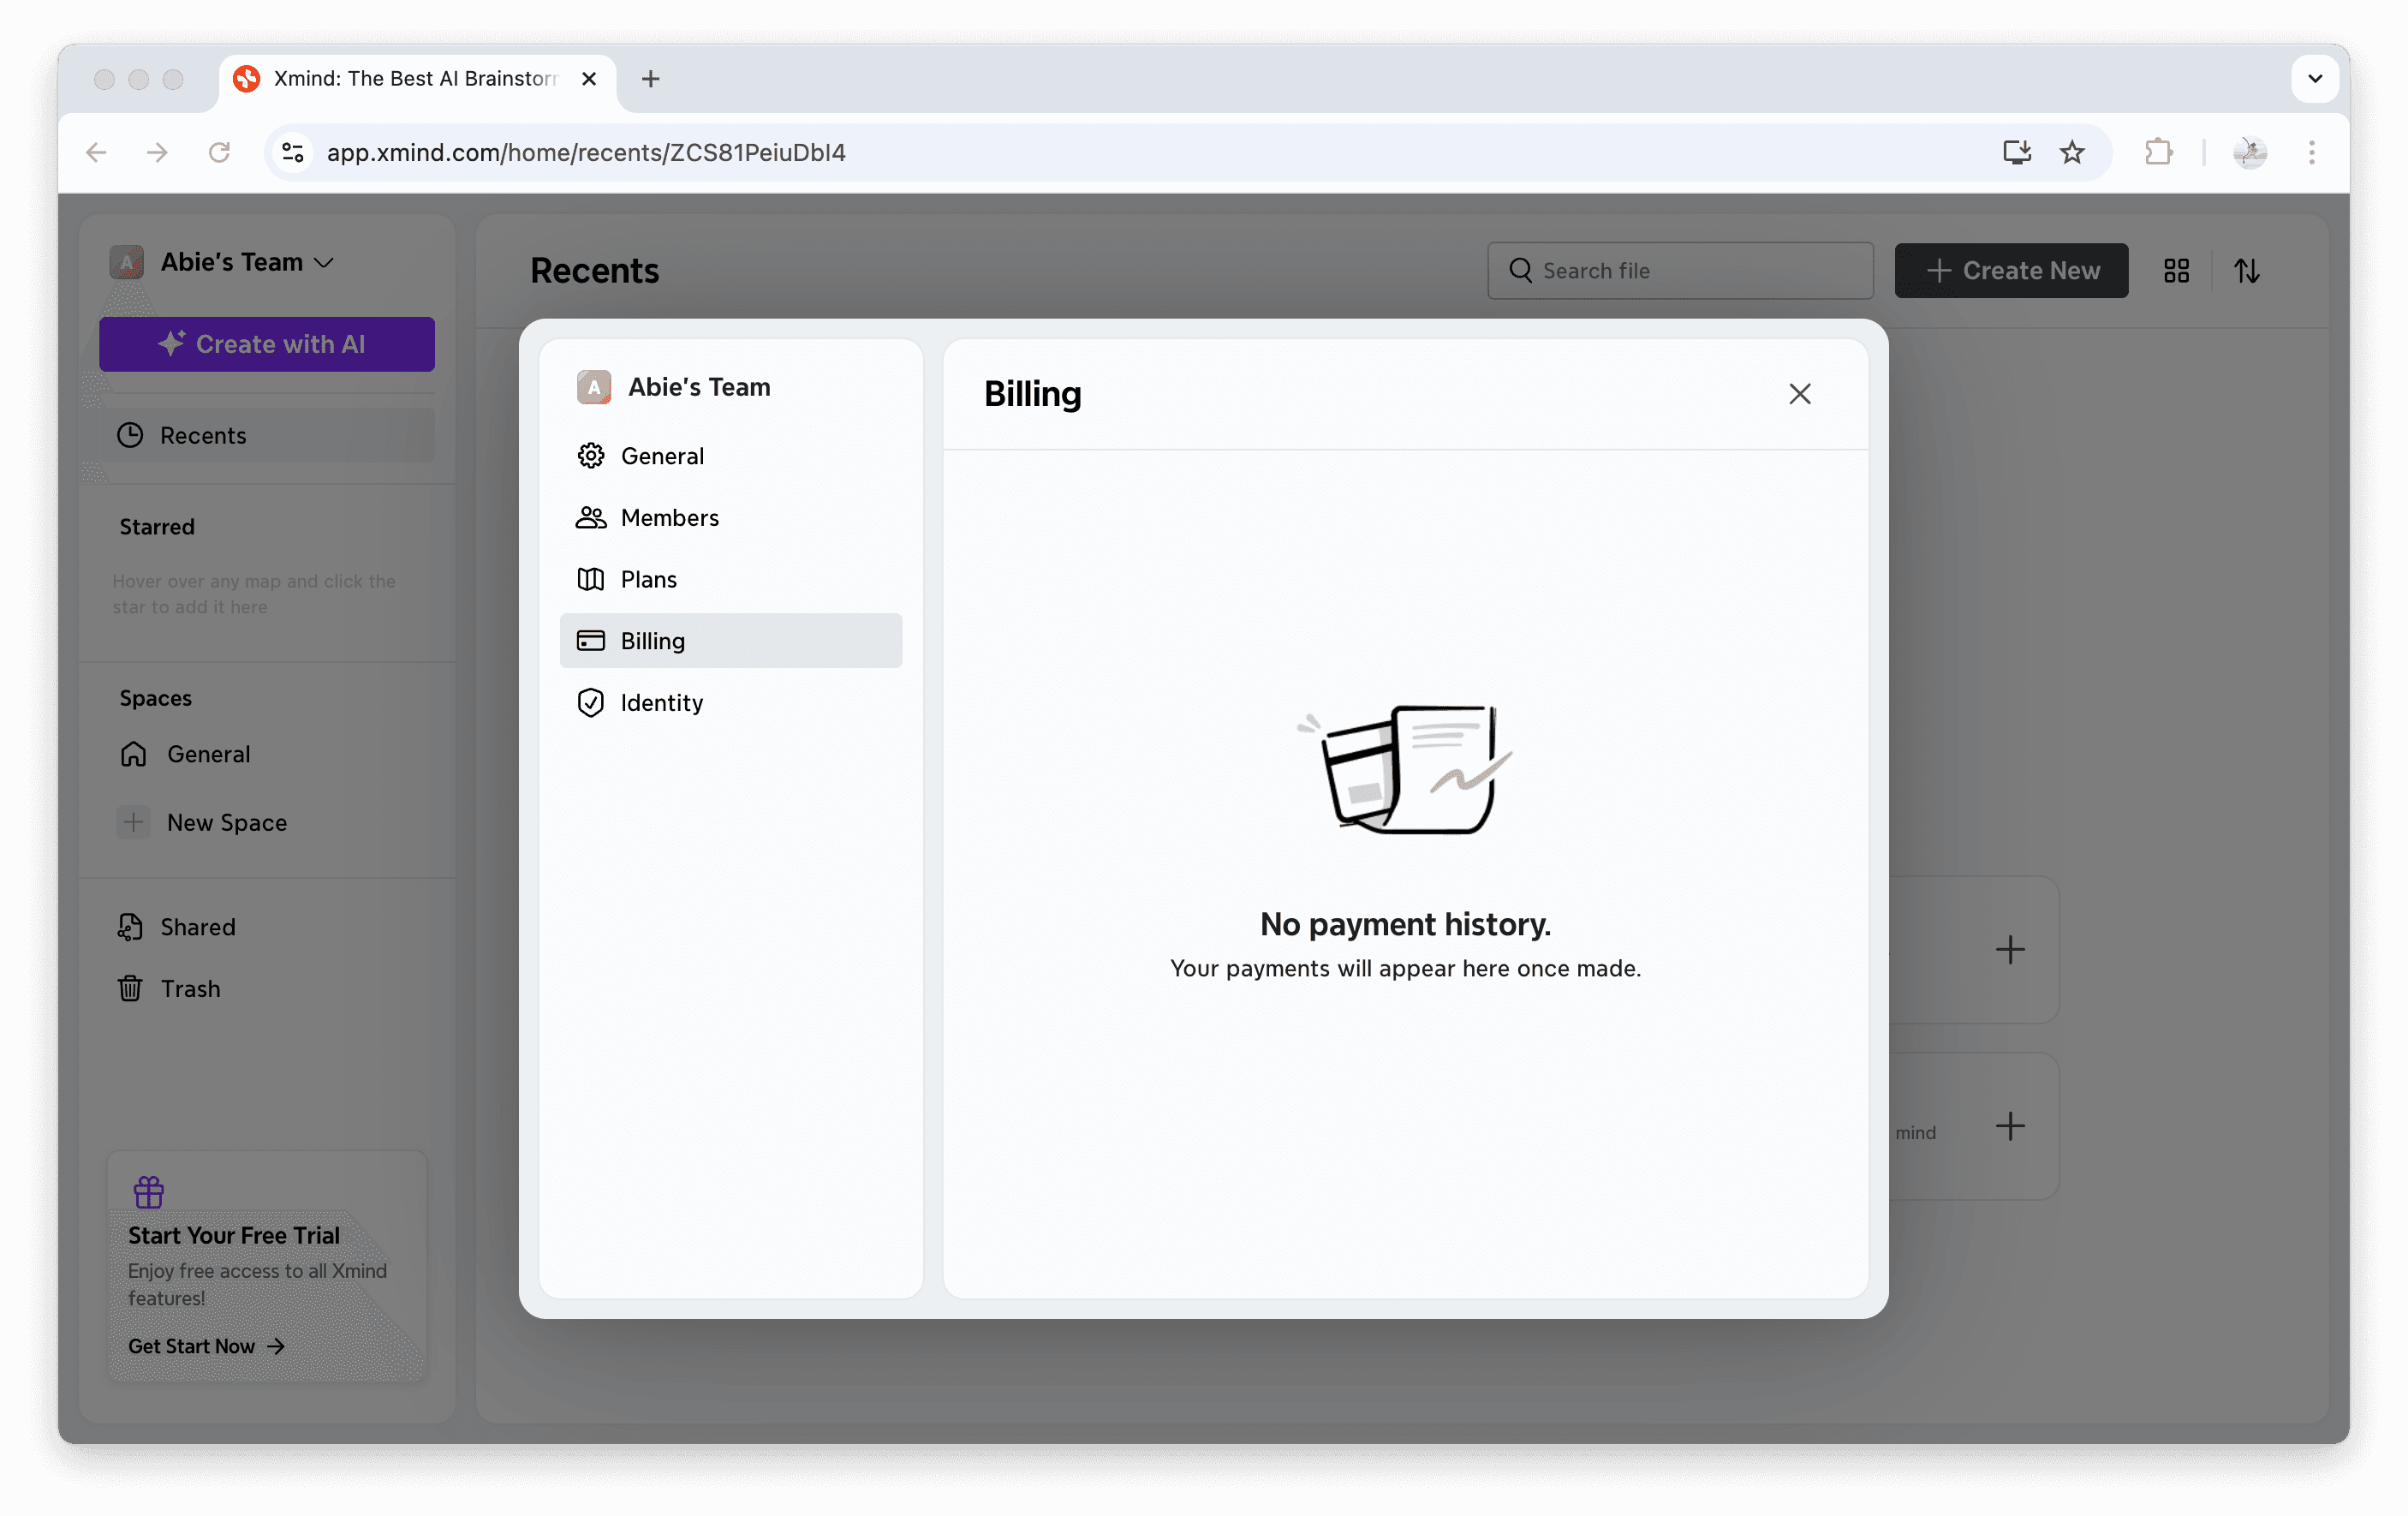
View Billing Details
1️⃣ Select the Settings icon.
2️⃣ Switch to the Billing tab to view payment history.
Update Team Settings
Change Team Name
1️⃣ Right click on your team name and select Rename.
2️⃣ Type in your preferred name and click Rename to update.
Team Roles and Permissions
Below is a quick overview of what Team Owners and Team Admins can do in Xmind.
Action | Team Owner | Team Admin |
|---|---|---|
Invite team members | ✅ | ✅ |
Manage team members | ✅ | ✅ |
Manage team settings | ✅ | ✅ |
Manage seats (billing status) | ✅ | ✅ |
View, manage, and upgrade the team’s subscription | ✅ | ✅ |
Change the team name, icon | ✅ | ✅ |
Transfer ownership of the team | ✅ | ❌ |
Set admin of the team | ✅ | ❌ |
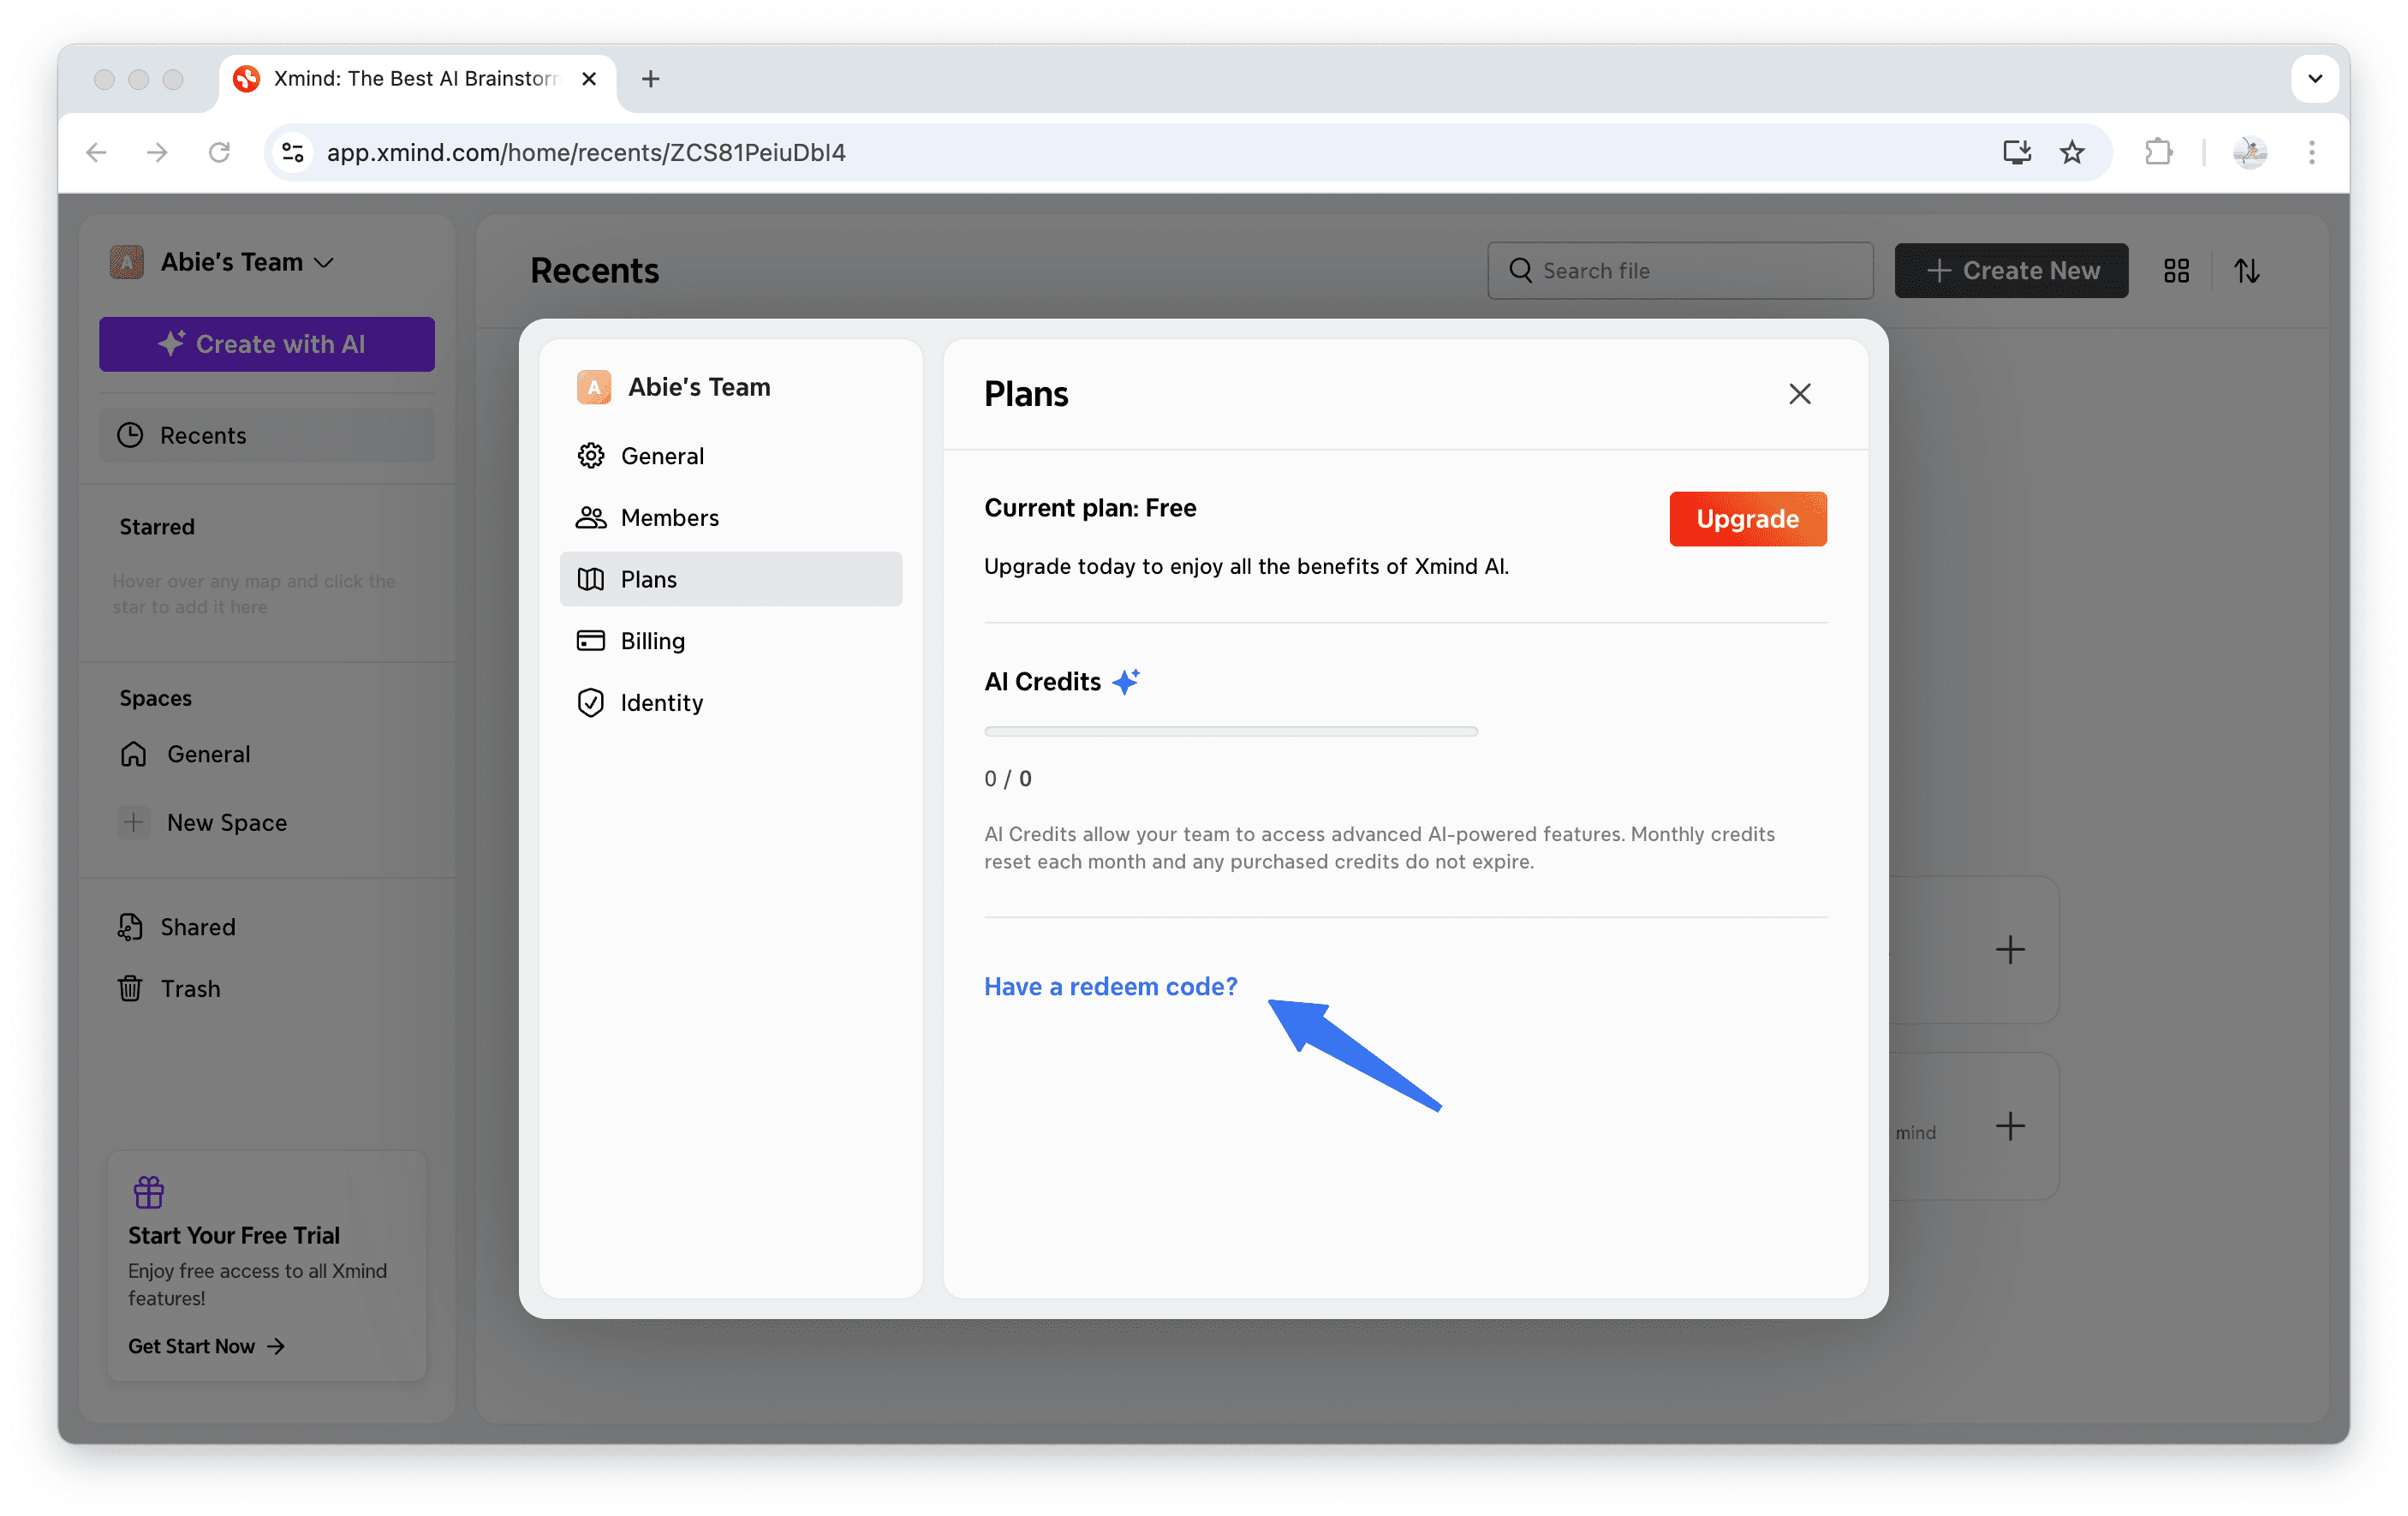
Redeem Code
To use a redeem code, follow the steps below.
Select the Settings icon > Switch to the Plans tab > Click ”Have a redeem code?“ Then enter the code and click Redeem.
Delete or Leave a Team
Delete a Team
1️⃣ Right click on the team name/open the team page > Settings > General.
2️⃣ In the Delete Team section, click Permanently Delete Team.
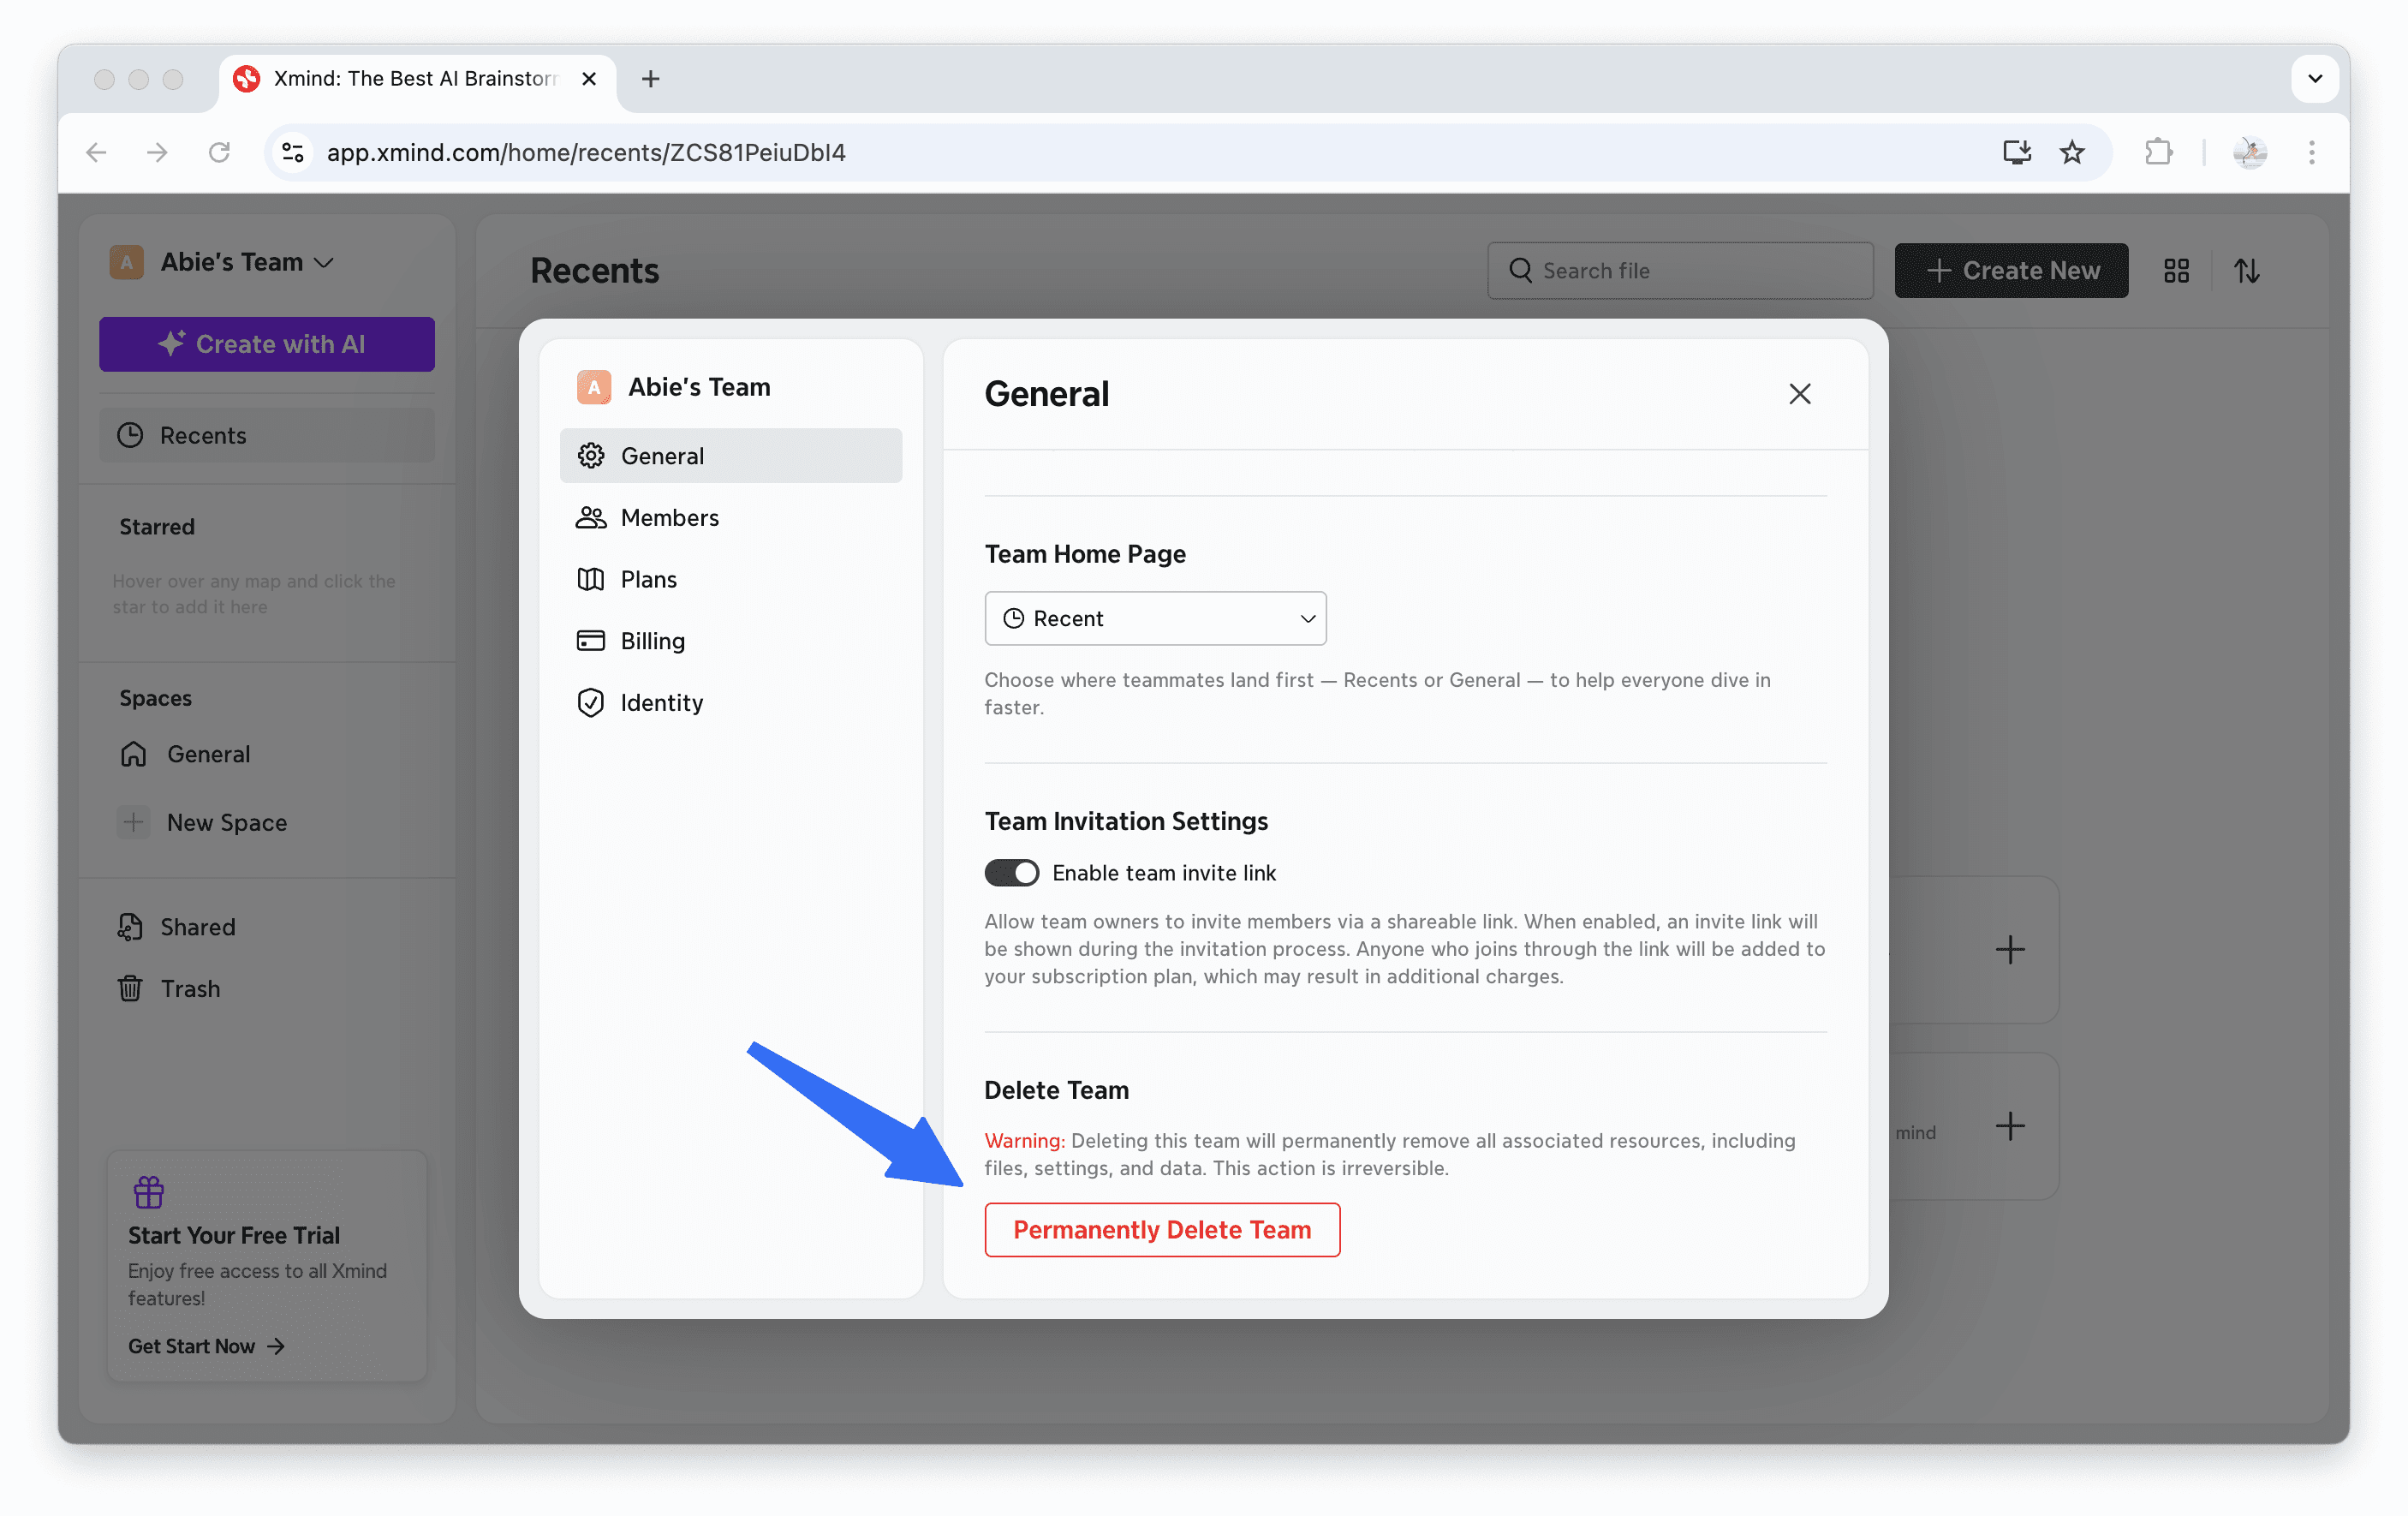
3️⃣ Enter the team name for confirmation and click Permanently Delete Team.
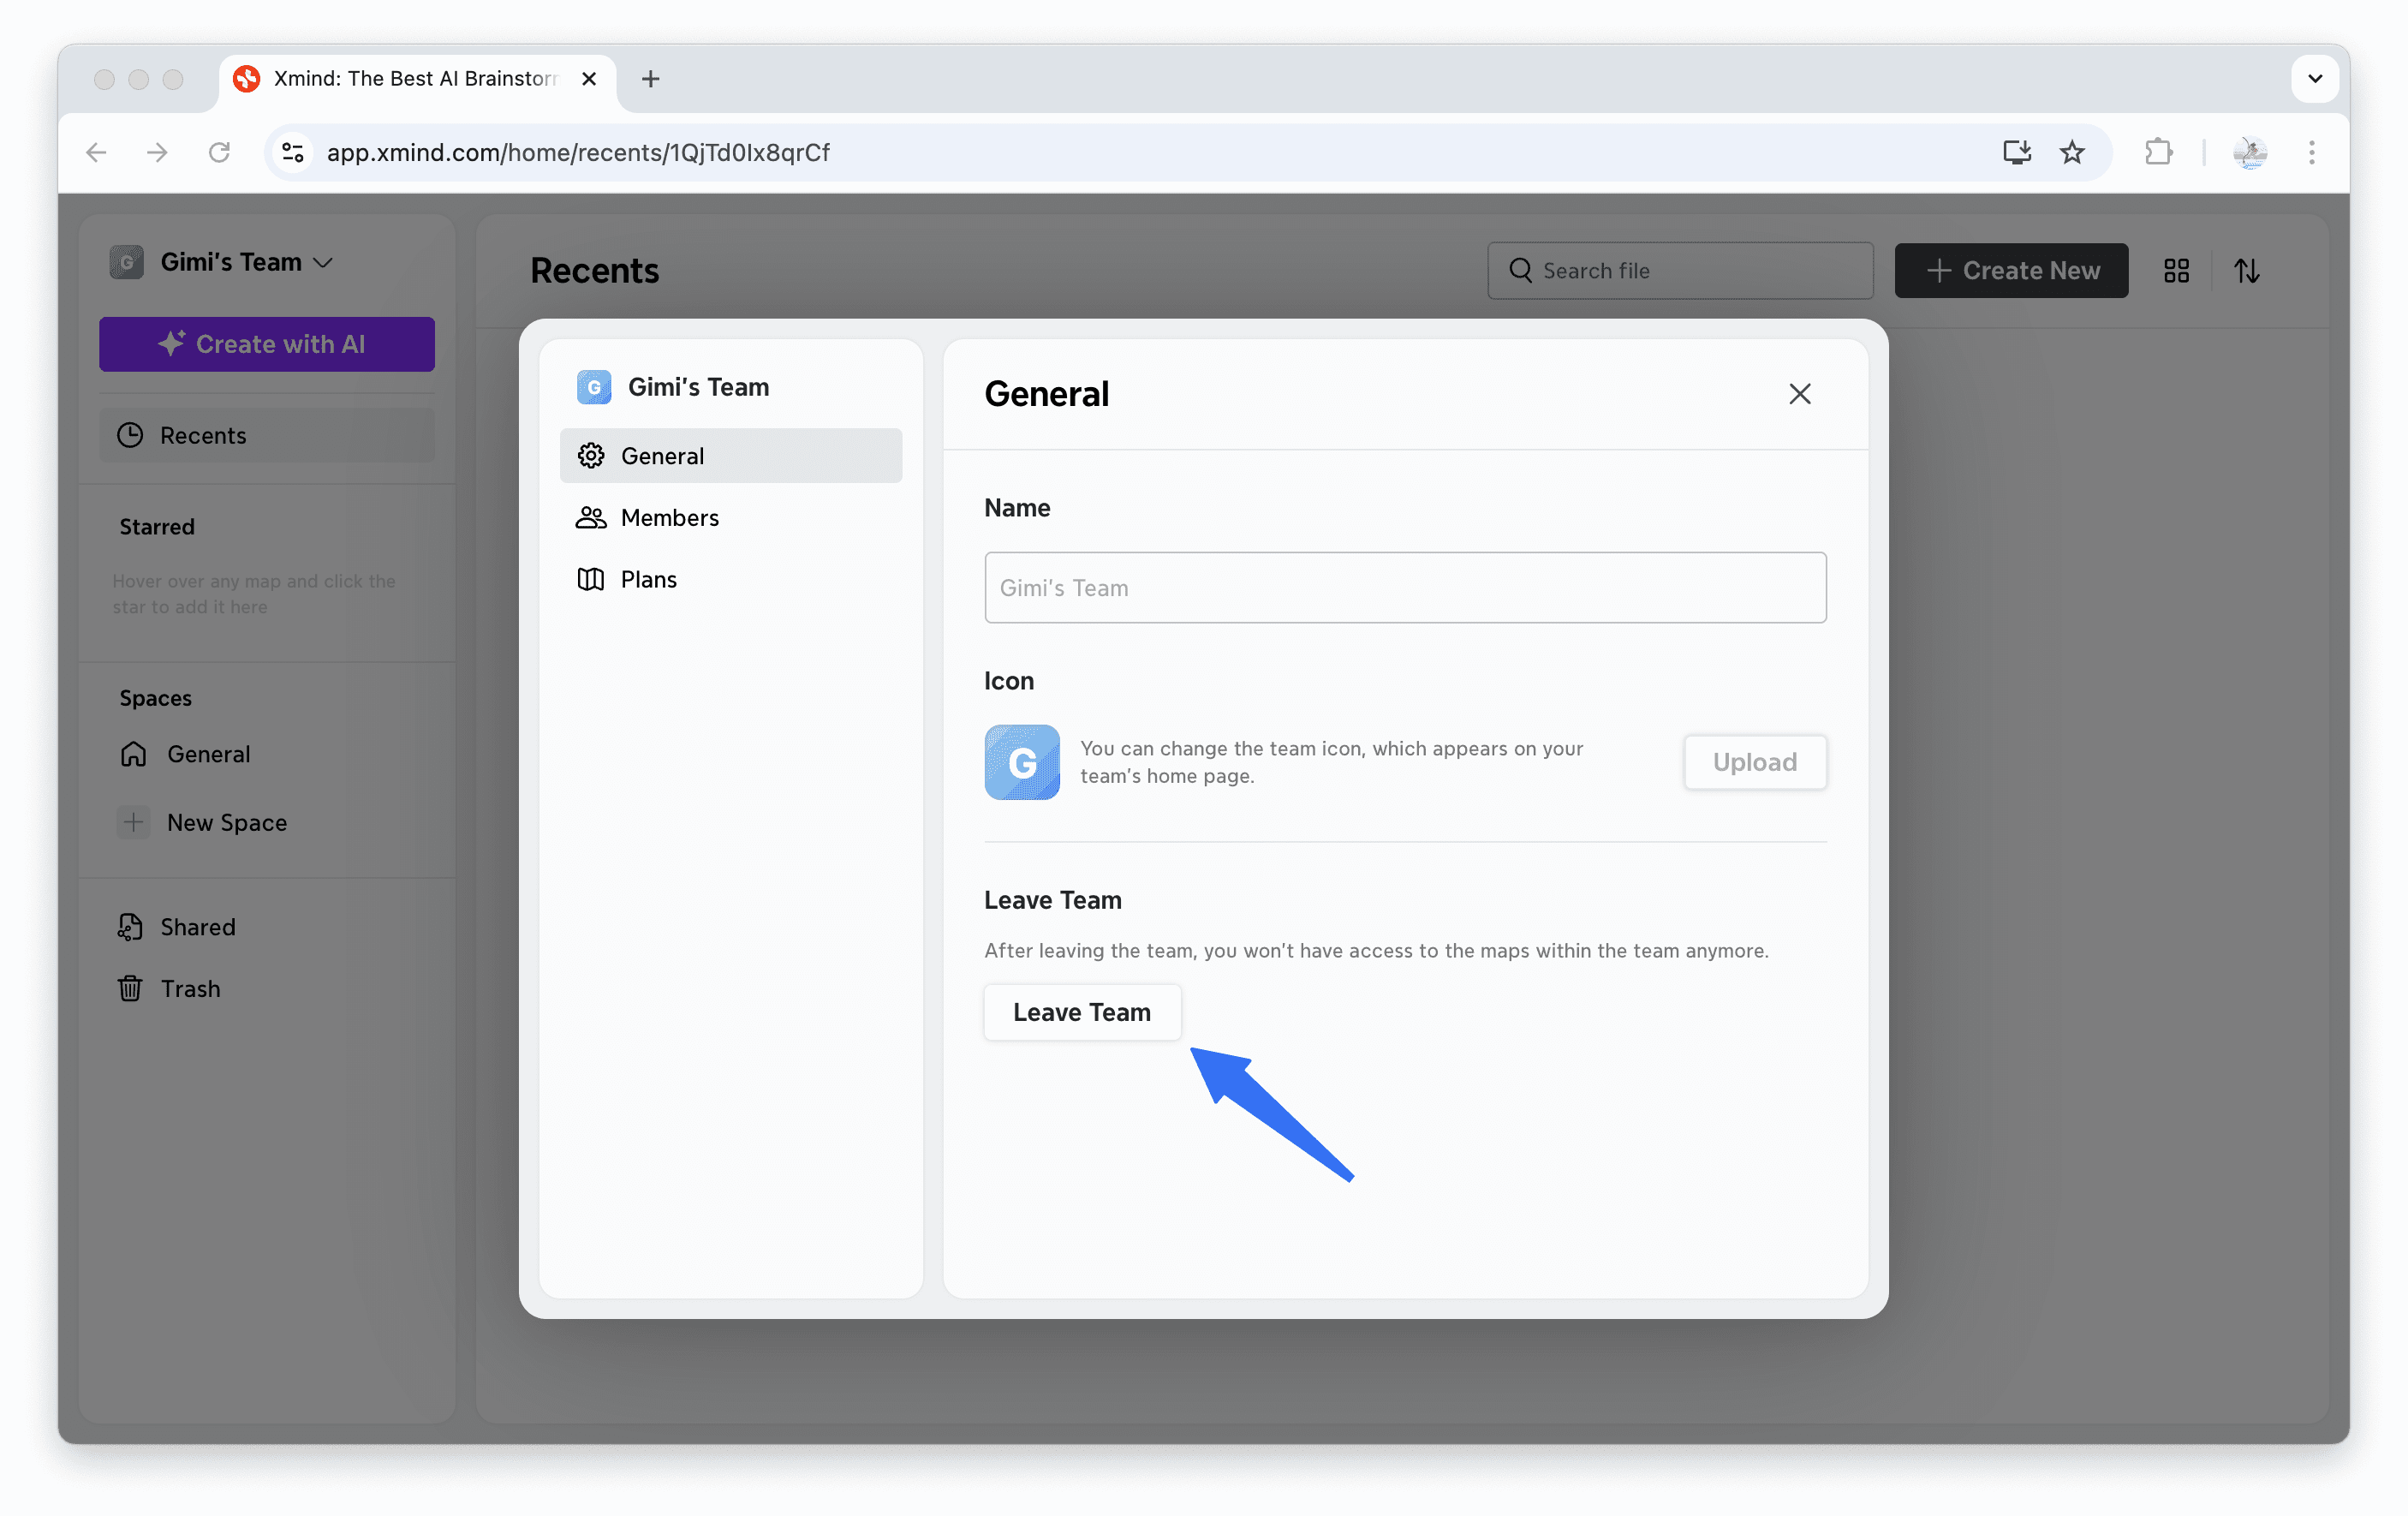
Leave a Team
1️⃣ Go to Settings > General
2️⃣ Click on Leave Team.