SSO (Single Sing-On)
SSO (Single Sign-On) allows team members to log in to Xmind using their company credentials, without needing to create separate Xmind accounts. It is available as part of the Xmind Enterprise Plan, enabling organizations to streamline access and enhance security.

How to set up SSO with Xmind Website
1️⃣ Open team settings
Right-click on the team name and select Settings, then go to the Identity tab. Here, the team owner can configure login authentication, including domain verification and SSO.


2️⃣ Add and verify domain
Click Add Domain and go to the domain settings page.

Enter your domain and click Continue. A DNS verification guide will appear with step-by-step instructions. Follow them to complete the verification process.
Once verified, your domain will be labeled as Verified in both the guiding page and the Identity panel.


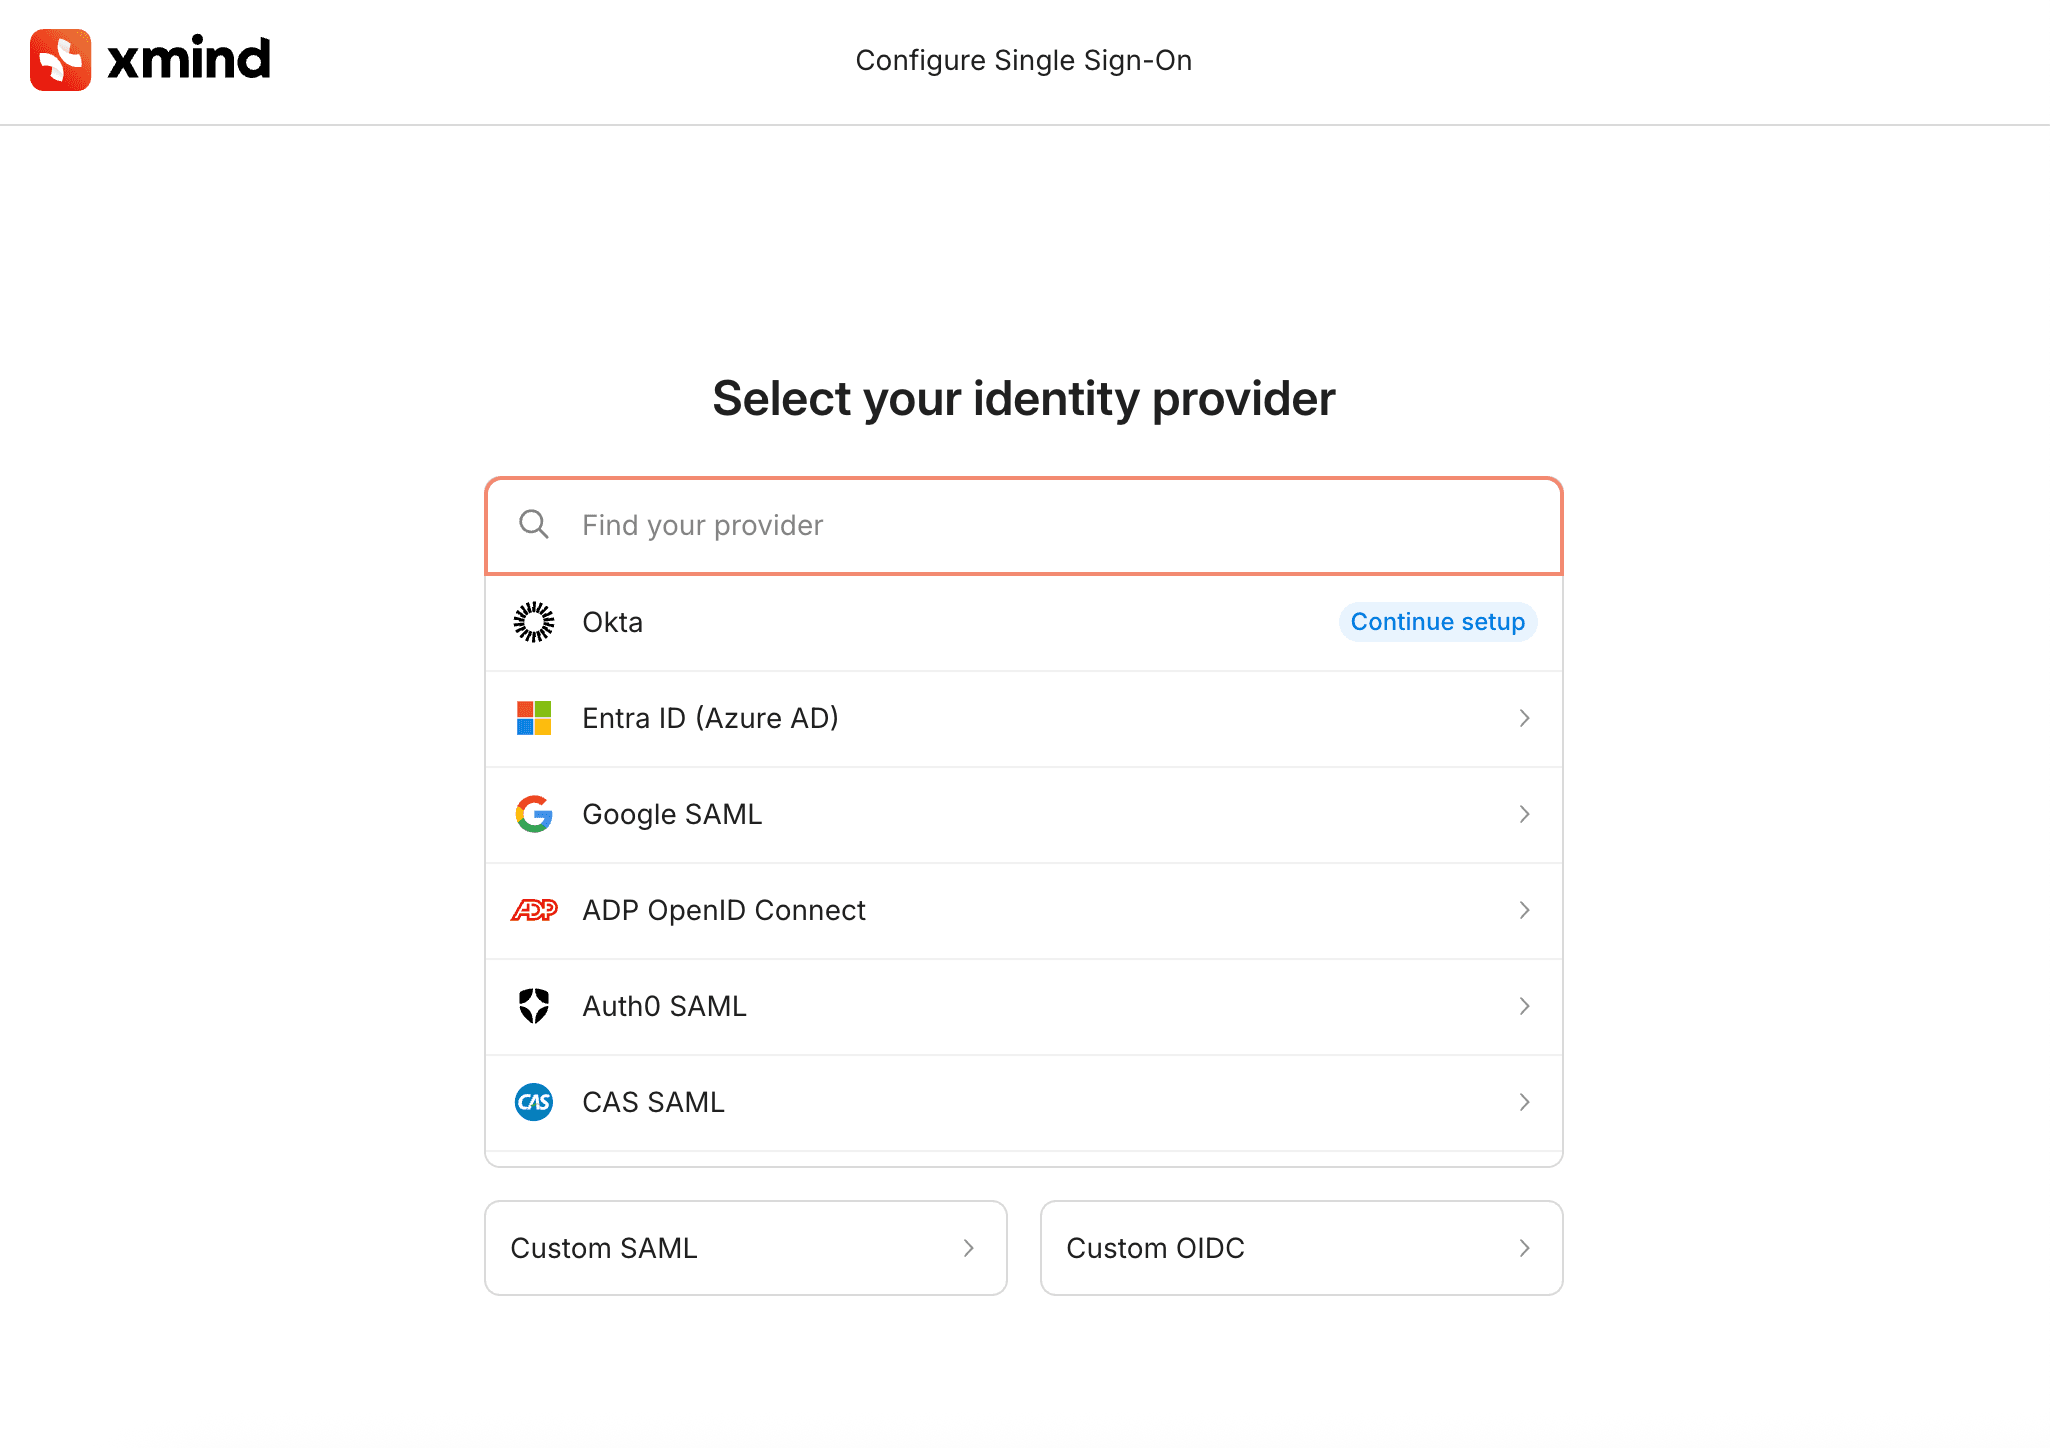
3️⃣ Configure the SSO provider
Click Go to Configuration to start setting up your SSO provider.

Select your identity provider (e.g., Okta, Azure AD) and follow the on-screen instructions to complete configuration.
4️⃣ Team member login
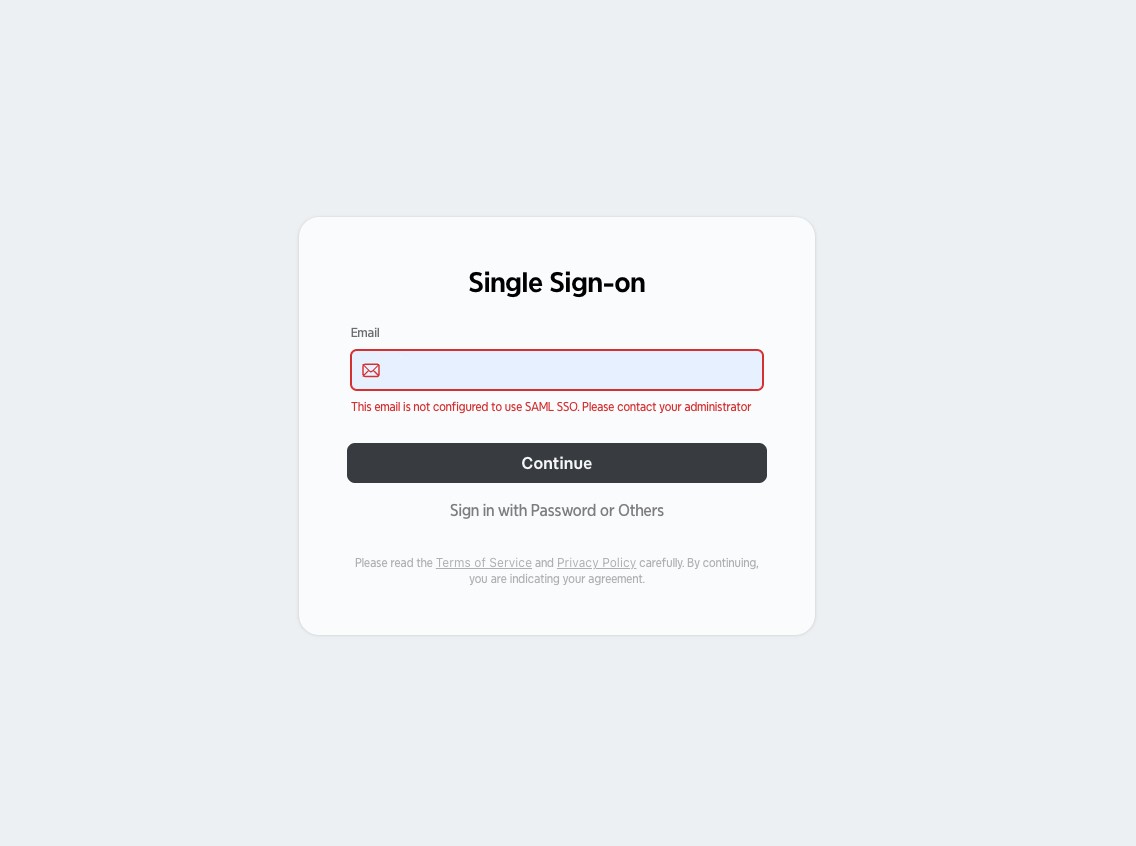
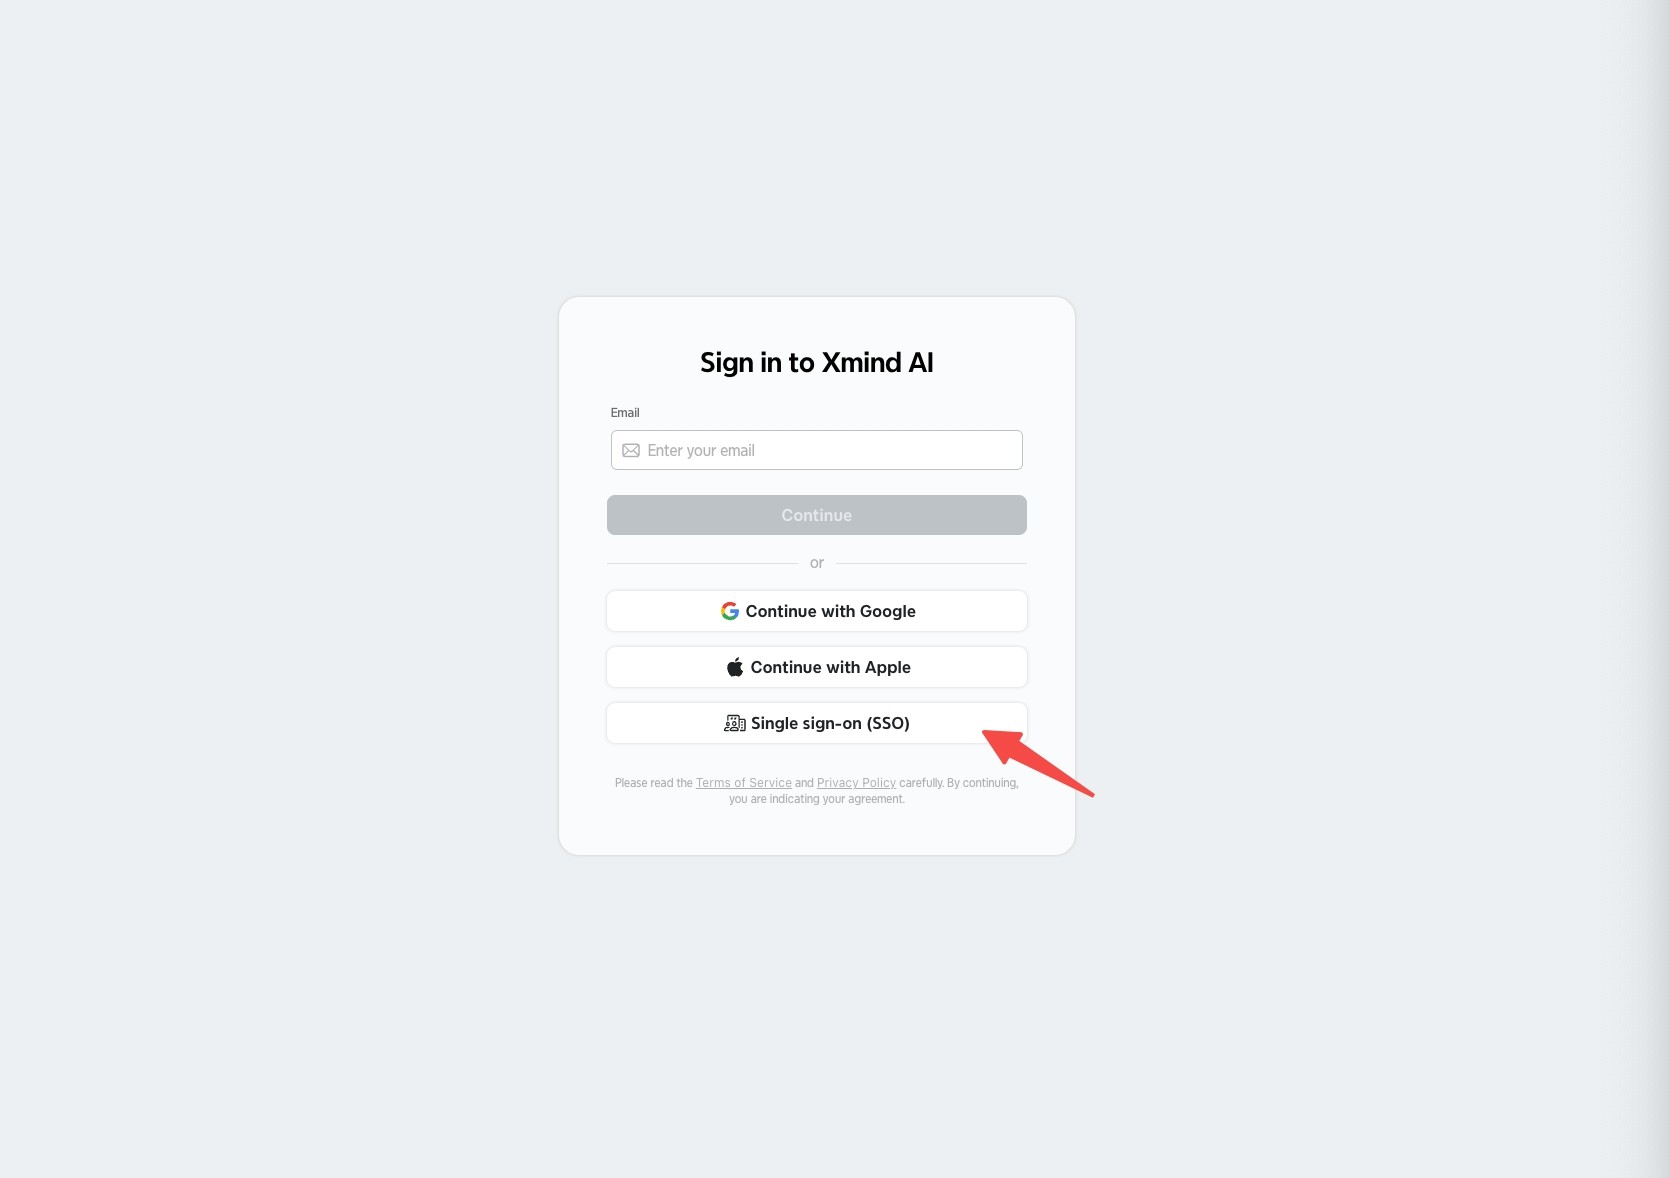
Once the team owner completes setup, team members can sign in using SSO.
If SSO is not configured, members will see an error message when trying to log in.