


Map Shot
Map Shot is a feature in Xmind designed to help users easily capture and enhance the appearance of their mind maps. With options to add colorful frames and shadows, Map Shot allows for the creation of more visually appealing and three-dimensional screenshots.

Starting Map Shot
Using Shortcuts
Go to Tools > Map Shot in the menu bar:
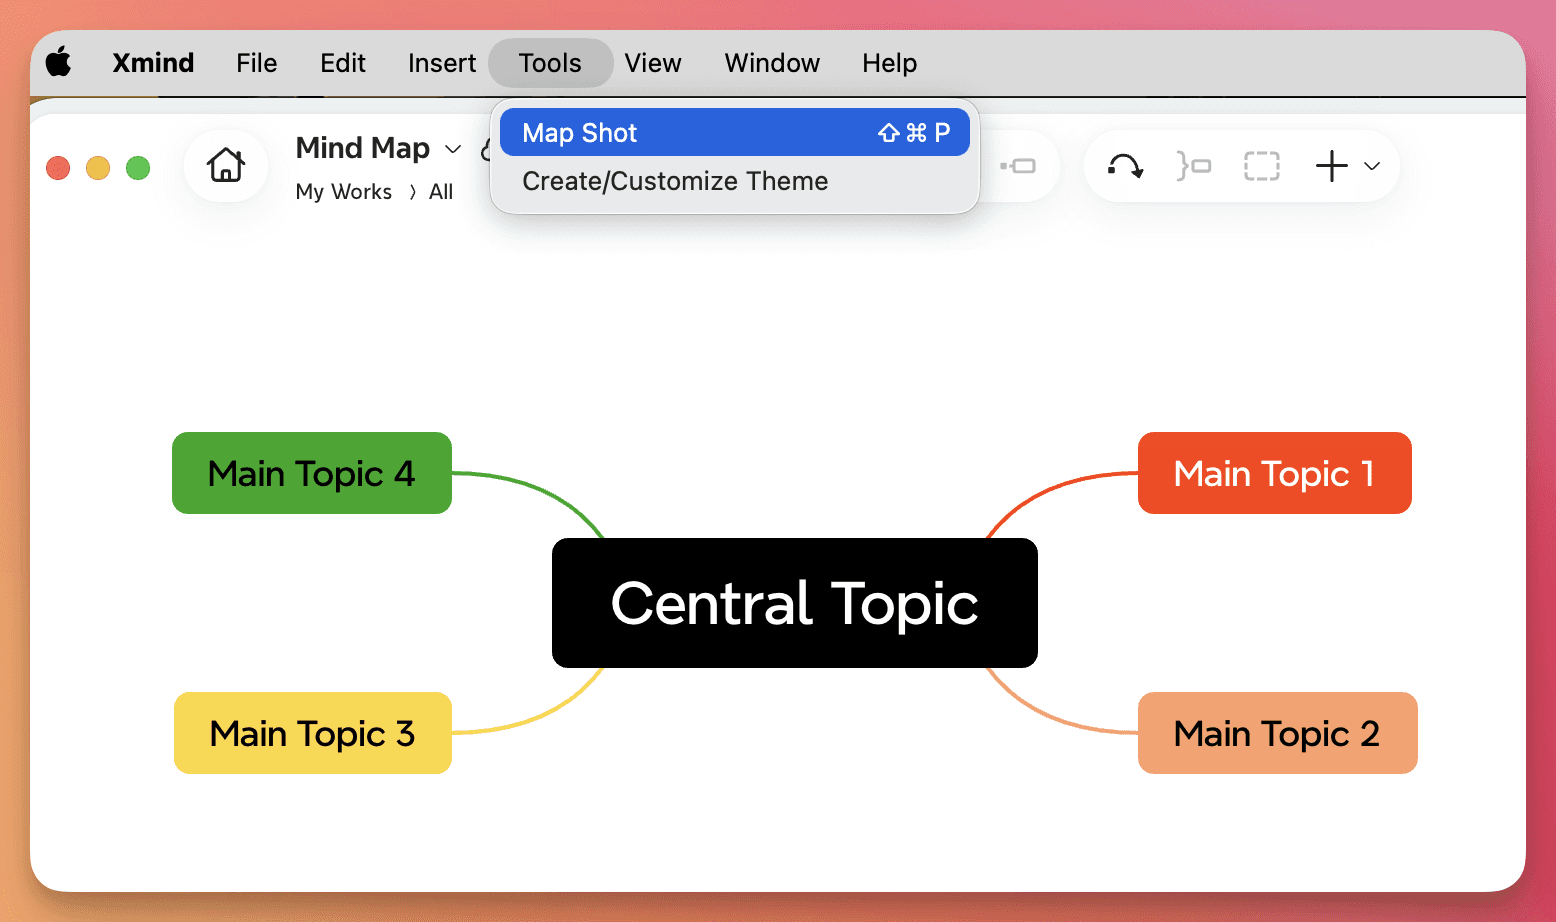
Or use shortcut:
Mac:
Command + Shift + PWindows:
F7
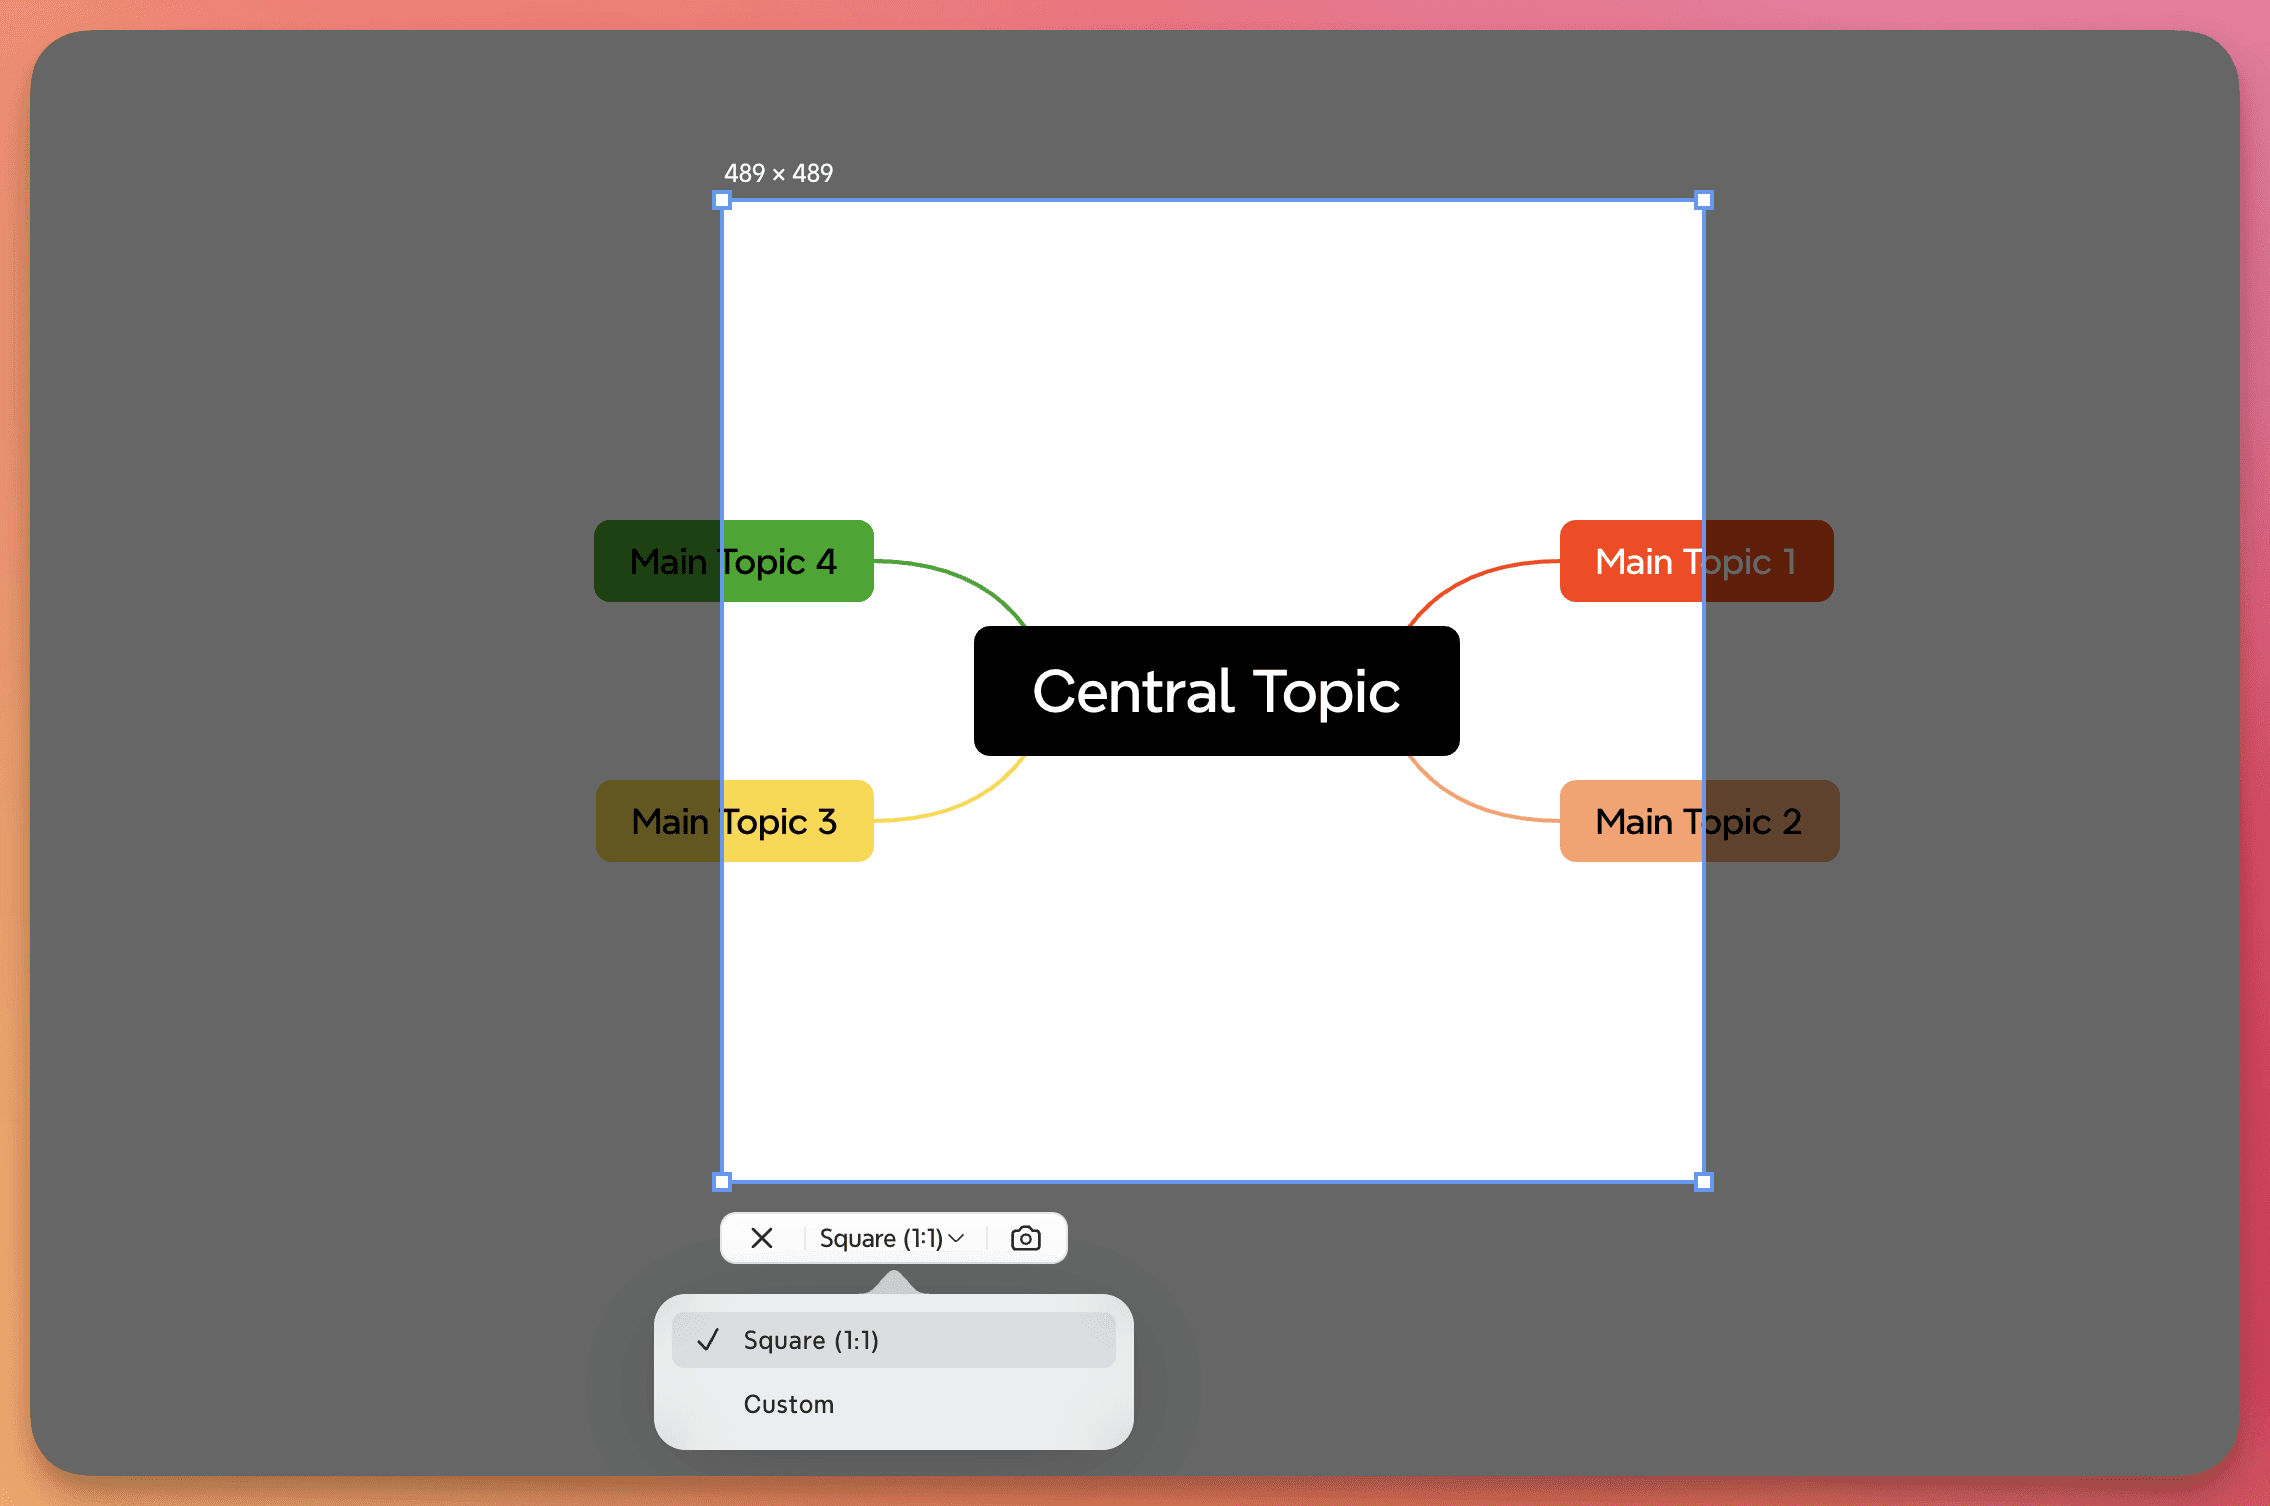
Setting the Ratio
Map Shot offers flexibility in capturing your mind maps:
1️⃣ Square (1:1): Drag to resize the capture area
2️⃣ Custom: Customize the aspect ratio to fit your needs.
After finishing the settings, click the camera button to capture the screenshot
Customizing Your Screenshot
Adjust Screenshot Options:
Frame: Adjust the thickness and color
Shadow: Add a shadow for depth
Presented with Xmind: Add a “Presented with Xmind” label
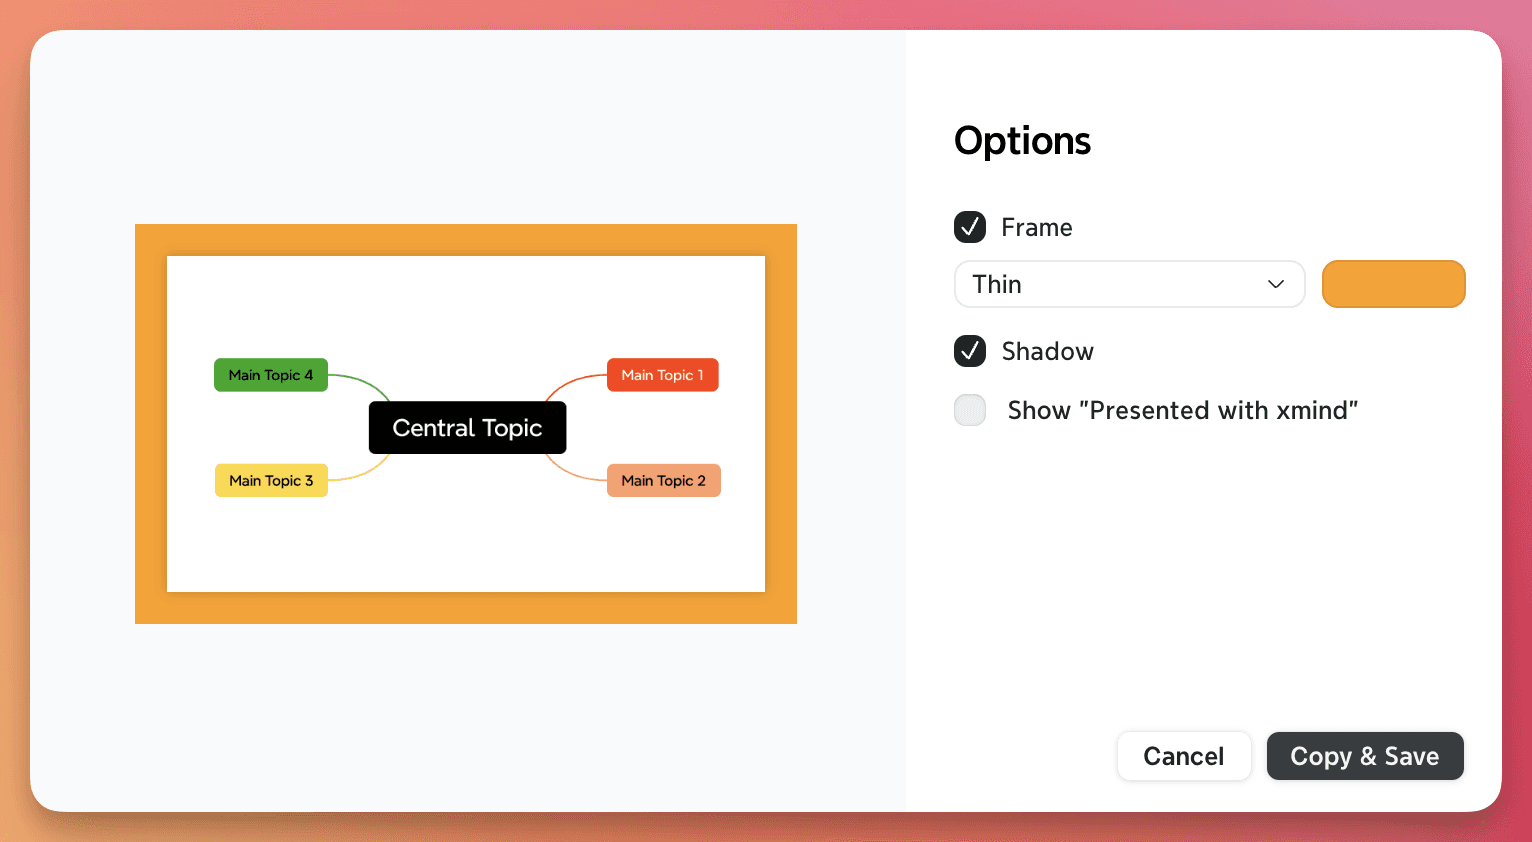
Click Copy & Save
After customization, click Copy & Save to save the screenshot to desktop.

