Skip Non-Working Days
Skipping non-working days helps ensure task schedules reflect actual working time by automatically excluding weekends, holidays, or days off.
How to Skip Non-Working Days in Xmind
1️⃣ Open the Task Panel.
2️⃣ Enable Skip Non-Working Days.
The first time you turn Skip Non-Working Days on in a mind map, Xmind will prompt you to create a Project Working Days calendar.
Customize Project Working Days
Step 1: Modify working days
Click to define which days of the week are working days.
The calendar preview updates automatically as you make changes.
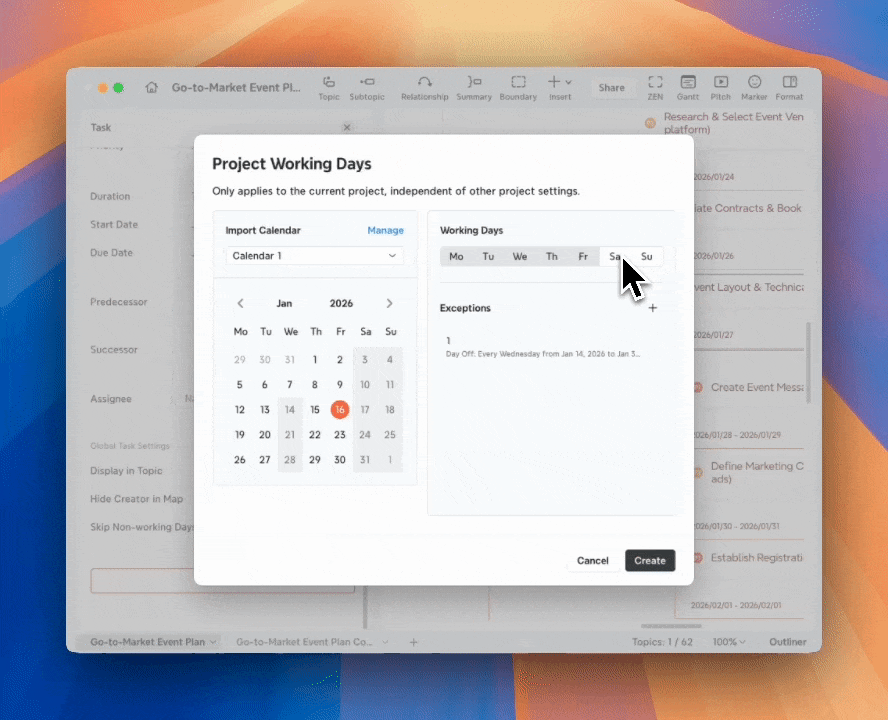
💡Attention: Changes made here apply only to this project and will not affect the original calendar template.
Step 2: Add and edit exceptions
Exceptions are used to override regular working day rules, such as holidays or make-up workdays.
1️⃣ In the Exceptions section, click “+” to add an exception.
2️⃣ Configure the exception details:
Title (optional)
Date Range – the period this rule applies to
Date – the specific date used by the rule
Type – Working Day or Day Off
Repeat – None, Daily, Weekly, Monthly, or Yearly
You can double-click an existing exception in the list to edit it.
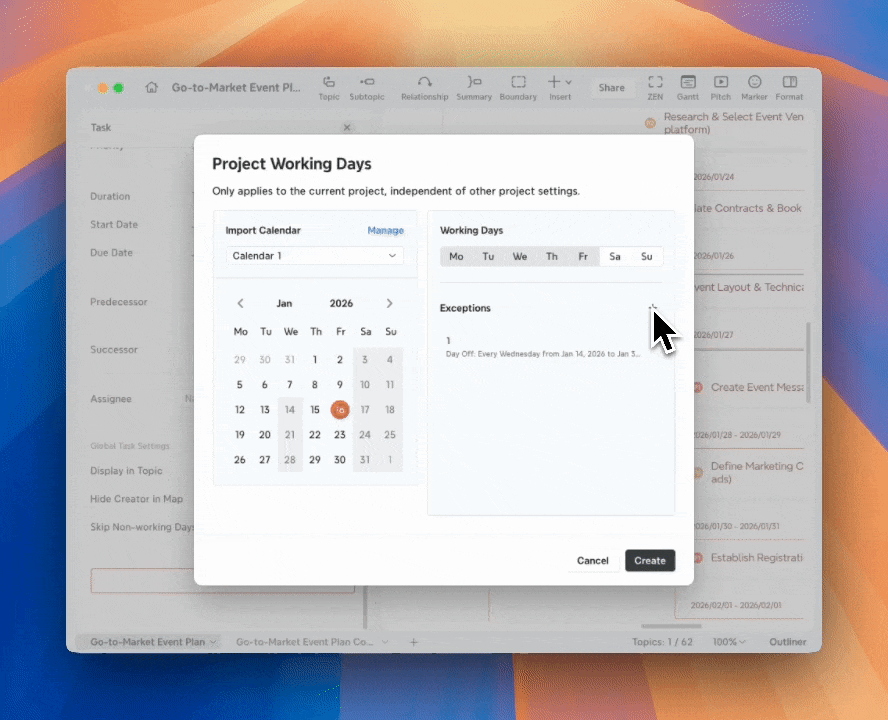
Step 3: Confirm project working days
Click Create to confirm your settings.
After confirmation, a Project Working Days button will appear at the bottom of the Task Panel.
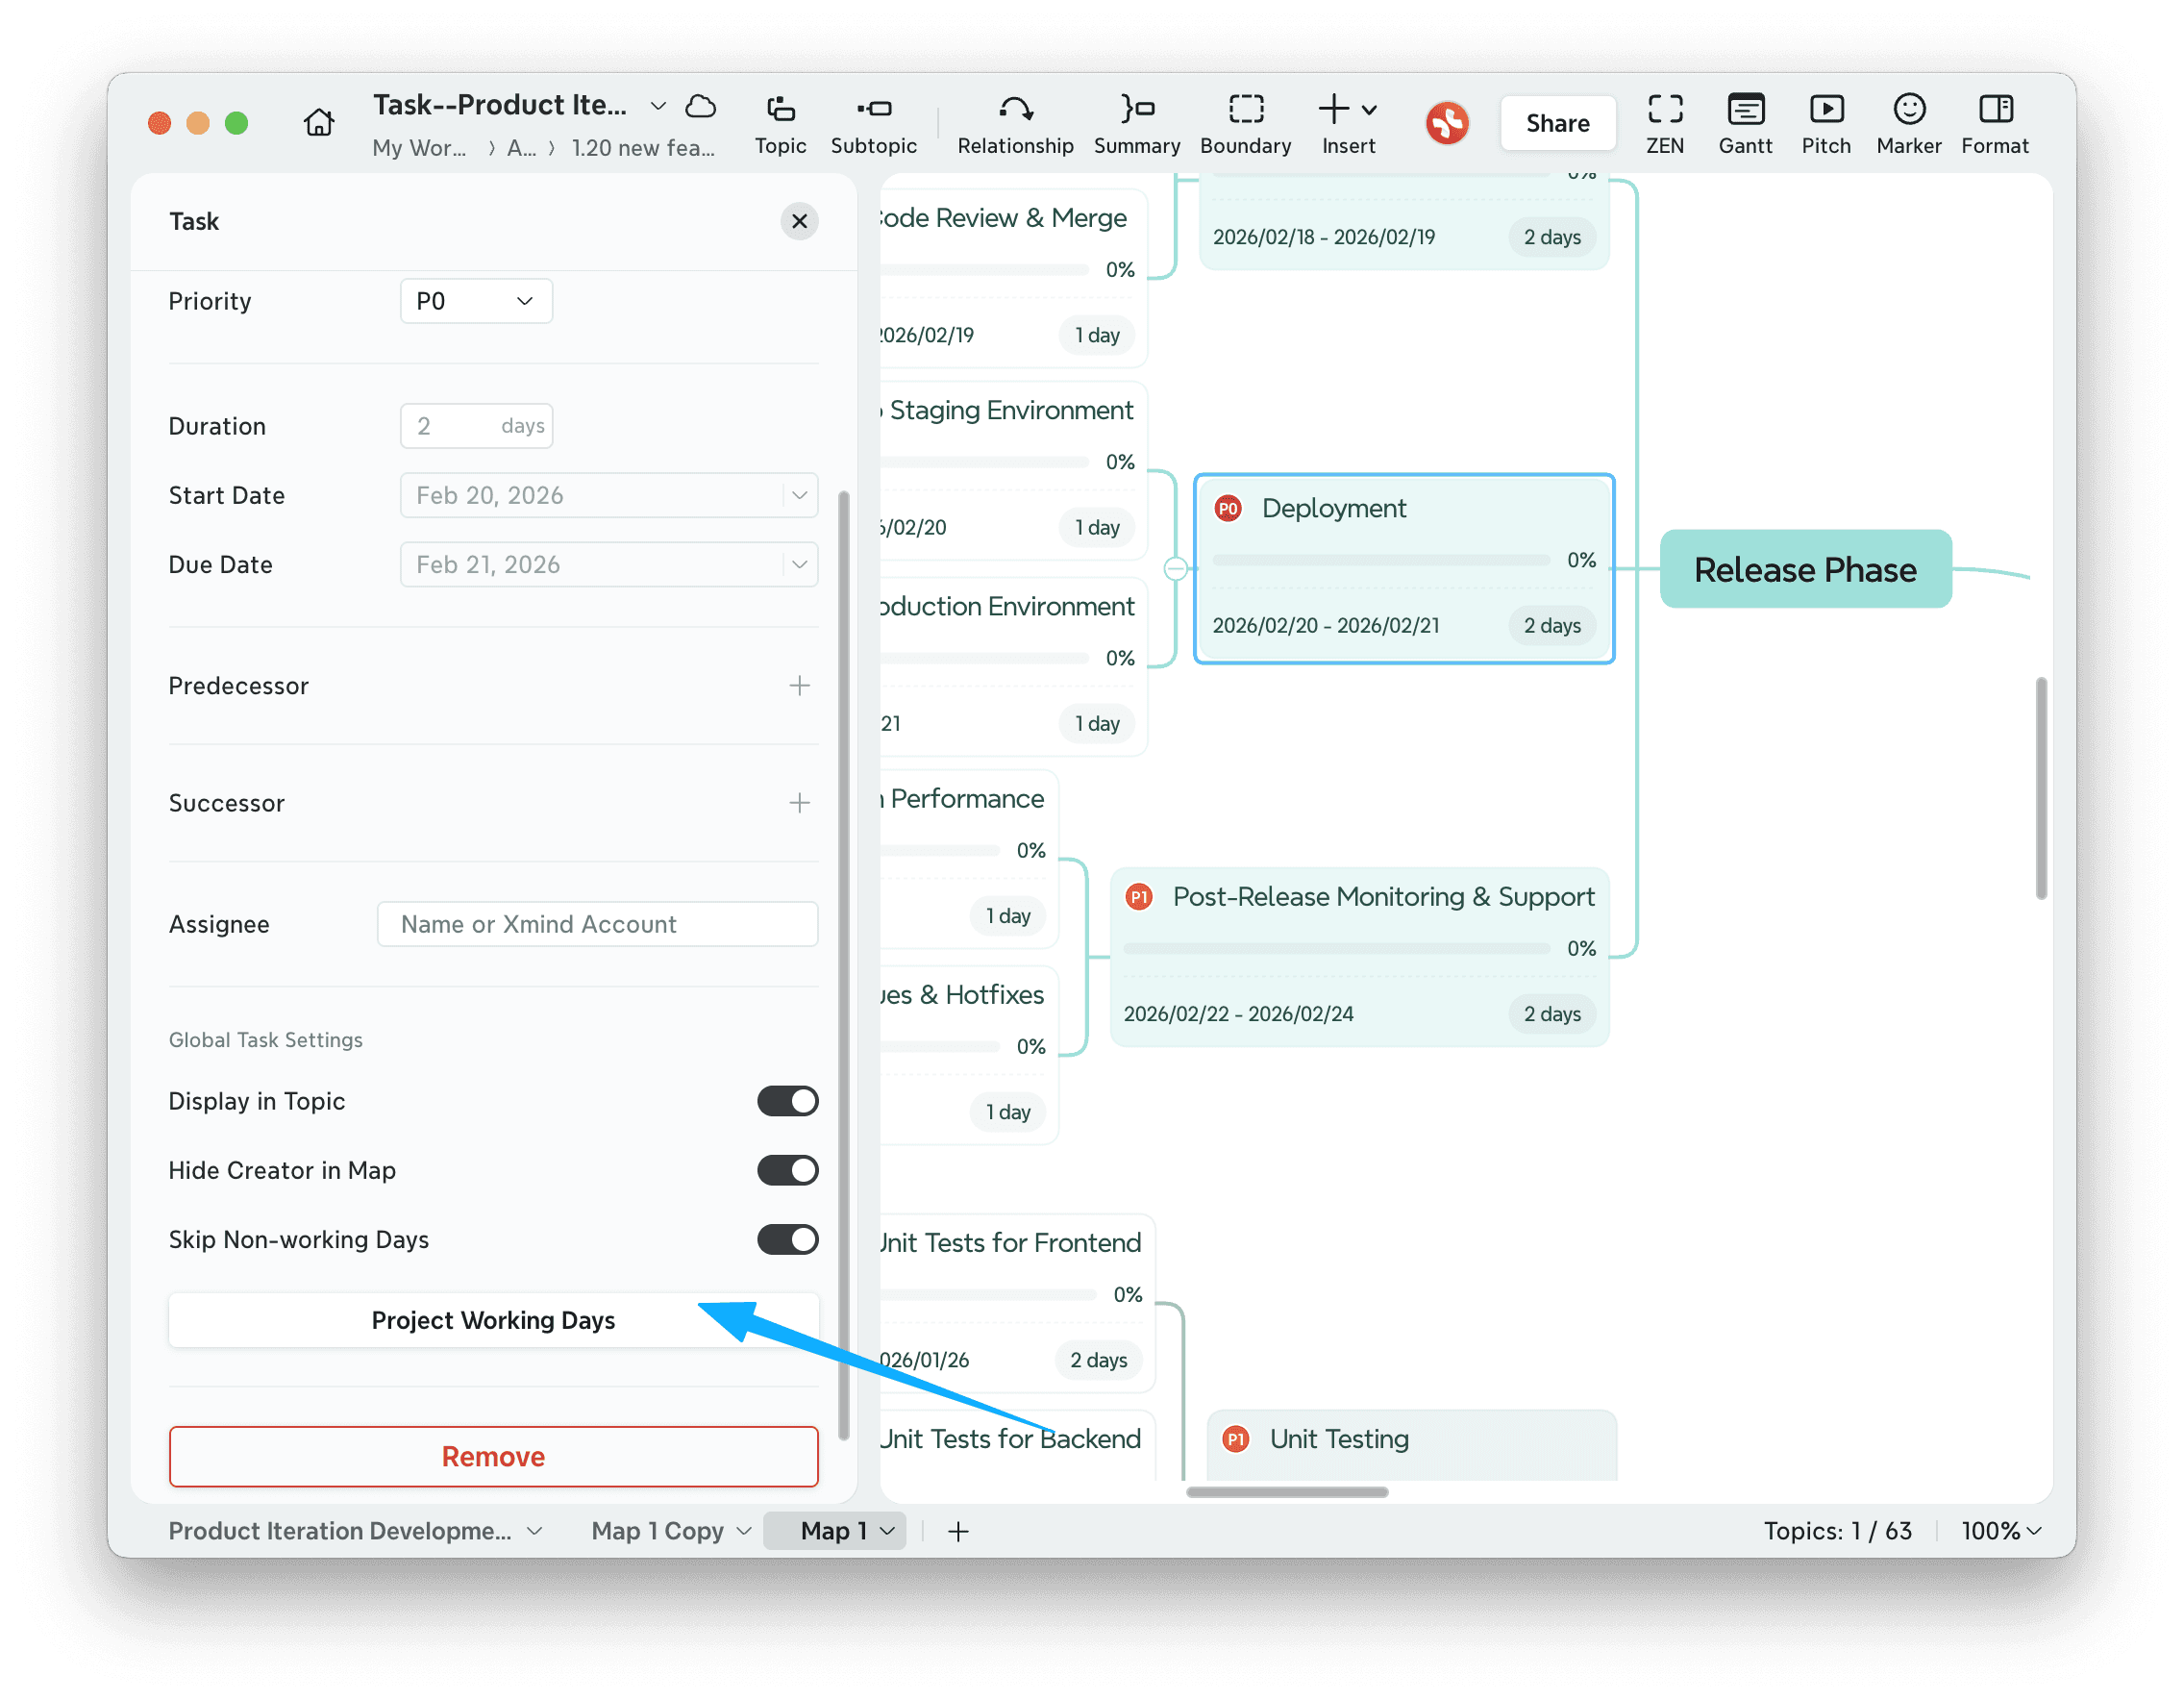
Click Project Working Days to:
View current settings
Import another calendar
Edit working days or exceptions
Delete the project working days
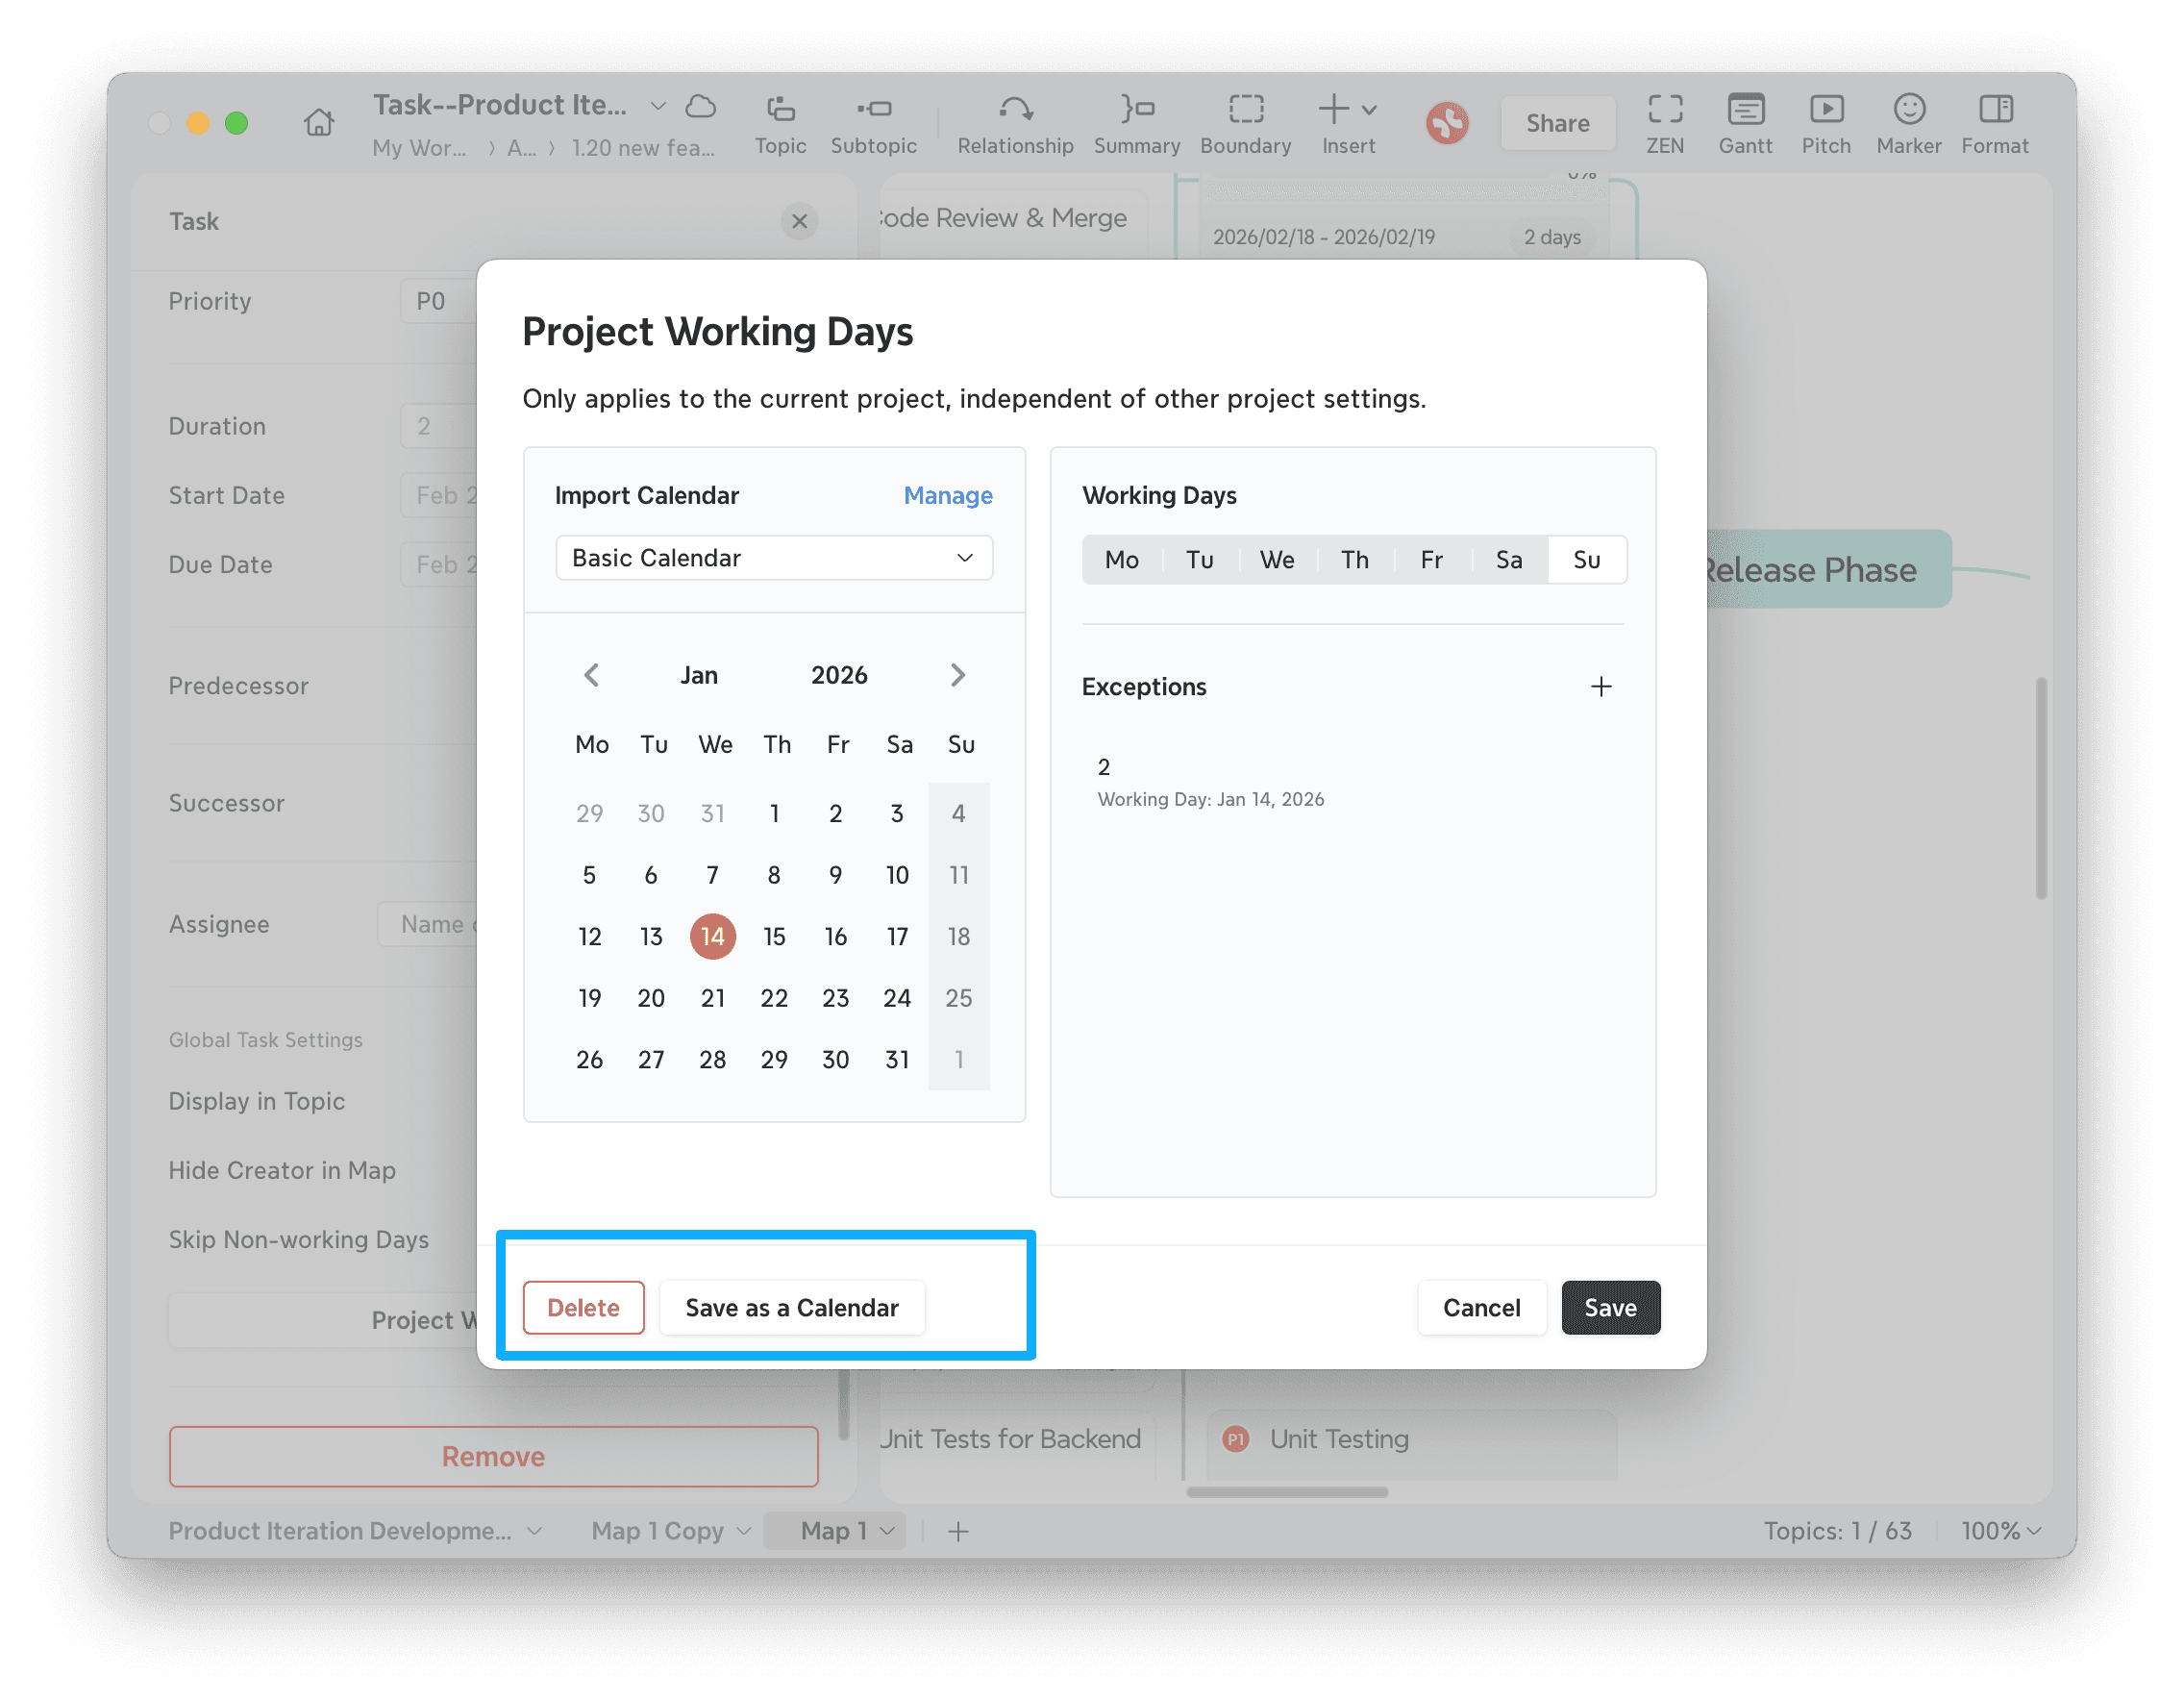
Import a Project Calendar
If you already have a calendar template, you can import it as the base for this project.

💡Attention: Switching to a different calendar will replace the current project settings, including exceptions.
Save Current Rules as a Template
To reuse your project settings in other maps:
1️⃣ Click Save as a Calendar.
2️⃣ The current project working days will be saved as a new calendar template.
You can apply this template to other projects later.
Manage Calendars
On Desktop App
1️⃣ Go to Preferences > Calendar to open Calendar Settings.
2️⃣ Click the calendar name to open the calendar list and switch between calendars.
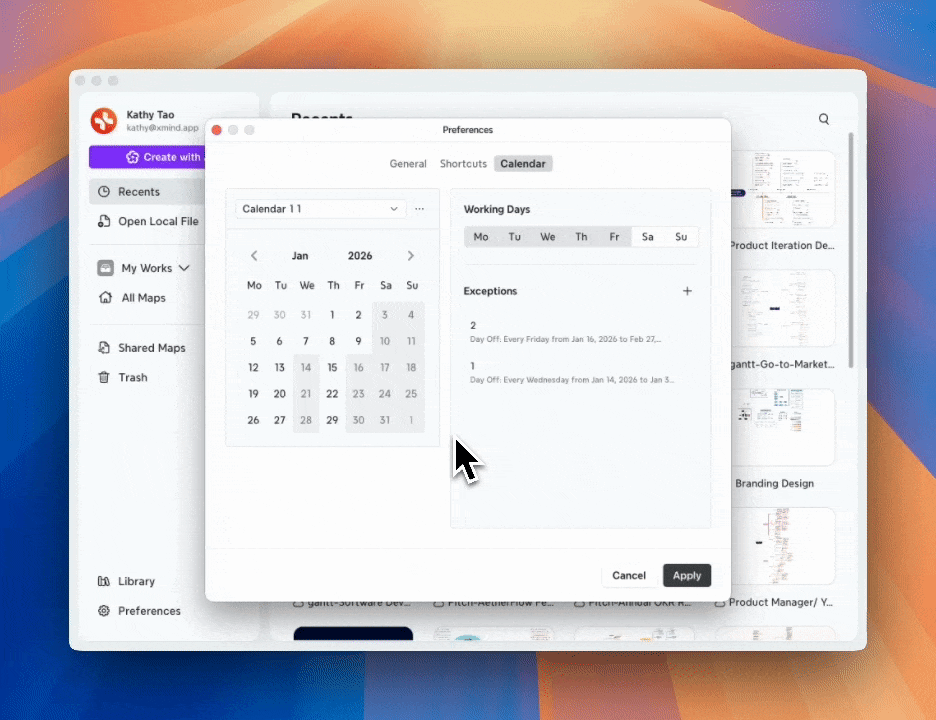
3️⃣ Click More next to a calendar to:
Rename the calendar
Copy Current Calendar
Create a New Calendar
Delete the calendar
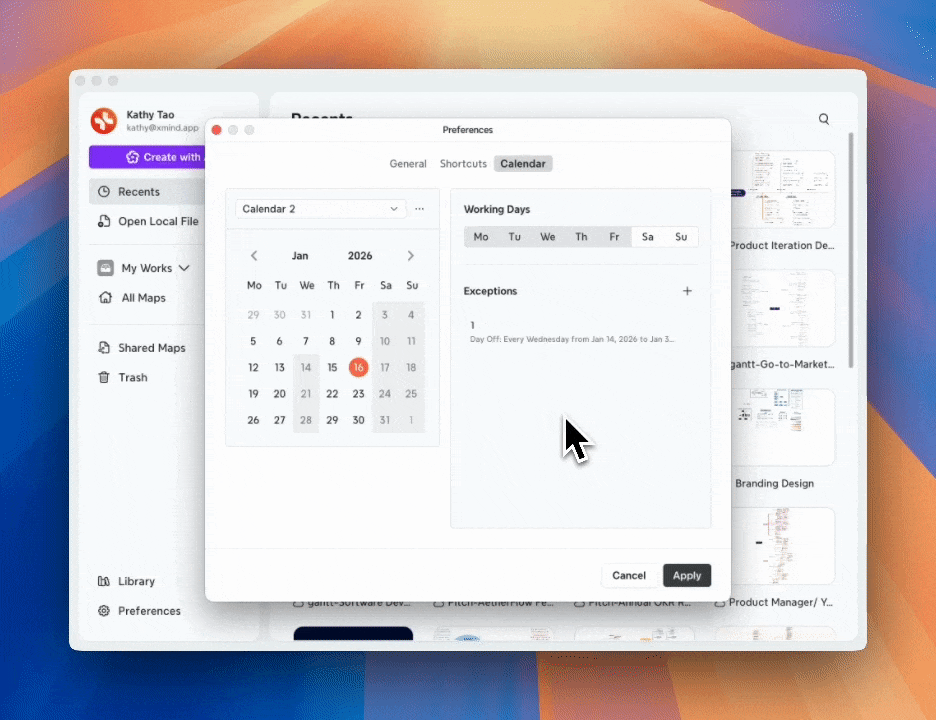
💡Attention: The default calendar cannot be renamed or deleted.
4️⃣ Managing working days and exceptions works the same as Project Working Days.
On Web
1️⃣ Open Calendar Settings:
For files in My Works: go to My Works > Settings > Calendar
For files in a Team Space: go to Team Space > Settings > Calendar (admin permission required)
2️⃣ All calendar-related actions work the same as on the desktop app.