Xmind MCP Server
Xmind MCP Server lets you connect your AI apps to Xmind, so you can create Xmind mind maps with simple words with your AI agents.

What is Xmind MCP?
Xmind MCP Server lets AI apps connect to Xmind, so your AI assistant can create, read, and edit Xmind mind maps for you.
After connecting Xmind MCP Server to an MCP-compatible client such as Claude, Claude Code, Codex, or ChatGPT, you can use natural language to turn conversations, notes, research, and project ideas into structured, editable Xmind mind maps. You can also ask your assistant to read existing maps, summarize their structure, or help refine them through chat.
Use Xmind MCP when you want to bring visual thinking into the AI apps where your ideas, discussions, and planning already happen.
Why connect Xmind to your AI apps?
Work where the conversation happens — Use Xmind from Claude, ChatGPT, Codex, and other AI apps without switching tools or copying content back and forth.
Turn ideas into visual structure — Transform scattered notes, prompts, meeting discussions, and research into clear, editable mind maps that make complex information easier to understand.
Use existing mind maps as context — Let your assistant read existing Xmind mind maps and use them for summaries, planning, writing, research, or follow-up work.
Refine maps through conversation — Add topics, revise wording, expand branches, or reorganize ideas by simply describing what you want to change.
Preserve ideas as editable assets — Save AI-assisted work as Xmind mind maps that you can revisit, refine, share, and continue developing.
What can you do with Xmind MCP Server?
Create mind maps from conversations — Turn brainstorming sessions, research notes, meeting discussions, or project ideas into structured Xmind mind maps.
List recent mind maps — Ask your assistant to find recently opened Xmind mind maps in your workspace and open the one you want to continue working on.
Read existing mind maps — Ask your assistant to read a mind map and return its content as a structured summary or markdown outline.
Get insights from a map — Extract key points, summarize the structure, identify action items, or suggest next steps based on an existing mind map.
Edit mind maps through chat — Add new topics, update existing content, expand branches, or reorganize ideas while keeping the map’s layout and visual style intact.
Continue previous work — Start from a recent Xmind map and use it as the basis for planning, writing, research, or decision-making.
Save ideas as reusable assets — Keep outputs as editable Xmind mind maps that can be opened, polished, shared, and built on later.
How to Add Xmind MCP Server?
Connect and Authenticate
On Claude
1️⃣ Open Claude Desktop and go to Settings > Developer > Connectors
2️⃣ Choose Add custom connector, then set a name and enter the server URL, then click Add.
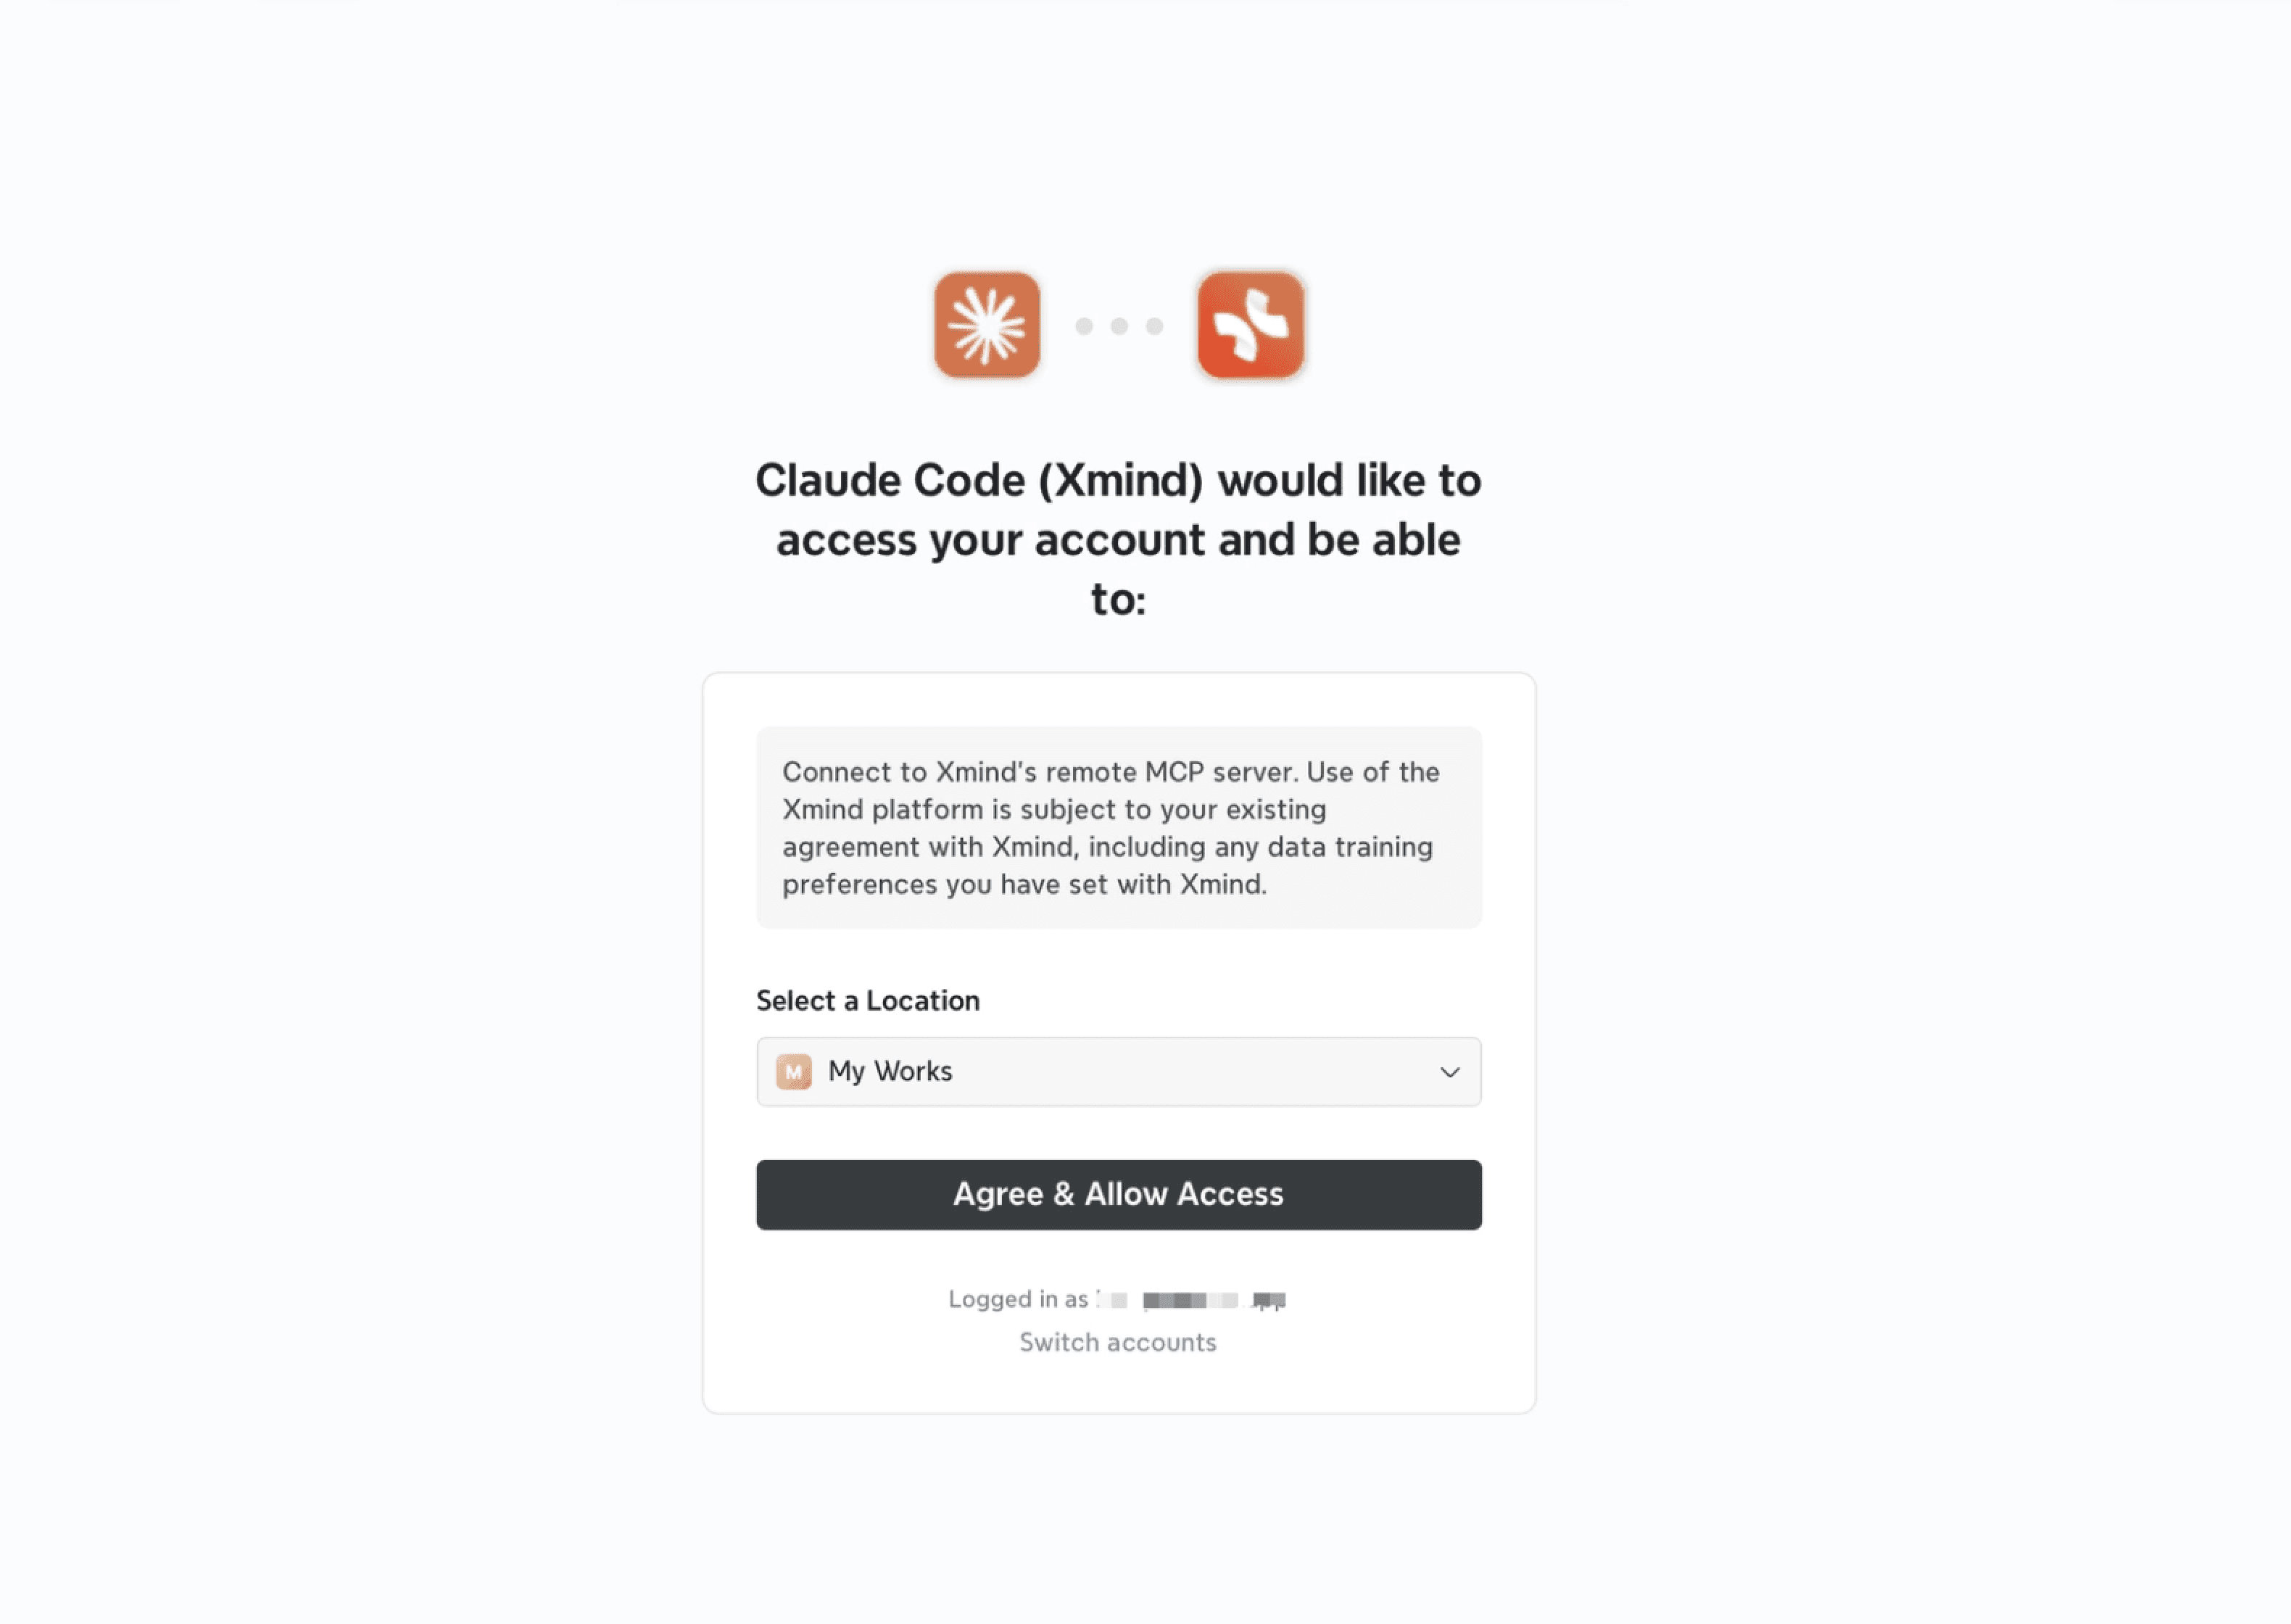
3️⃣ Click Connect, then authorize with your Xmind account in the browser window that opens.
4️⃣ Return to Claude and confirm that Xmind MCP Server is available.

On Claude Code
1️⃣ Run the following command in your terminal:
2️⃣ Start Claude Code, type /mcp, and select xmind to authenticate.
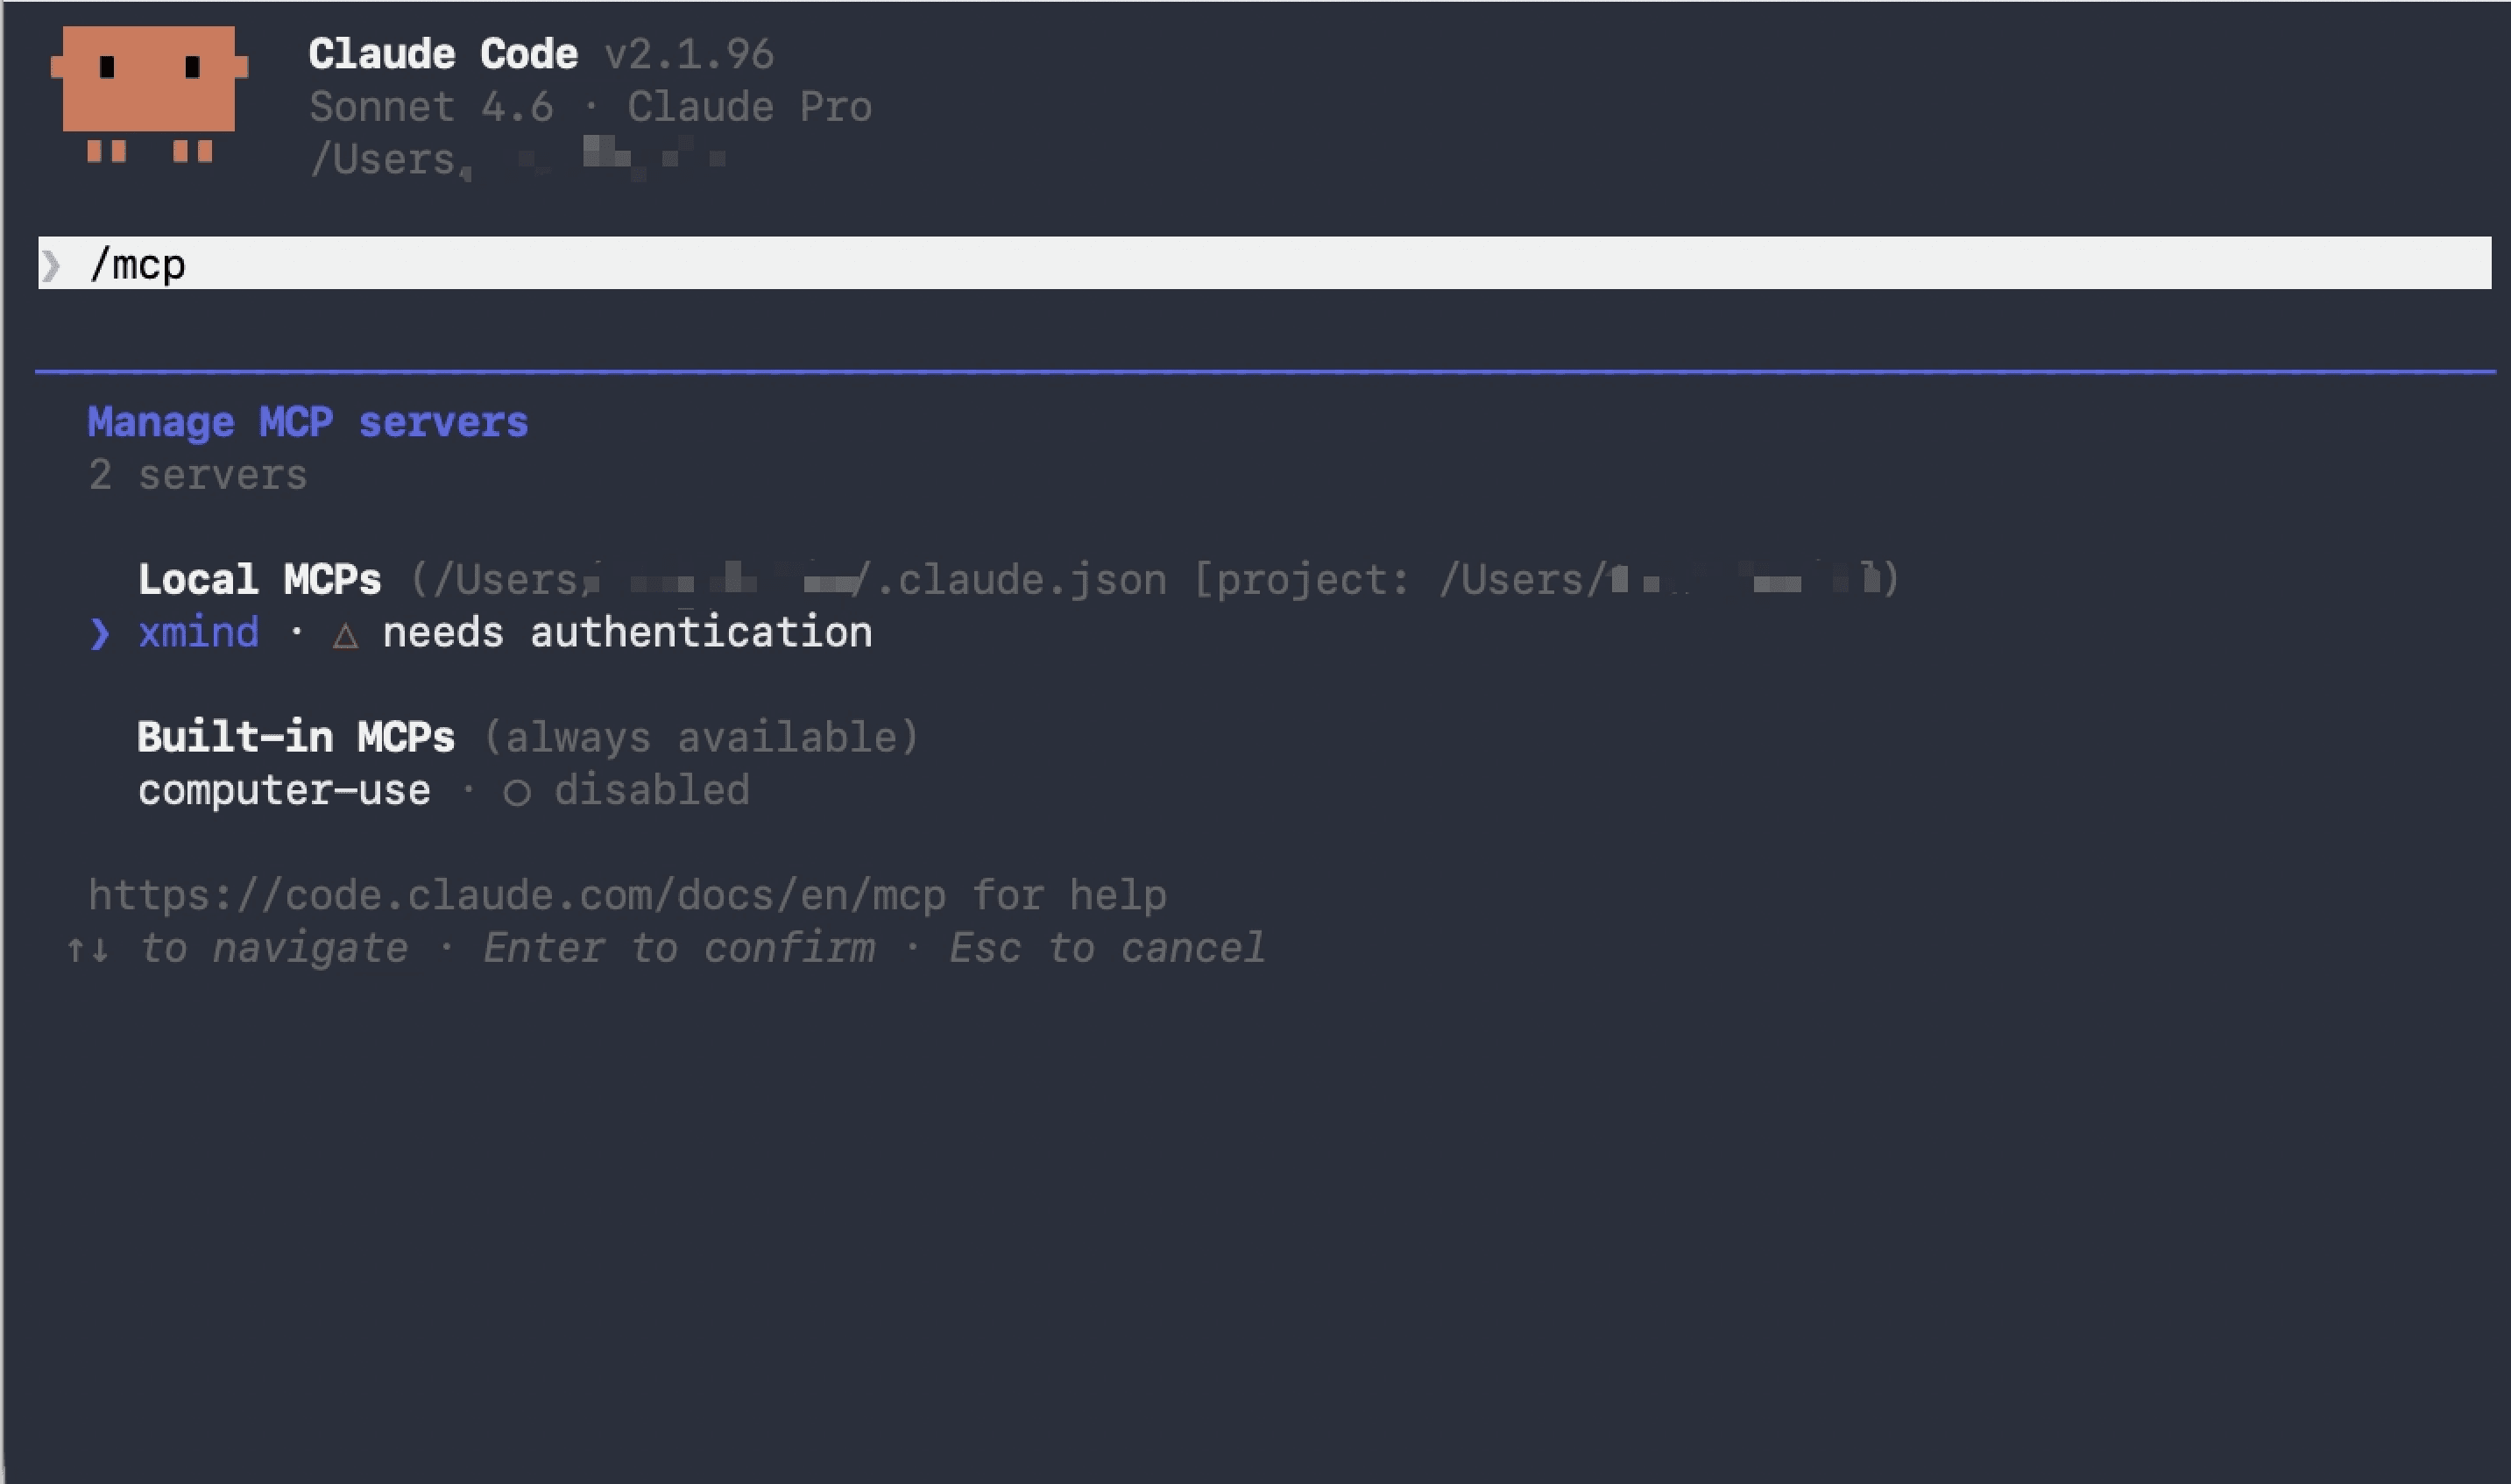
3️⃣ Authorize with your Xmind account in the browser window that opens.
On Codex Desktop
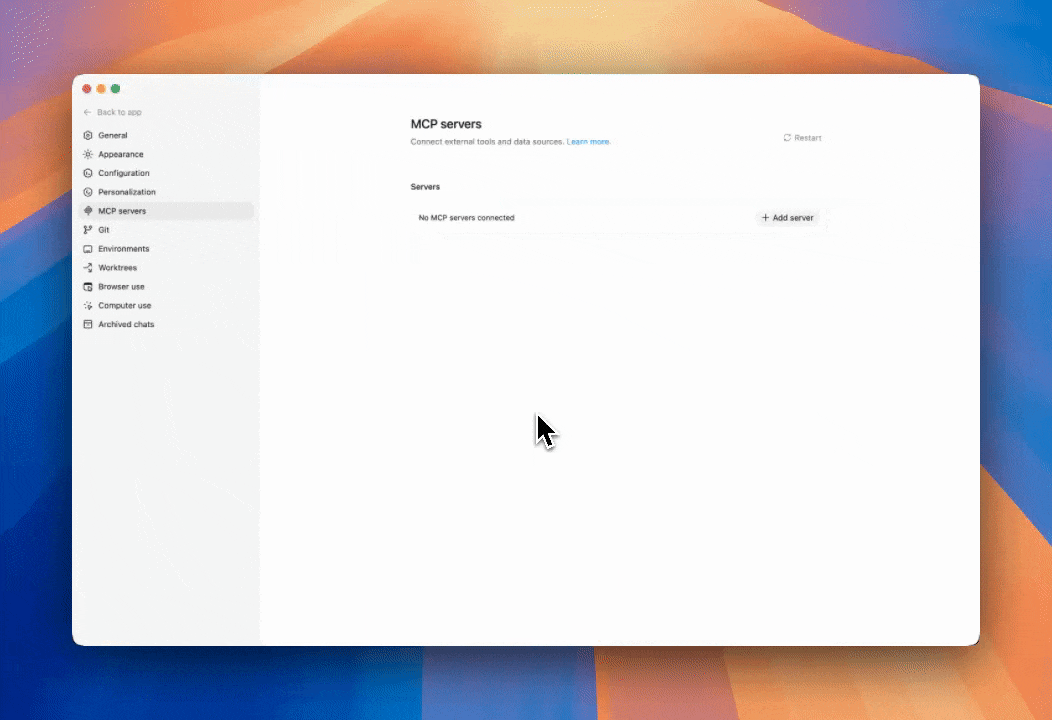
1️⃣ Open Codex and go to Settings > MCP servers.
2️⃣ Click Add server, name the server, select Streamable HTTP and enter the server URL, click Save.
3️⃣ Click Authenticate, and complete the authentication with your Xmind account when prompted.
On other MCP-compatible clients
Any MCP-compatible client can connect to Xmind using the Streamable HTTP transport.
1️⃣ Open your client’s MCP settings.
2️⃣ Add Xmind MCP Server URL:
3️⃣ Complete the OAuth authorization flow in the browser window that opens.
4️⃣ Enable the server and verify that it is available in the client.
Configure Xmind MCP
On Claude
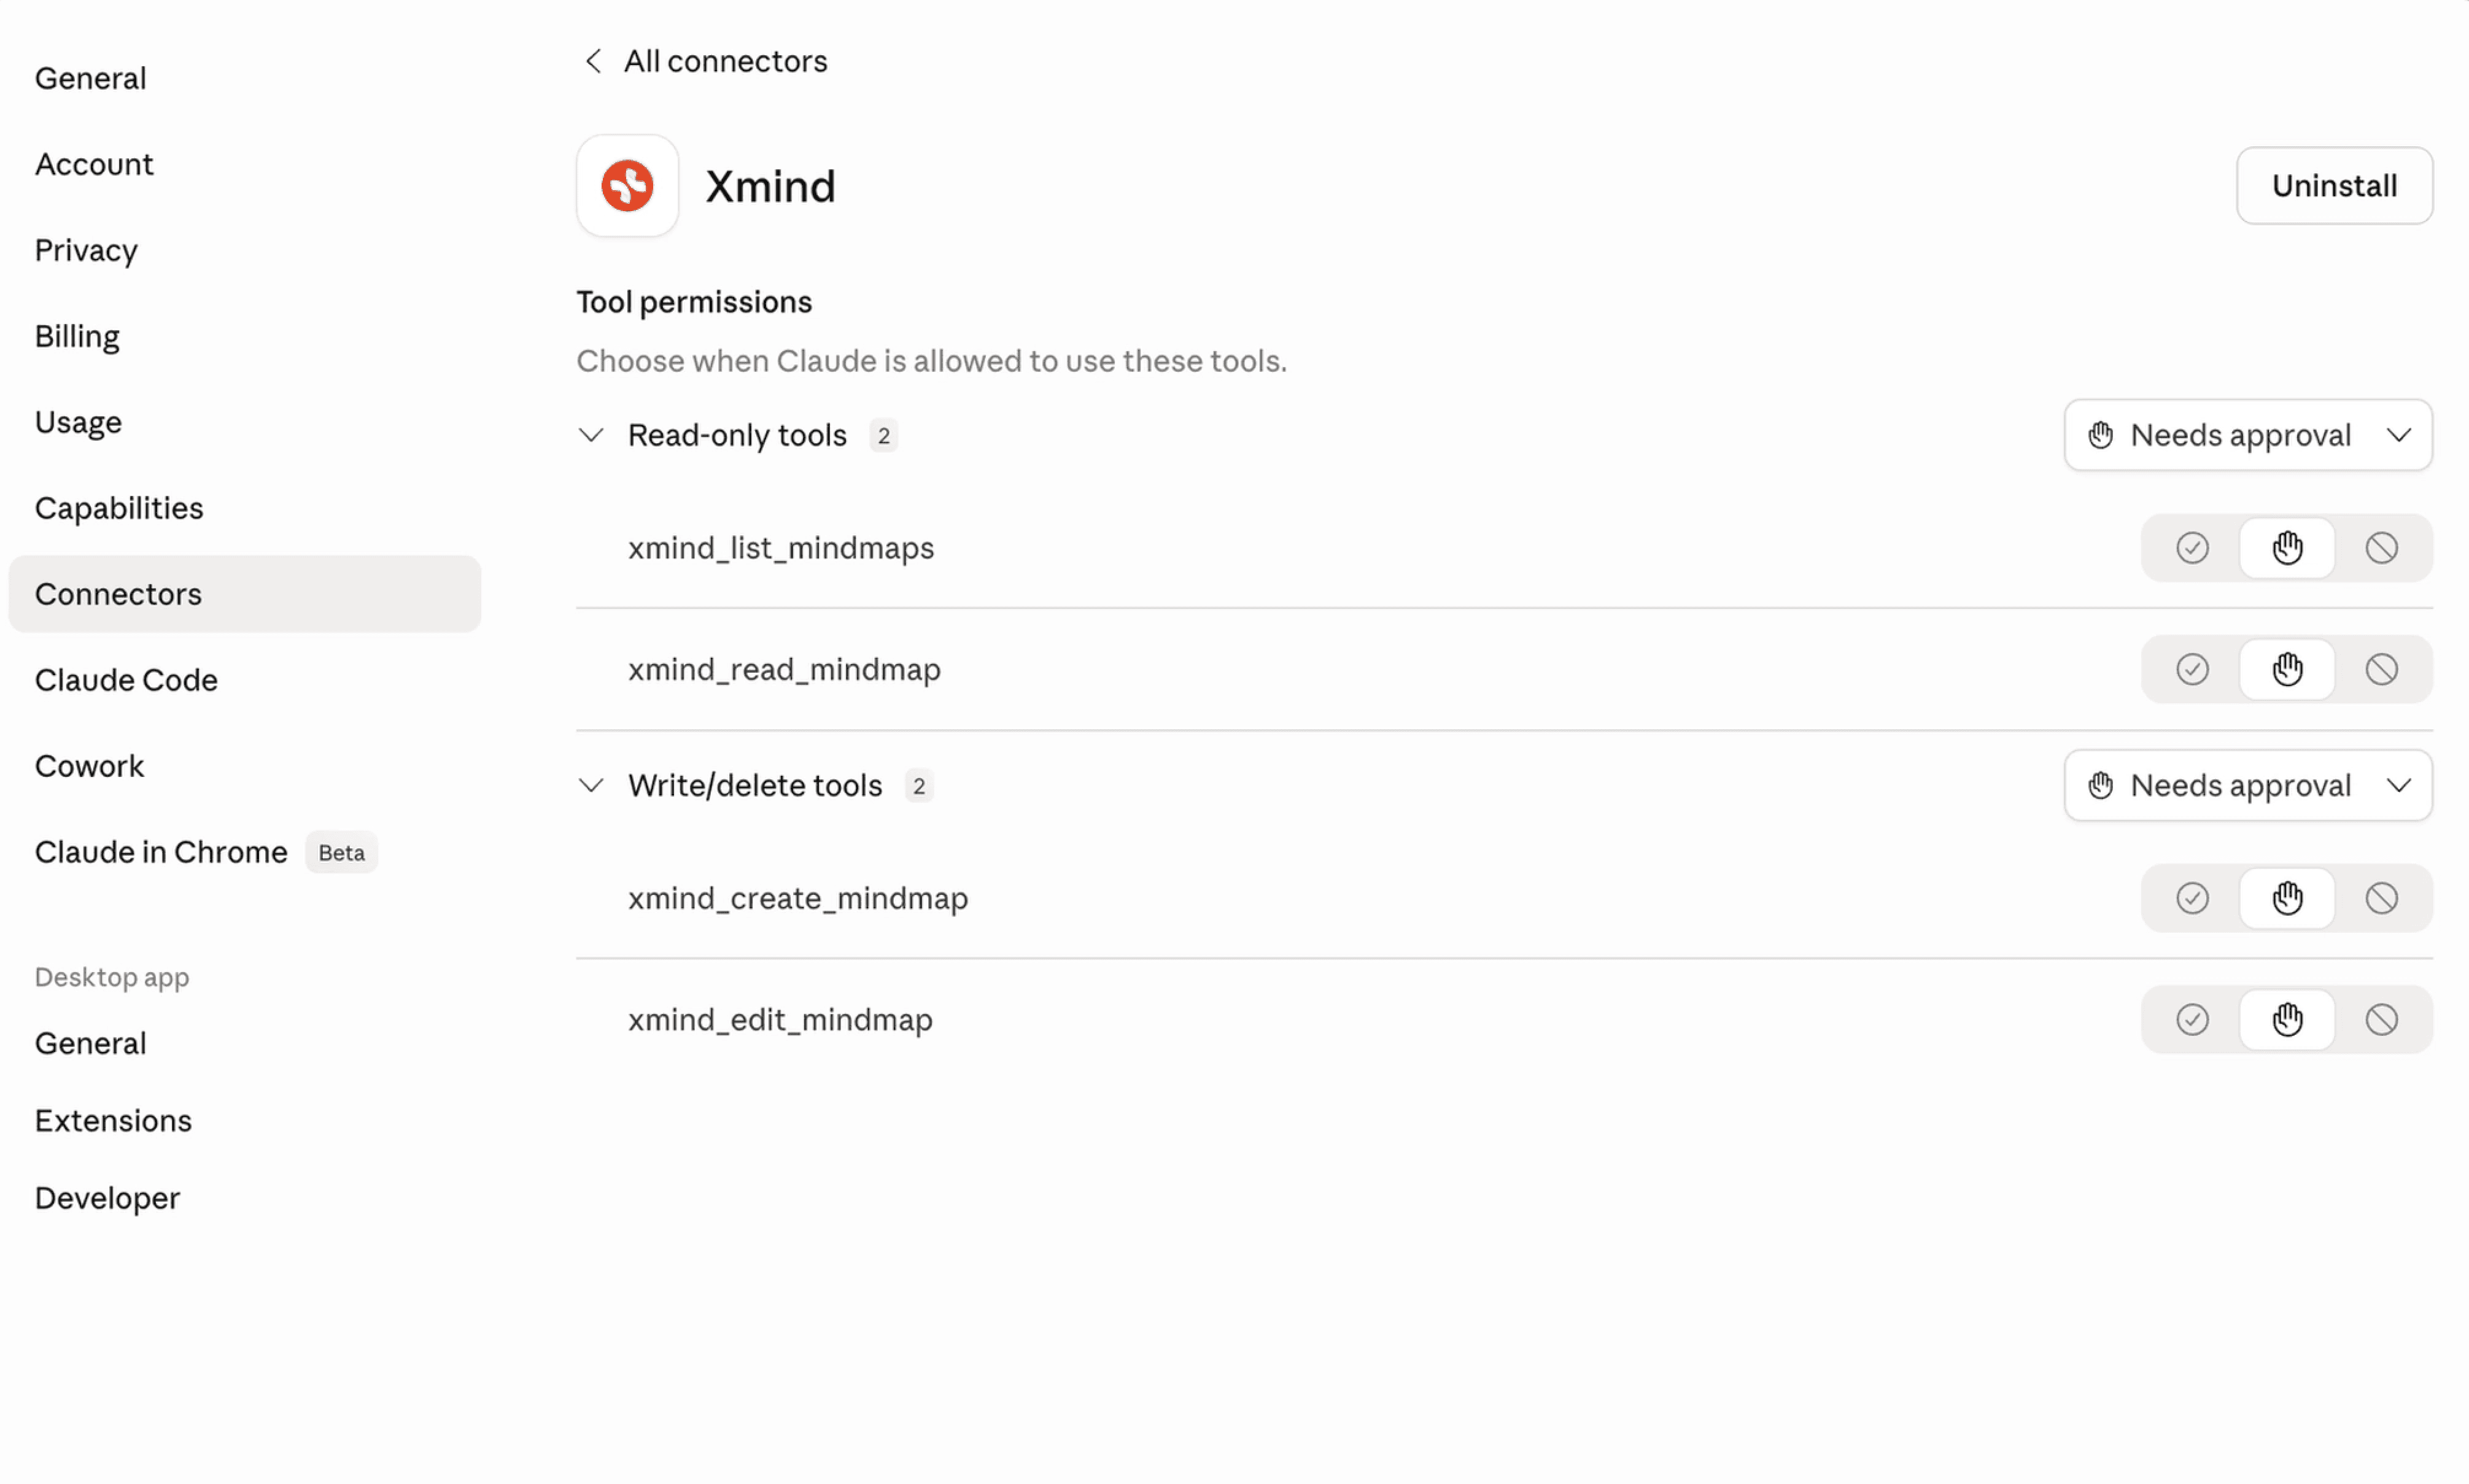
1️⃣ Go to Settings > Connectors > Xmind > Configure
2️⃣ You can adjust the permissions for the following features:
Read-Only Tools
Write Tools
Use Xmind MCP with Claude
Create mind maps with Xmind MCP
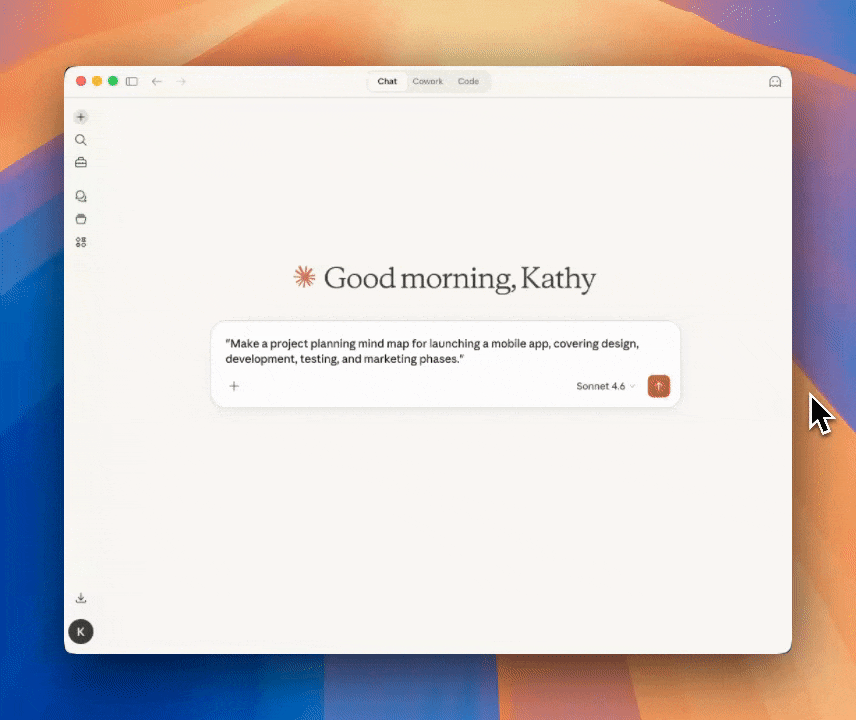
1️⃣ Describe your ideas in natural language, and ask your AI assistant to generate a structured mind map saved to your Xmind account.
2️⃣ If this is your first time using it, a permission prompt may appear; click Always allow to continue.
3️⃣ Click Open in Xmind to check and edit the mind map.
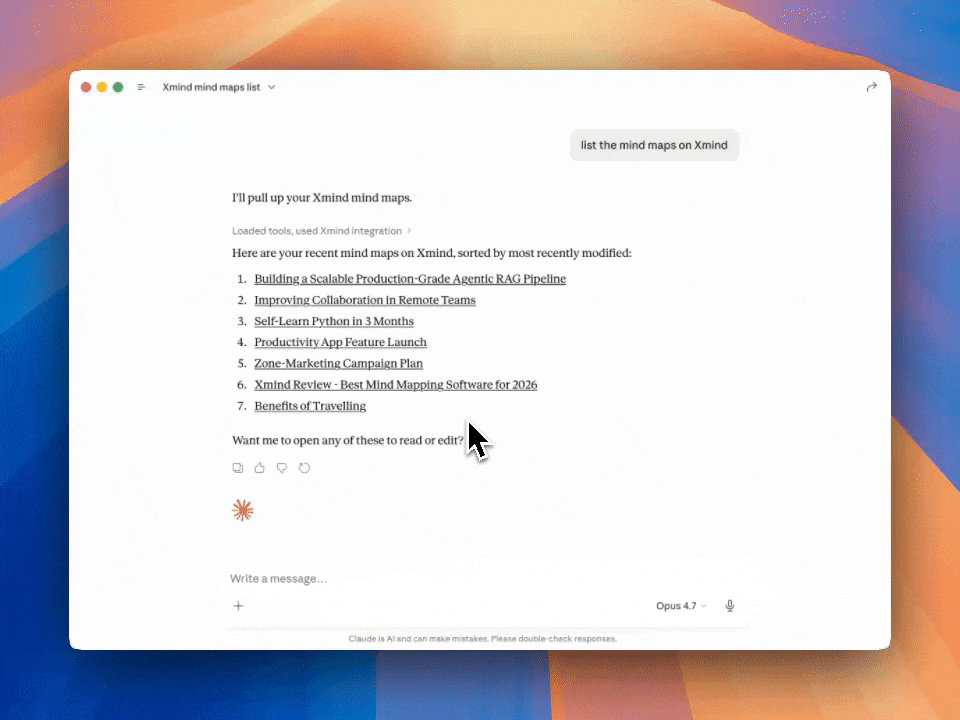
List the mind maps with Xmind MCP
Describe your request to list the mind maps on Xmind. It will then display all the mind maps you opened recently. Click a title and it will show the link to open the mind map in Xmind.
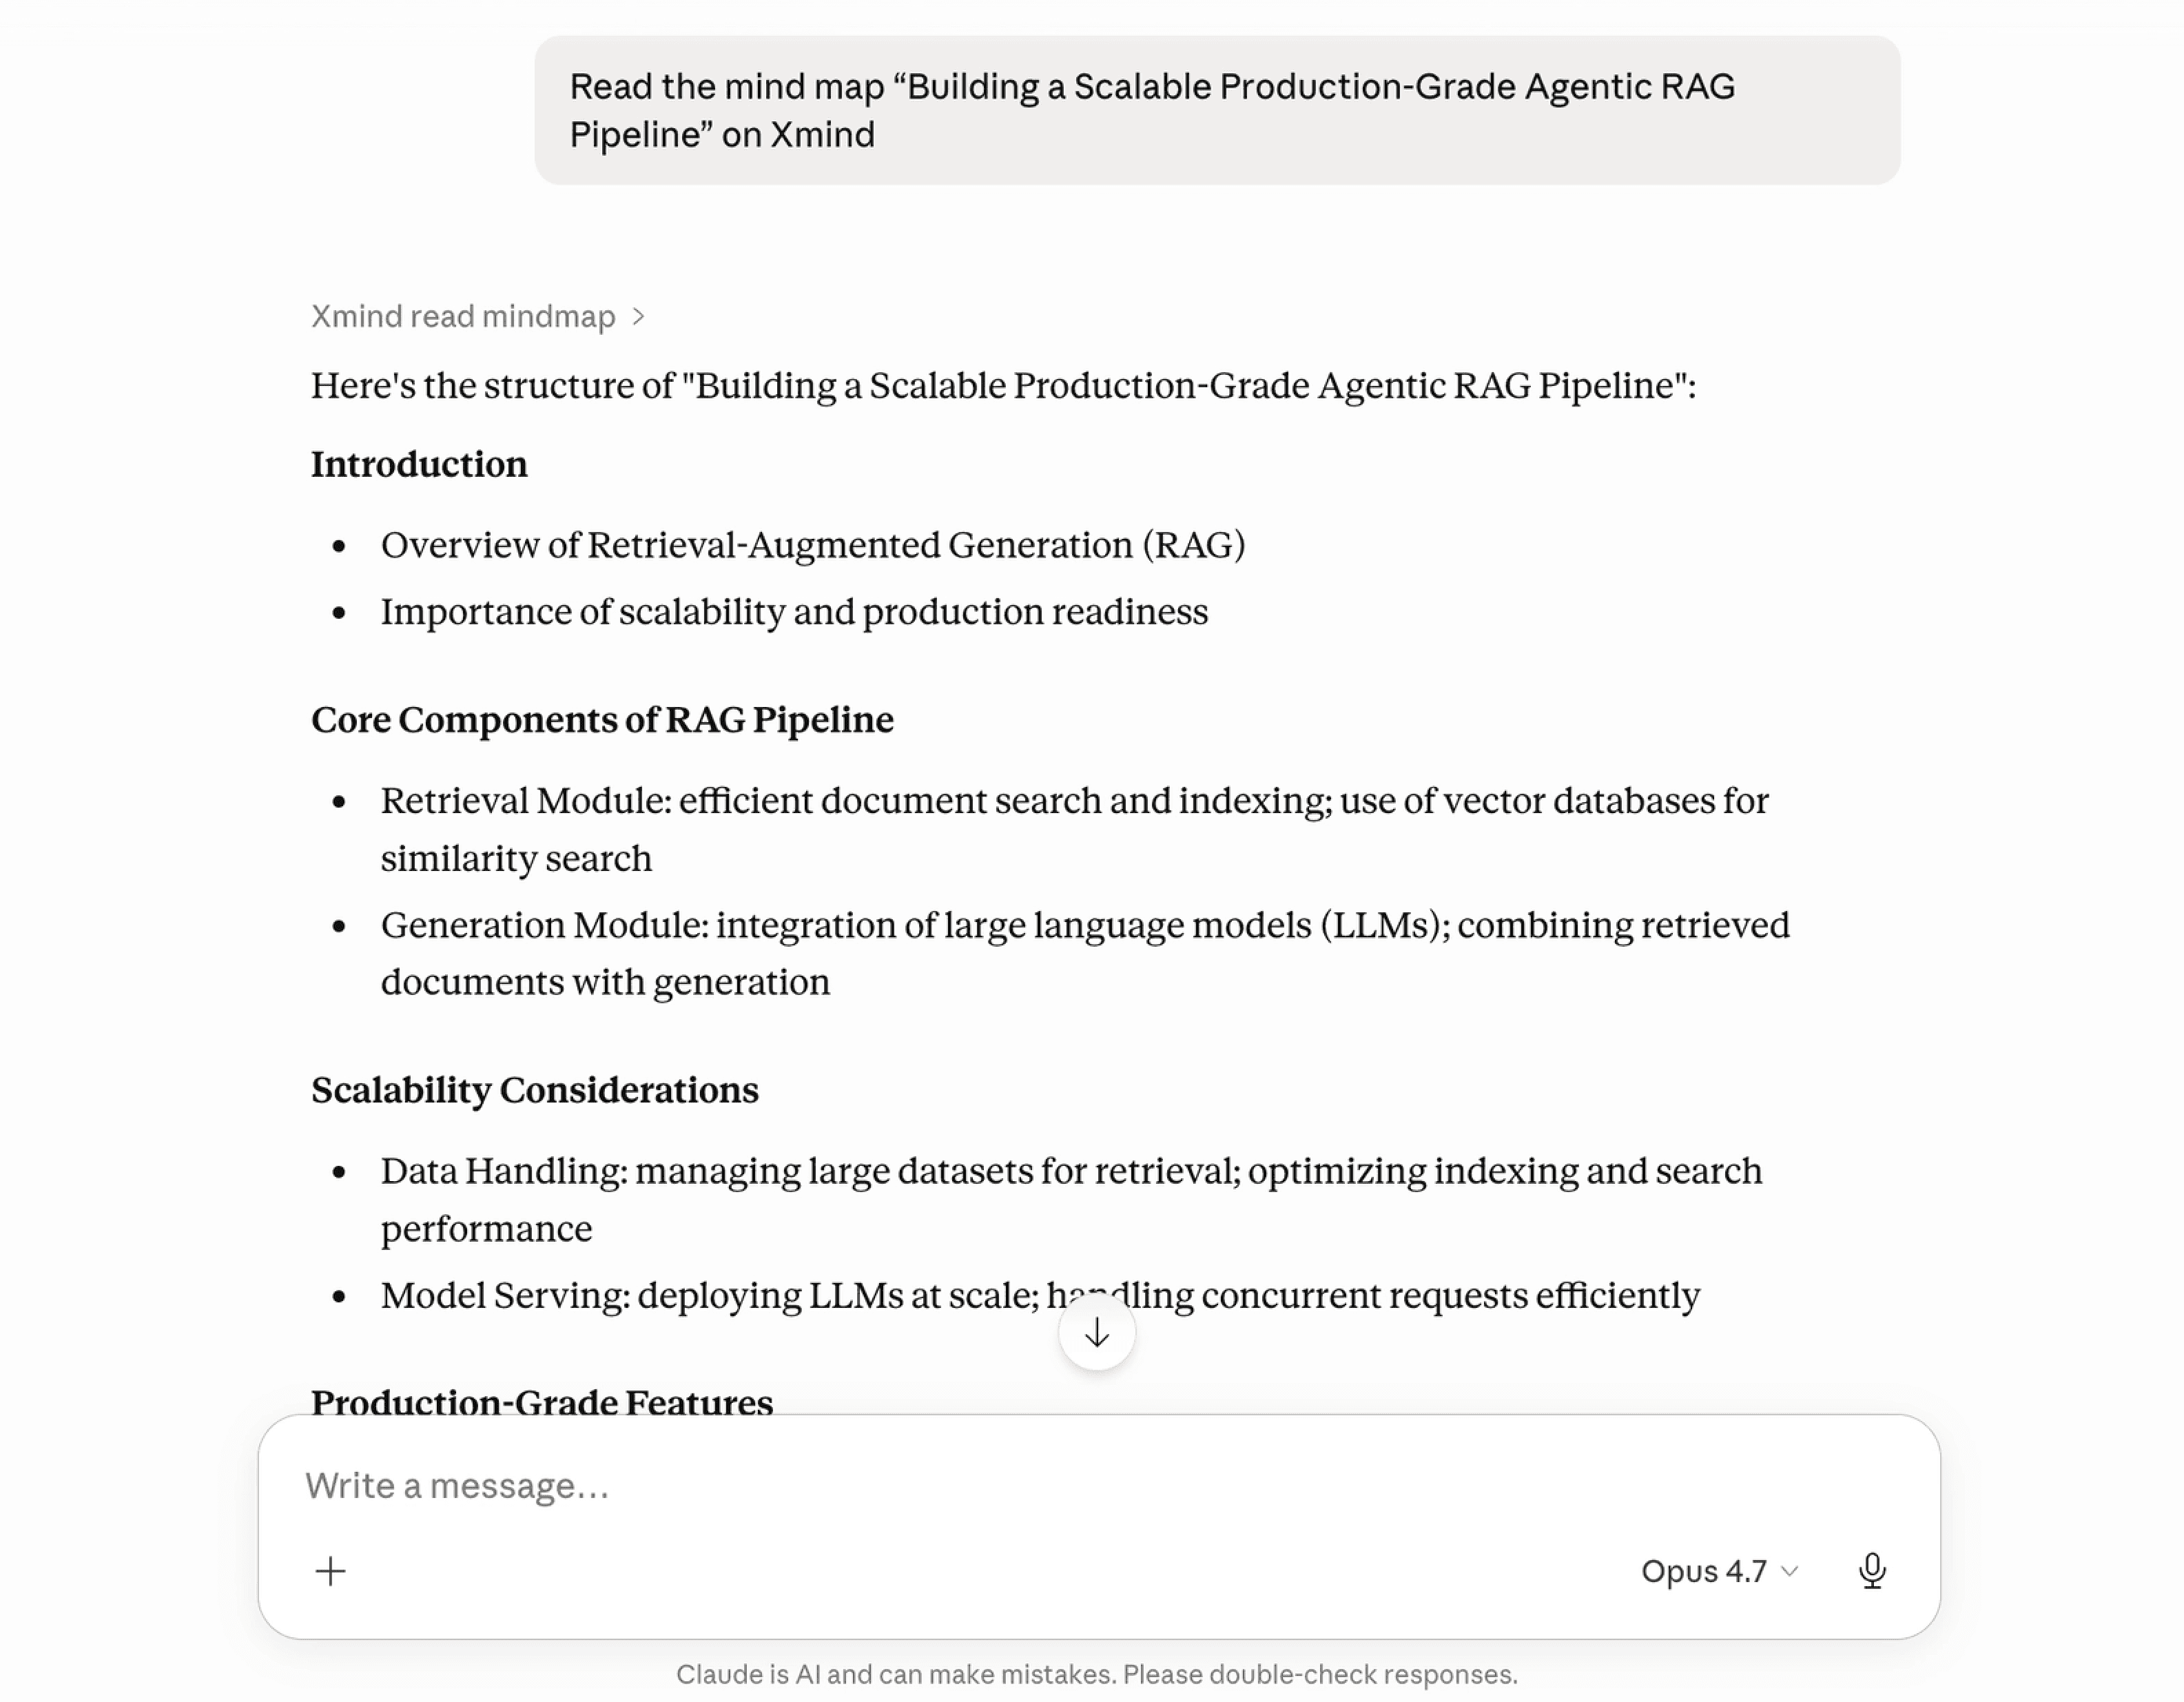
Read the mind maps with Xmind MCP
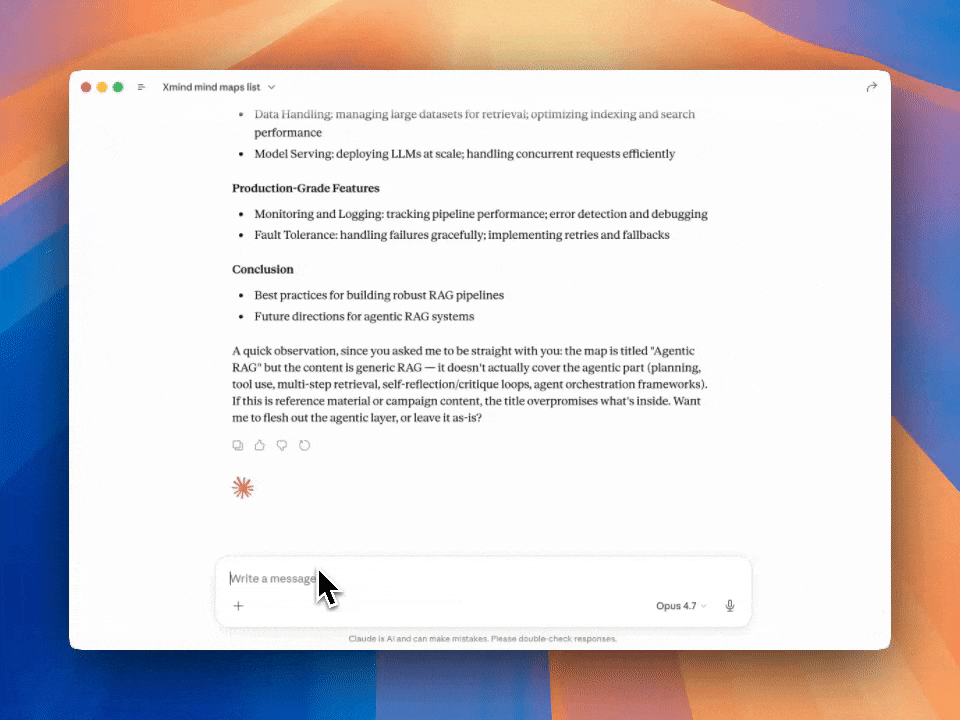
Describe your request to read the mind map in Xmind, the AI assistant will read the existing mind map and return its content as markdown.
Edit the mind maps with Xmind MCP
1️⃣ Ask the AI assistant to read the mind map you want to edit;
2️⃣ Describe the changes you want to make to the mind map. It can adjust or add content to topics while keeping the mind map’s layout and visual theme intact.