















Marker
Markers help you add visual labels to topics in a mind map. You can use them to show priority, progress, task status, roles, tags, or any other information that needs to be recognized at a glance. Xmind provides built-in markers such as priority, task progress, flags, stars, arrows, symbols, and more. You can also create custom marker groups and add your own marker icons on Xmind for desktop.

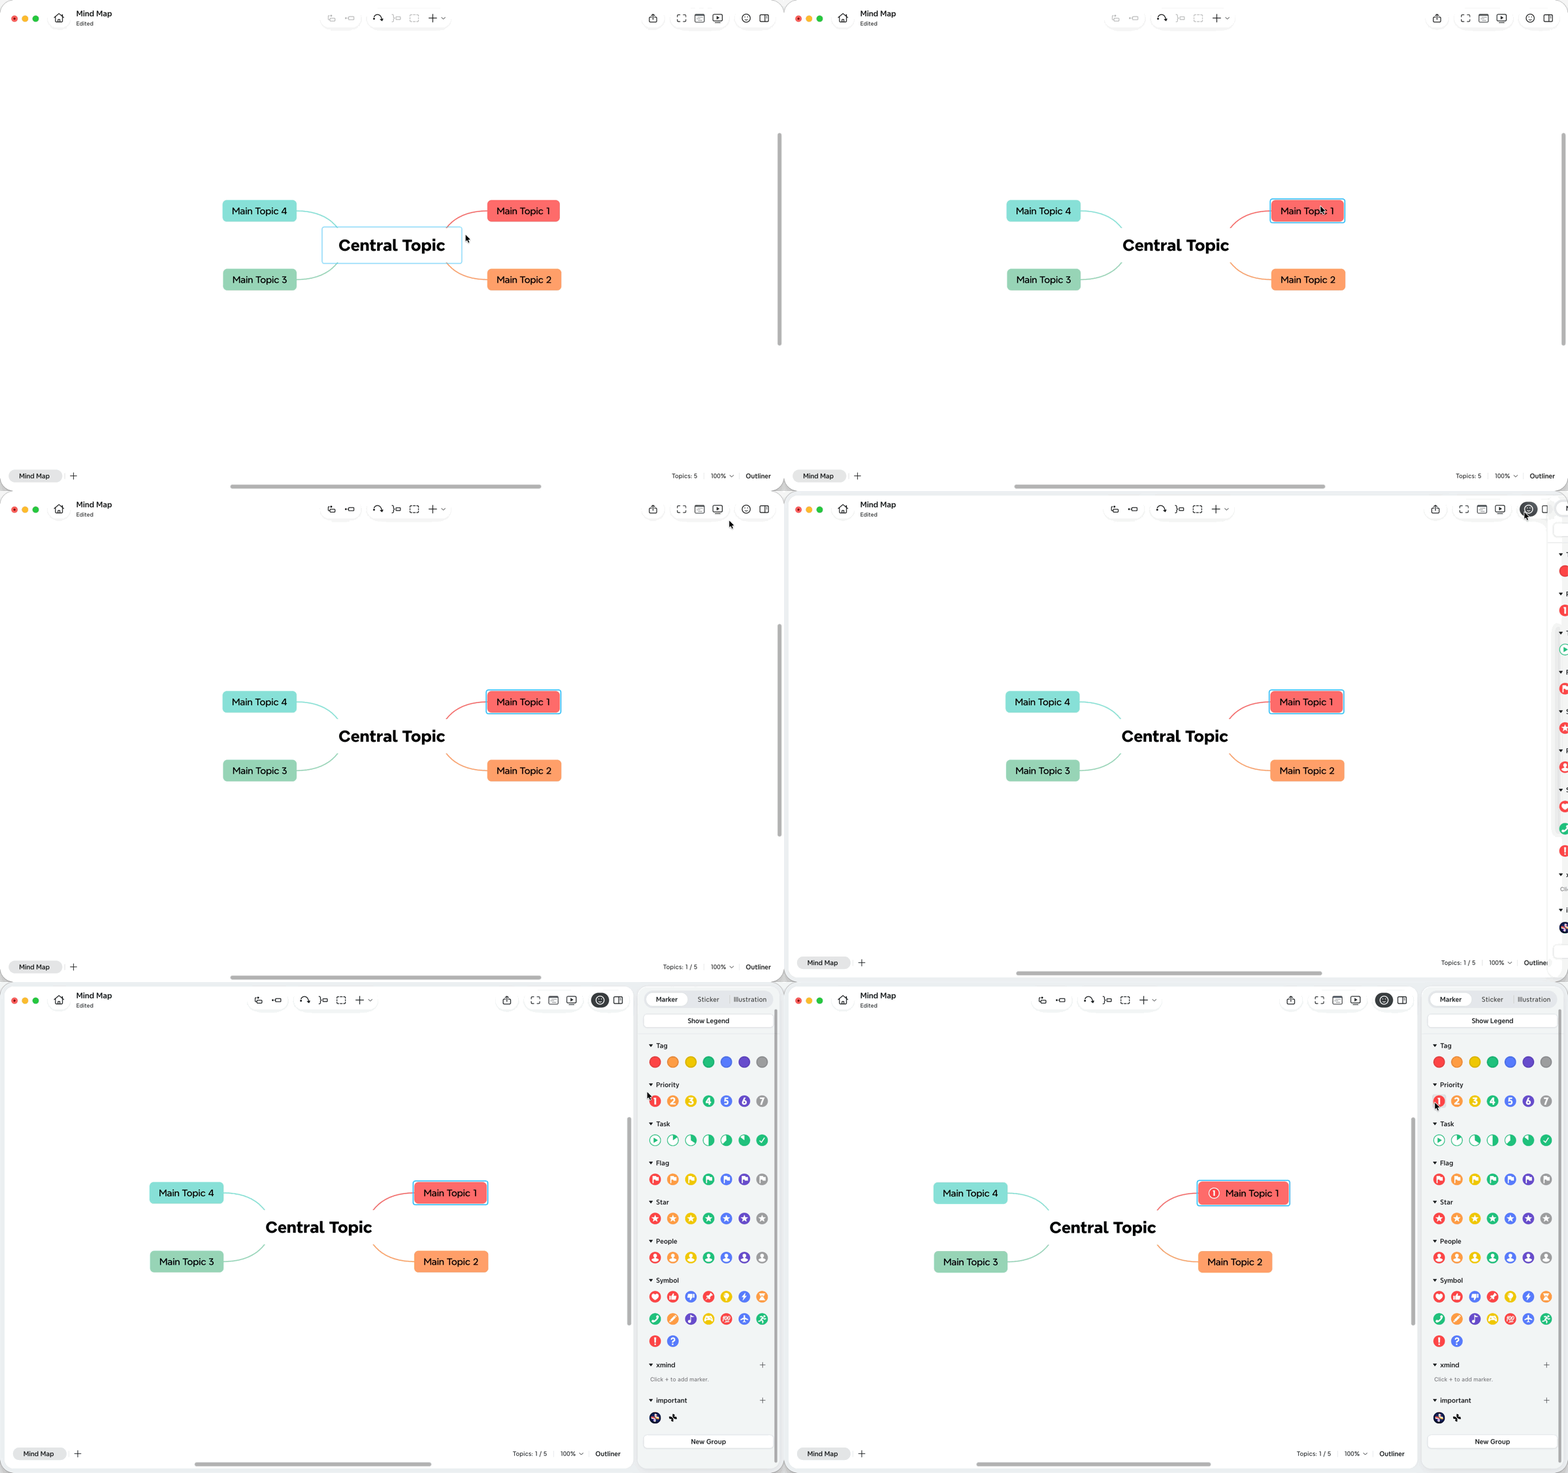
Insert a Marker
- Select the topic, click Marker in the toolbar, or click Insert > Marker, then select the marker you want to insert. The selected marker will be added to the topic.
Switch Marker
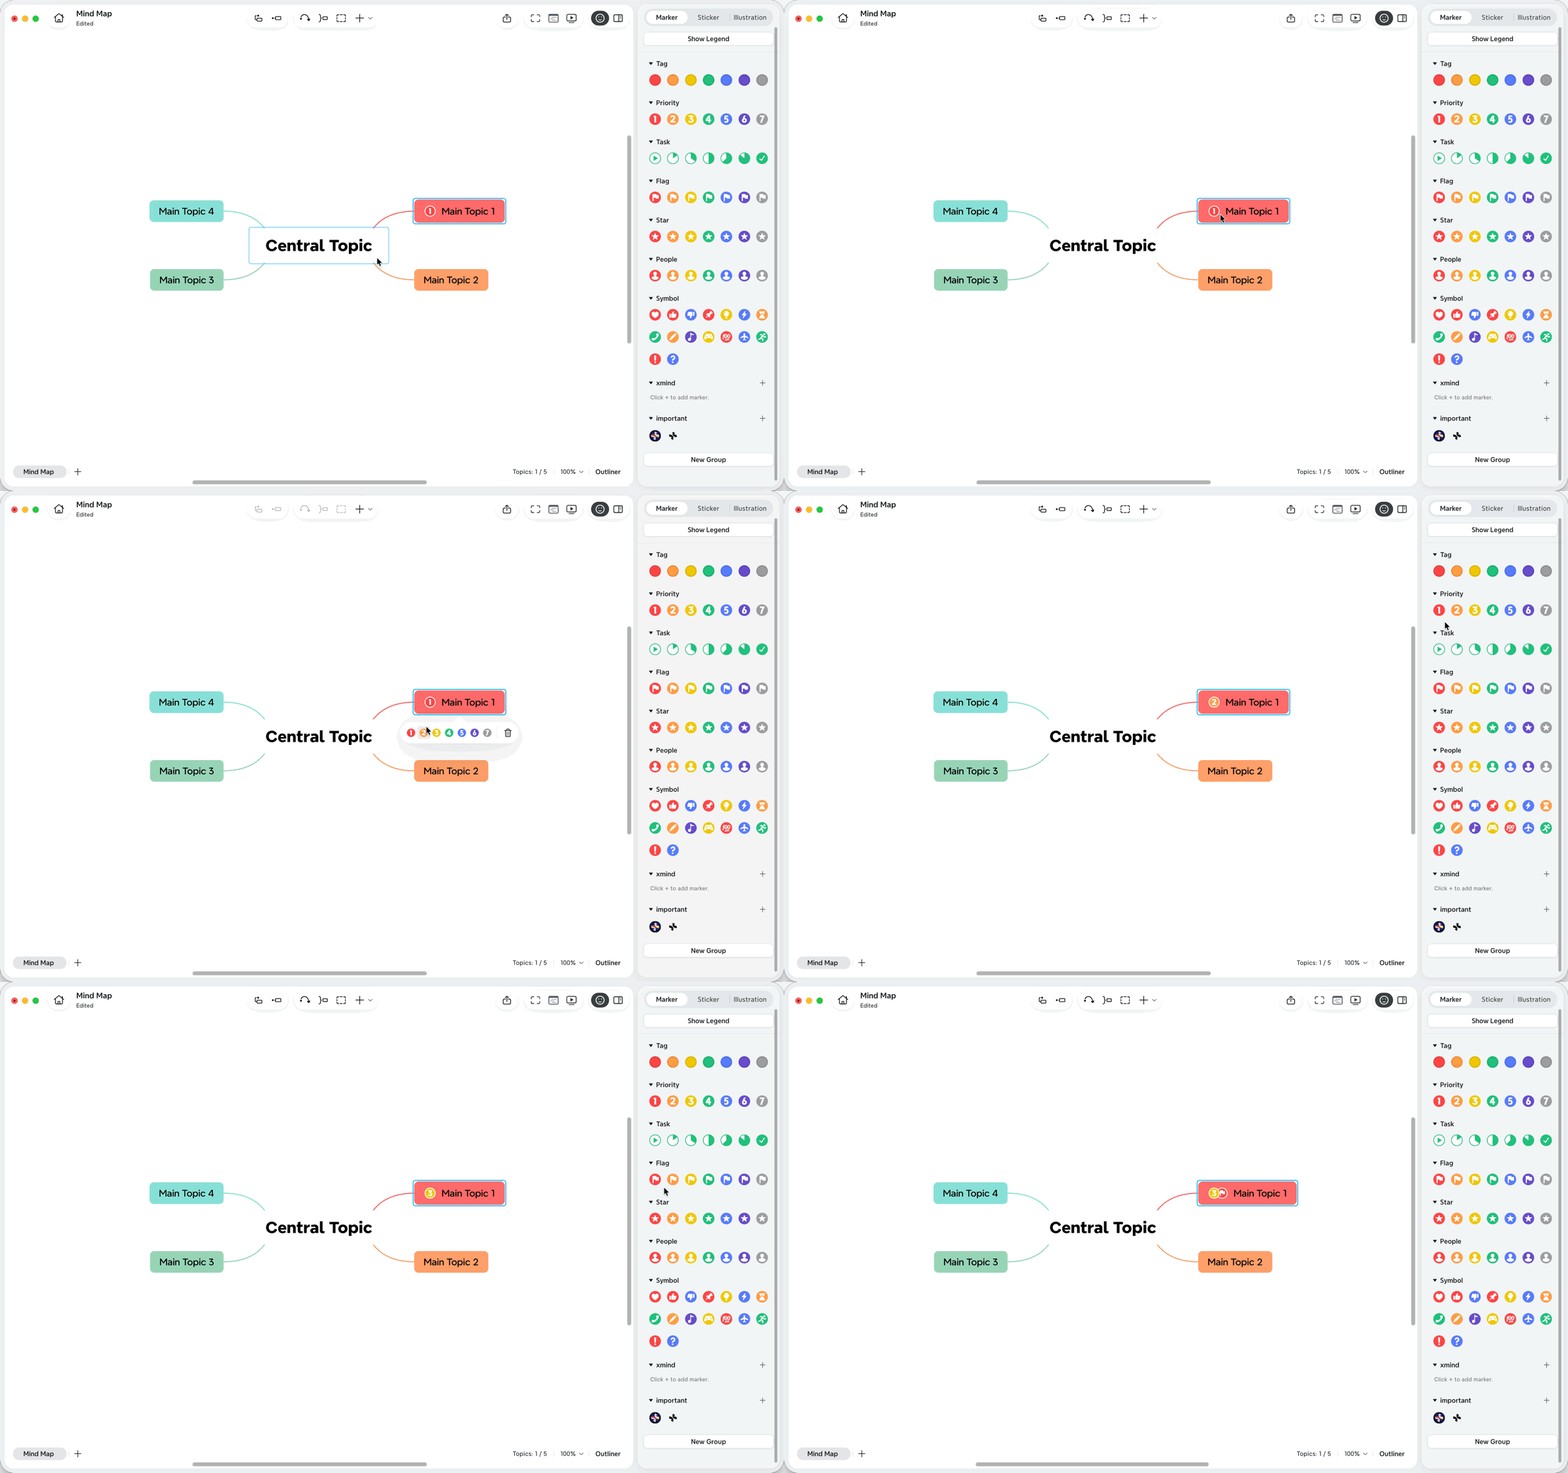
There are two ways to switch marker:
-
Click the marker icon to open the pop-up panel, then switch to another marker.
-
Open the marker panel, choose another marker from the same marker group.
If you choose another marker from a different marker group, the topic will add it as a new marker.
Delete Marker
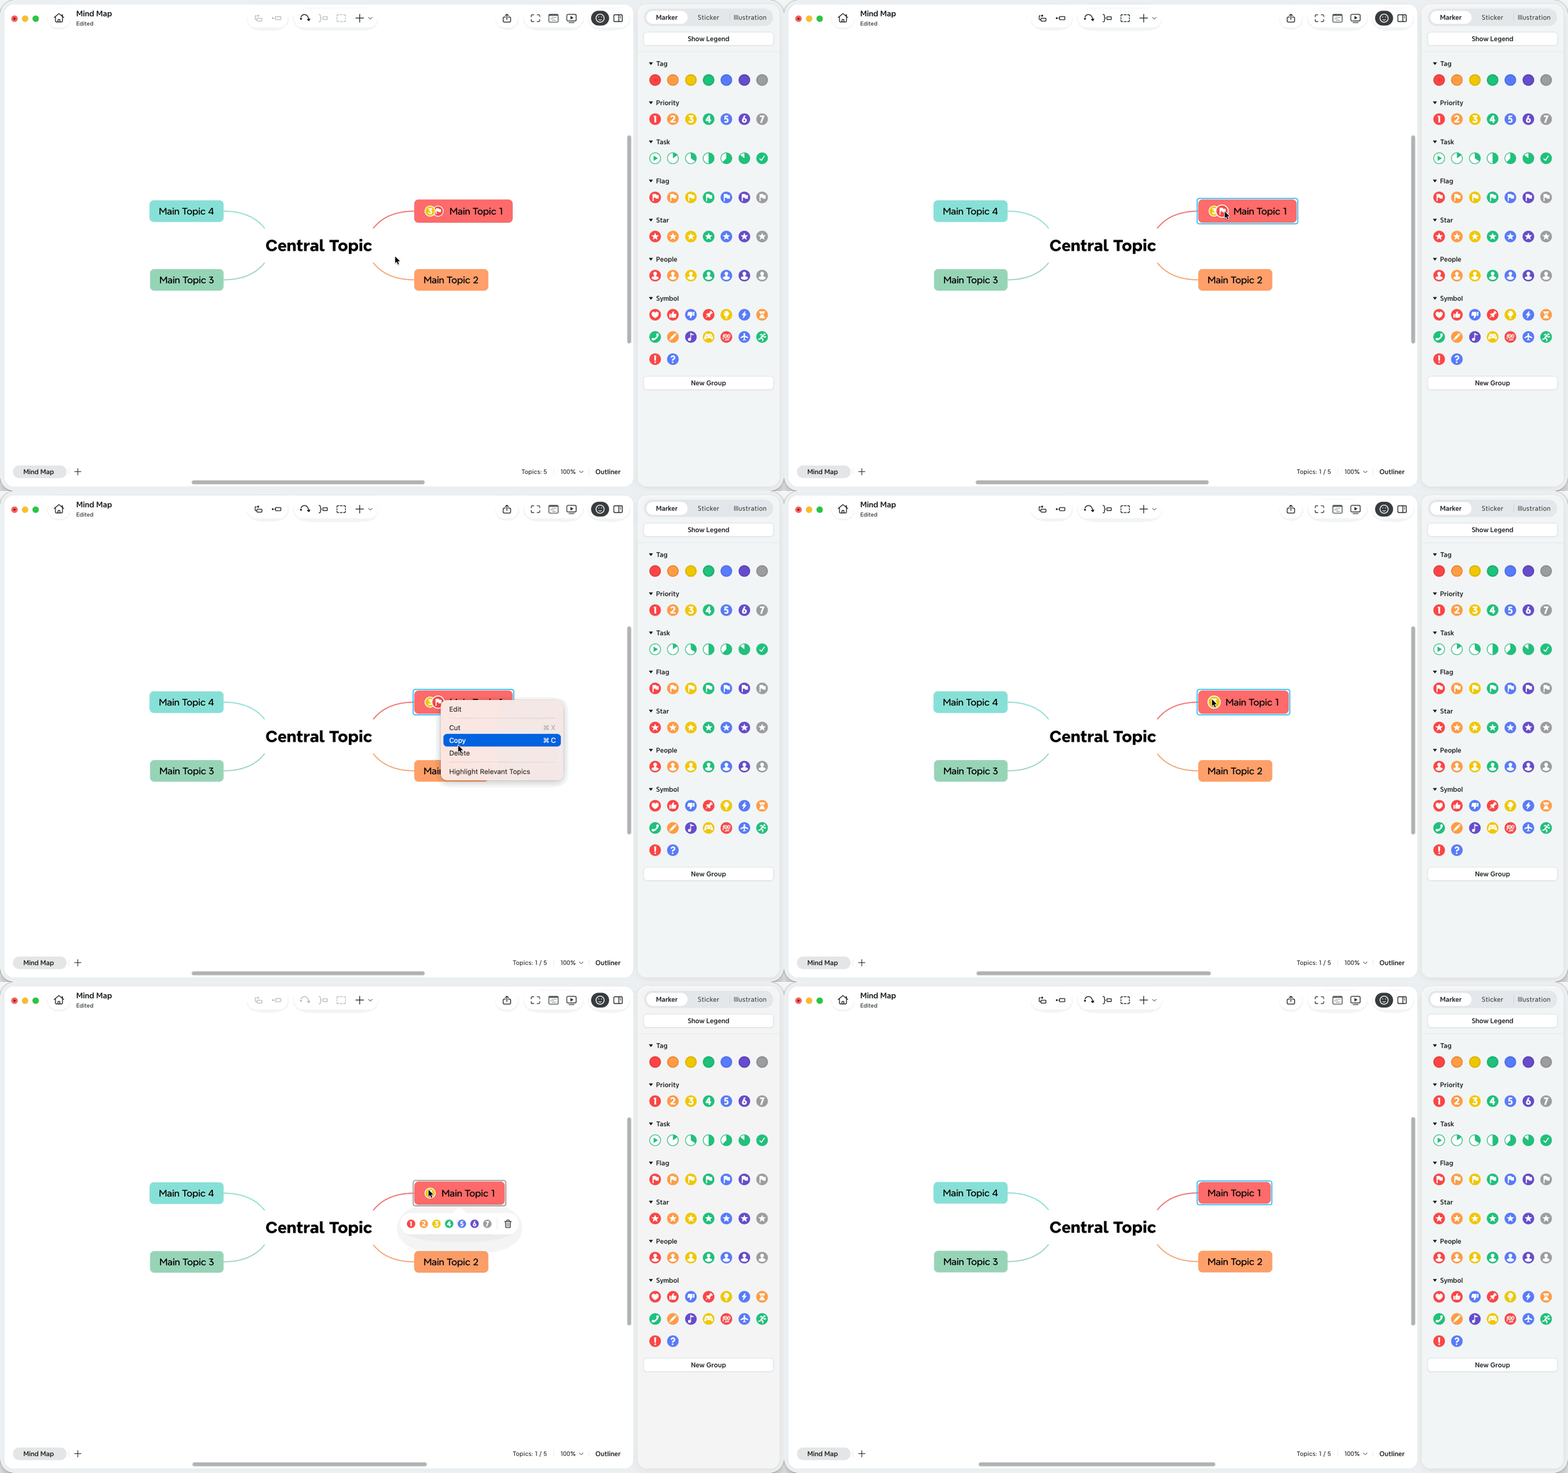
There are two ways to delete a marker:
-
Right click on the icon, choose Delete.
-
Click the marker icon, delete it by pressing trash icon.
Show & Hide Legend
Legends help explain what the markers in your mind map represent.
-
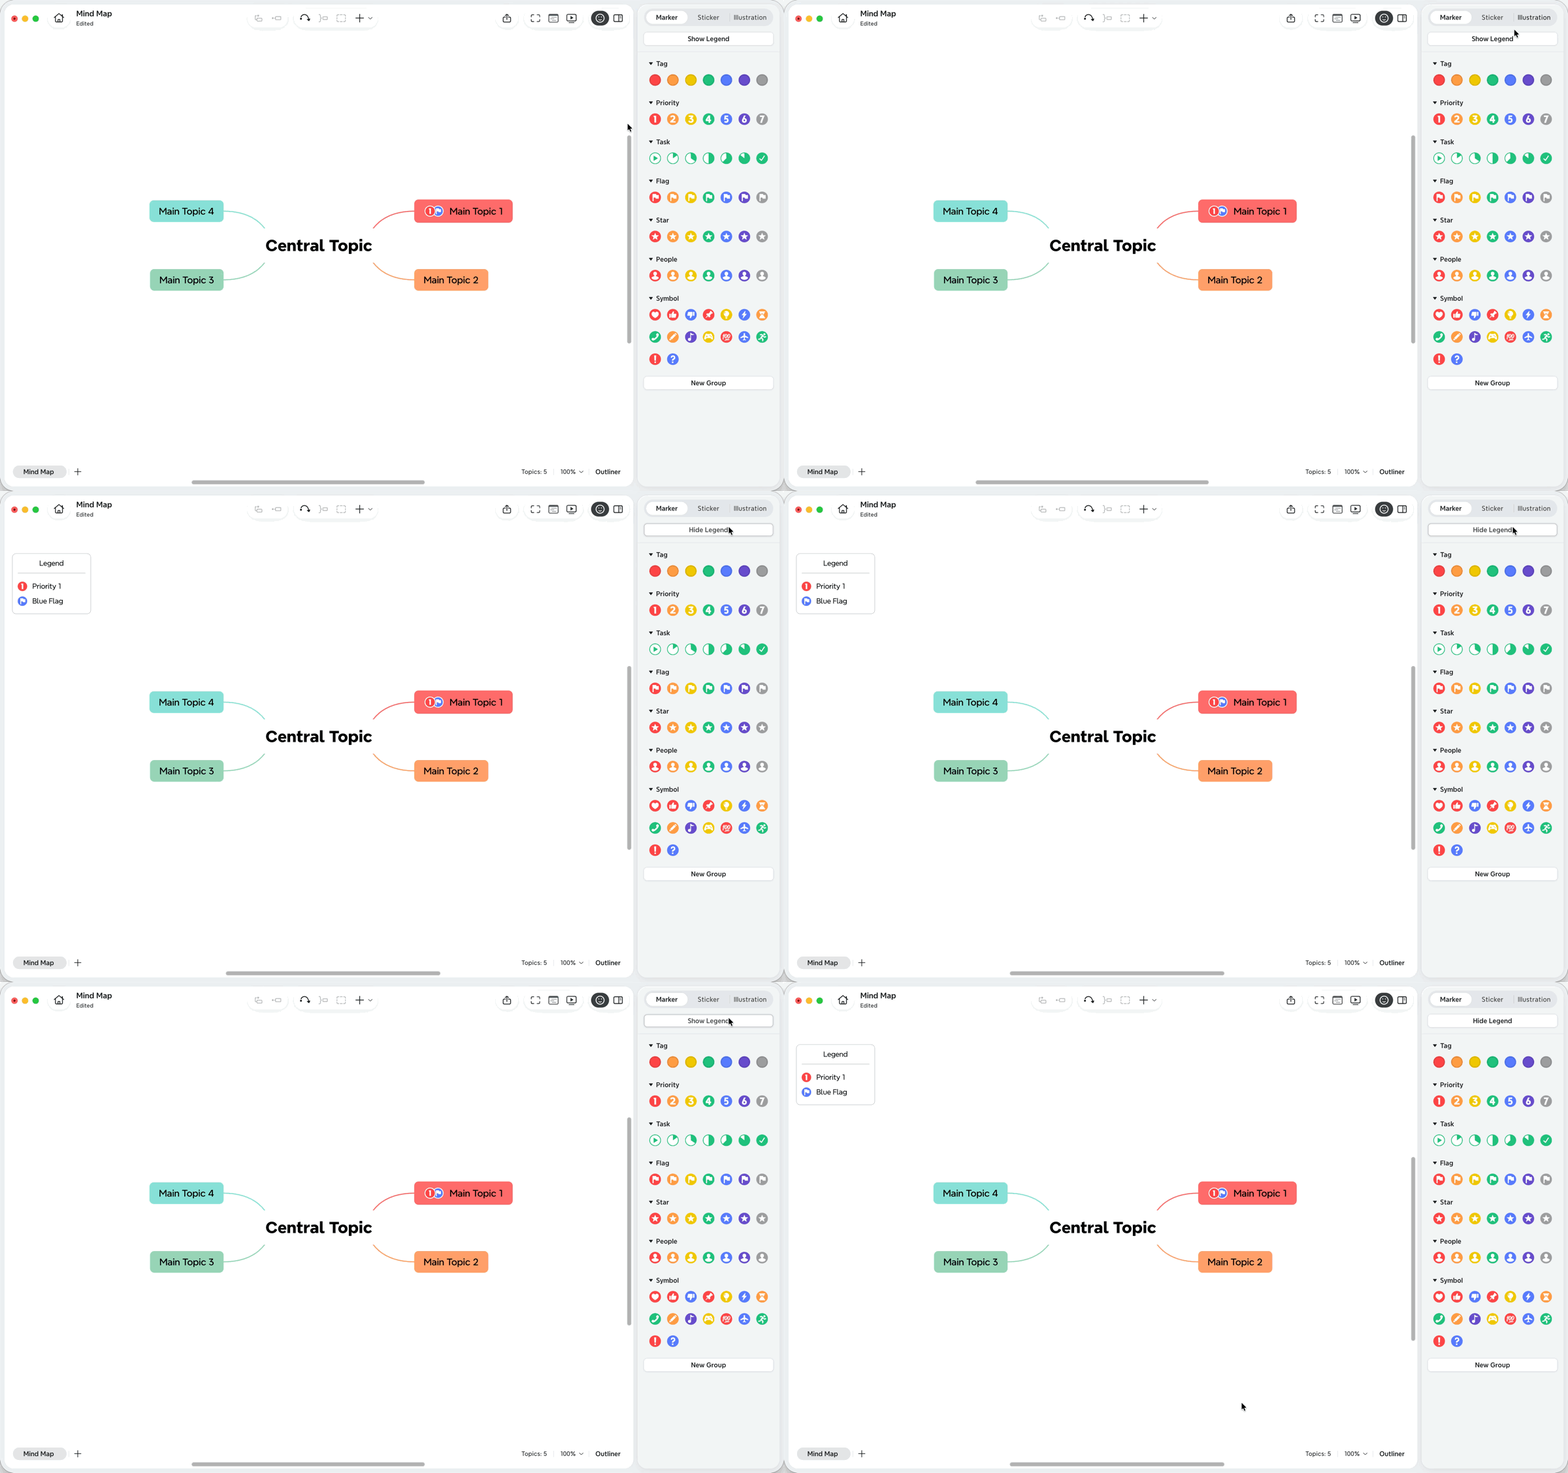
You can see Show Legend in Marker, click on it, a legend will appear in the mind map, showing the markers that have been inserted and their corresponding names.
-
Click on Hide Legend, the legend will be hidden from the mind map.
Rename the Marker
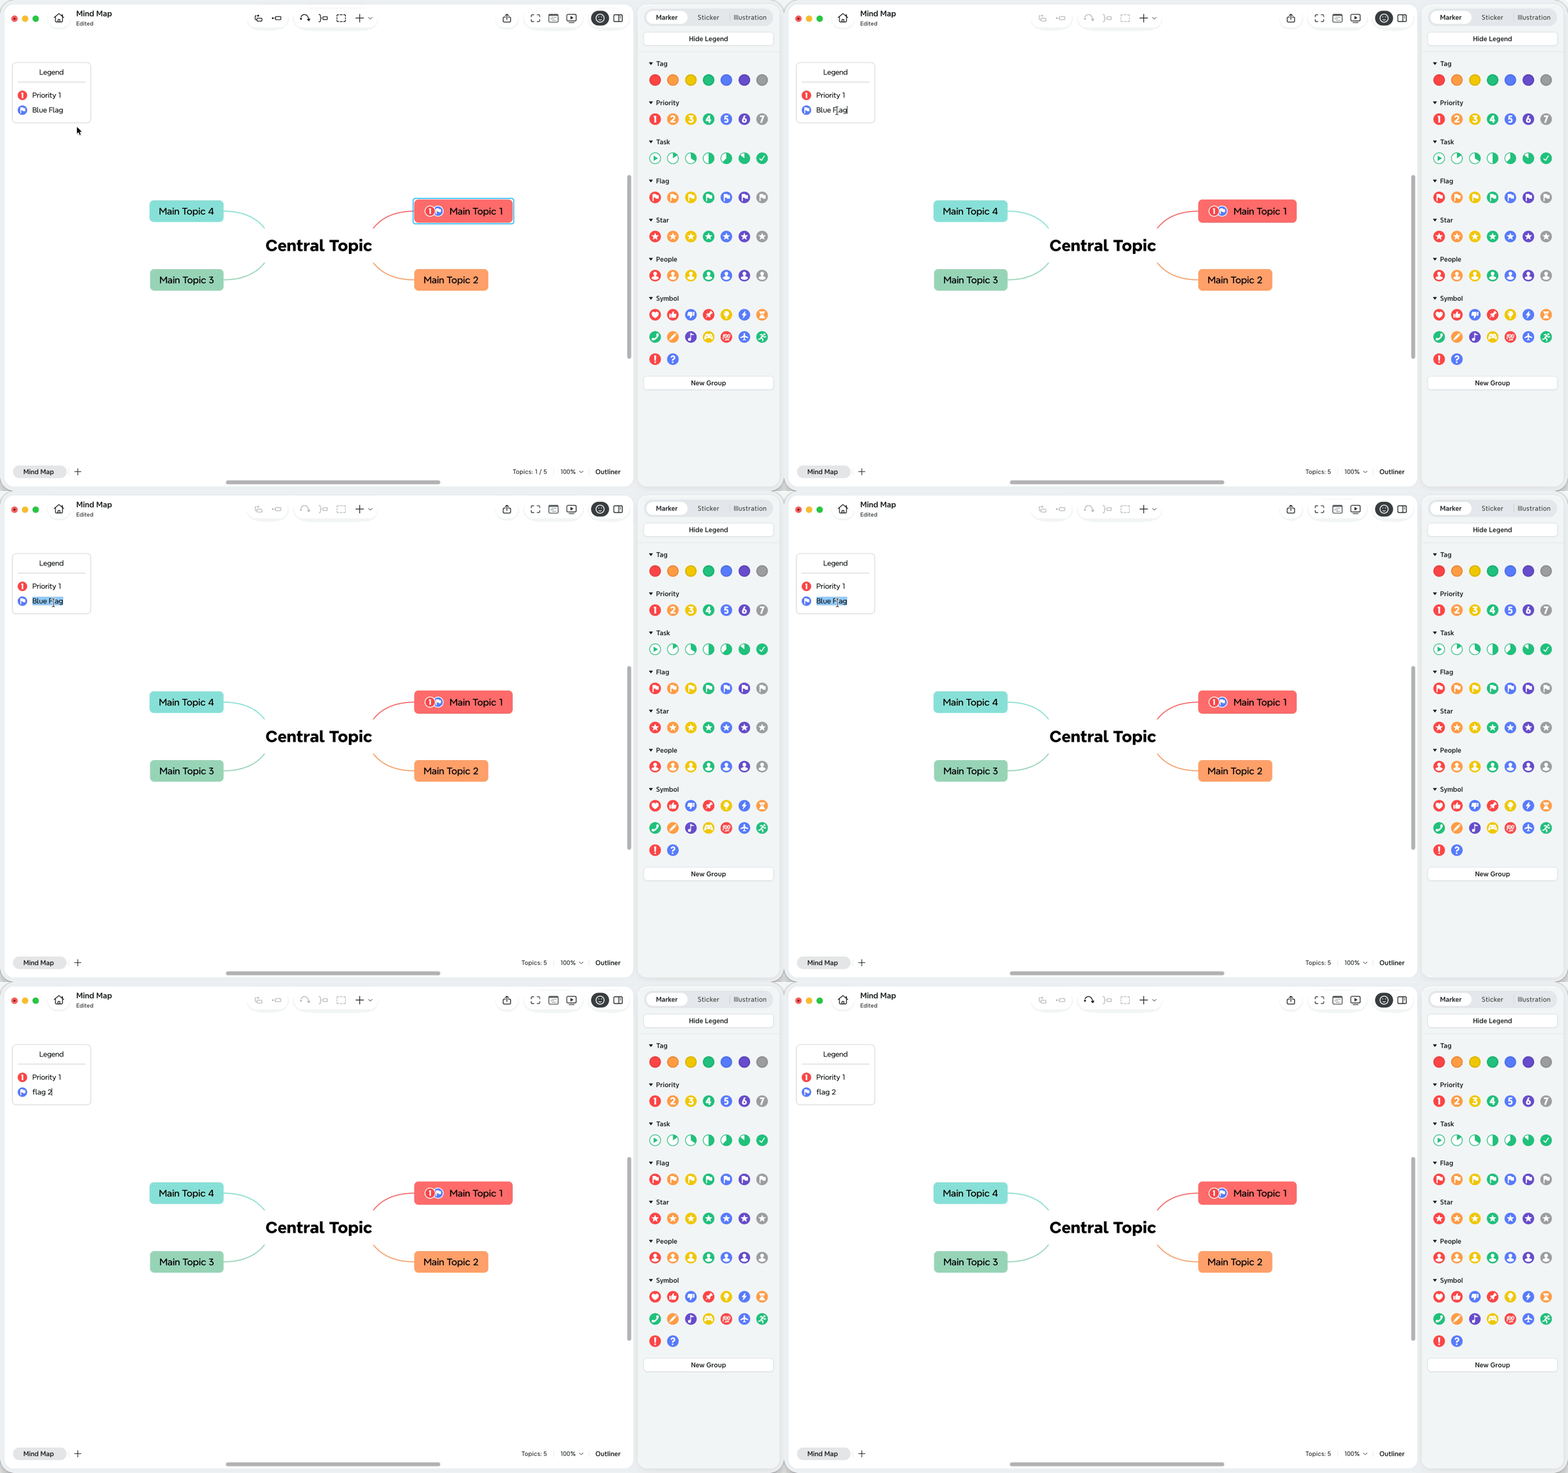
You can rename a marker in the legend to make its meaning clearer in the current mind map.
1️⃣ Show the legend in the mind map.
2️⃣ Double-click the text next to the marker icon, then you can edit the name.
Custom Marker
Custom Marker allows you to create your own marker groups and add personalized marker icons to your mind maps. You can import images or previous marker packages, organize them into groups, and use them together with Xmind’s built-in markers.
Attention: Custom markers can be created and managed in local files on Xmind Desktop. And it requires Premium subscription.
Create a Custom Marker Group
1️⃣ Open a local file, or create a new file in Xmind Desktop.
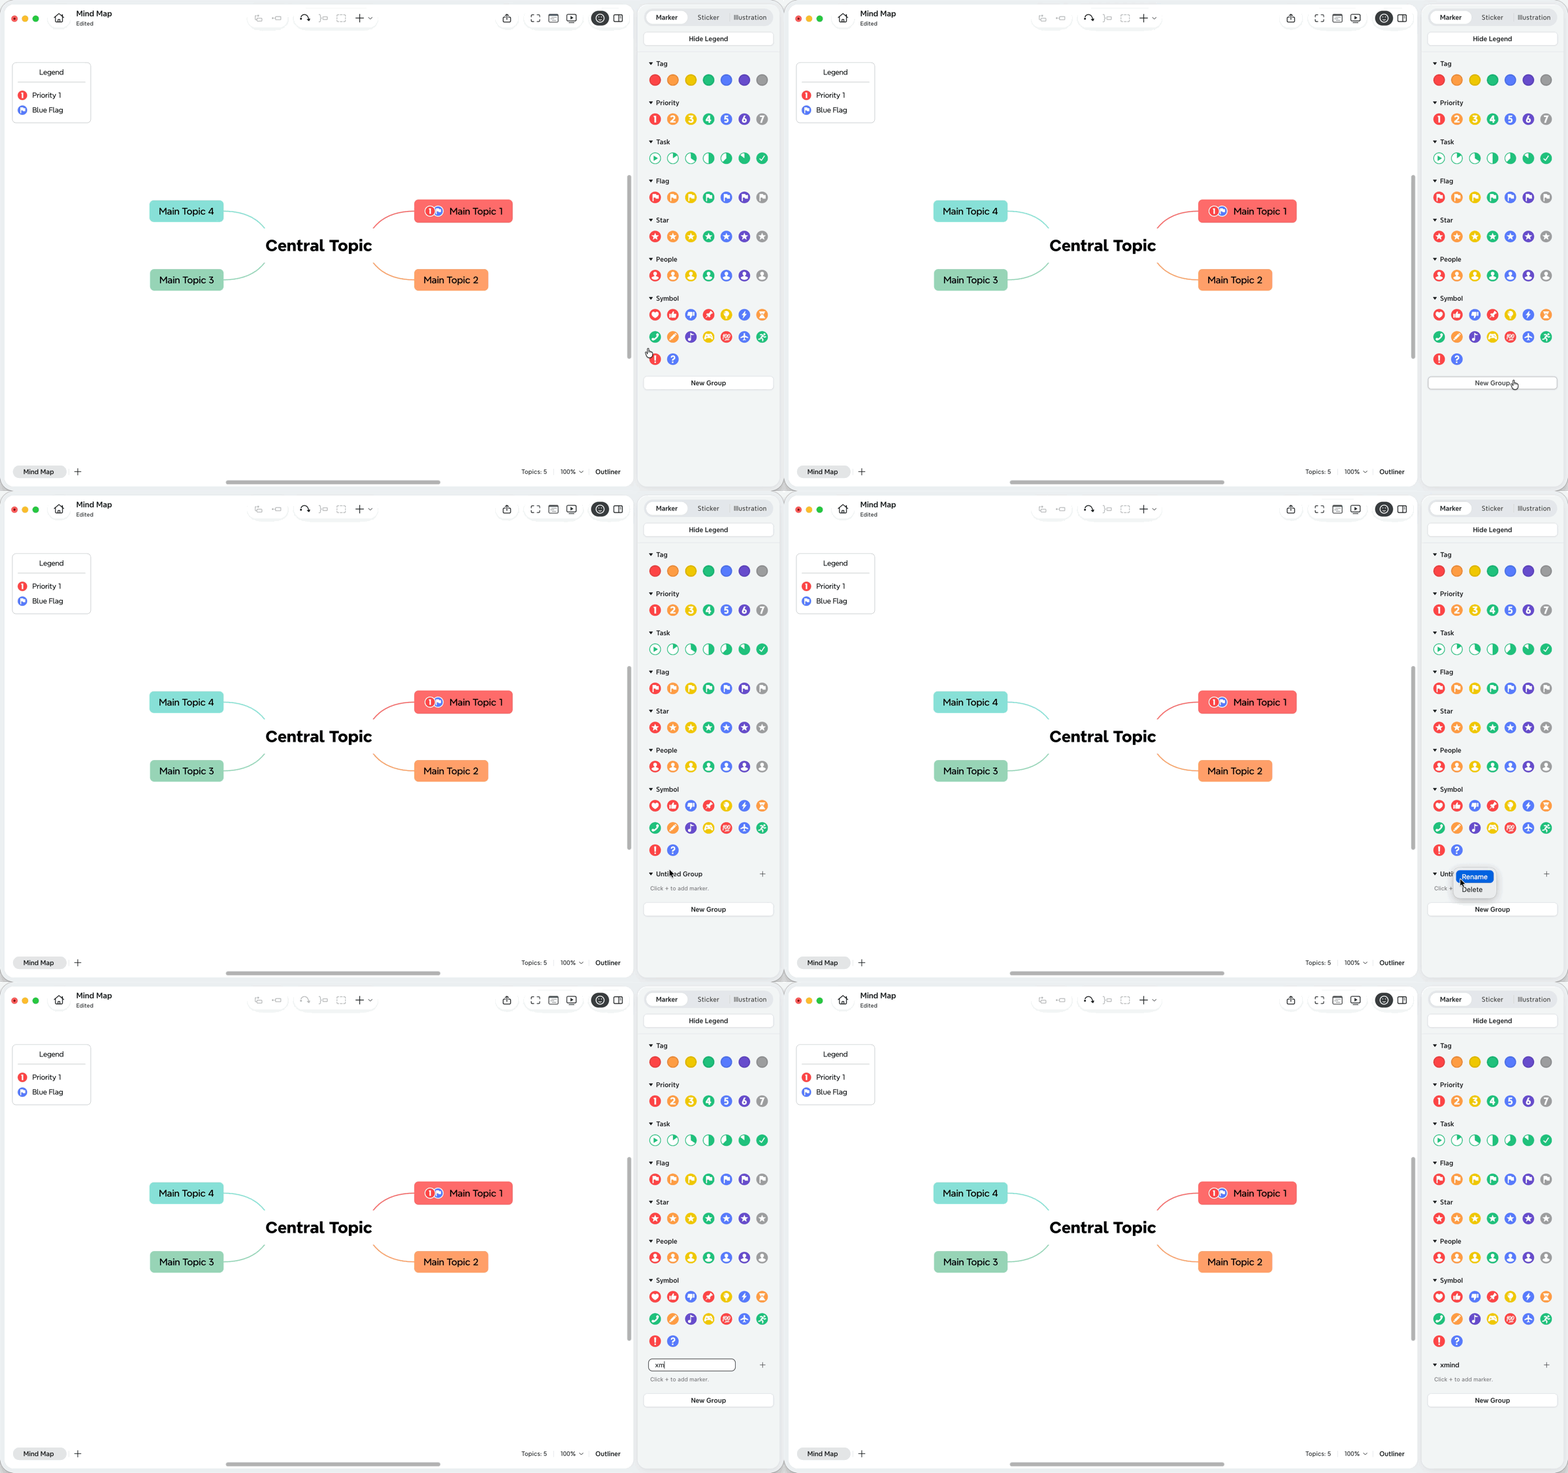
2️⃣ Open the Marker panel, then find the New Group button, click it then enter a name for the custom marker group.
The new group will appear in the Marker panel, where you can add and manage custom markers.
3️⃣ Right click the name of the group, you can choose to Rename or Delete the group.
Add Custom Markers
After creating a custom group, you can add custom markers by importing images or marker packages.
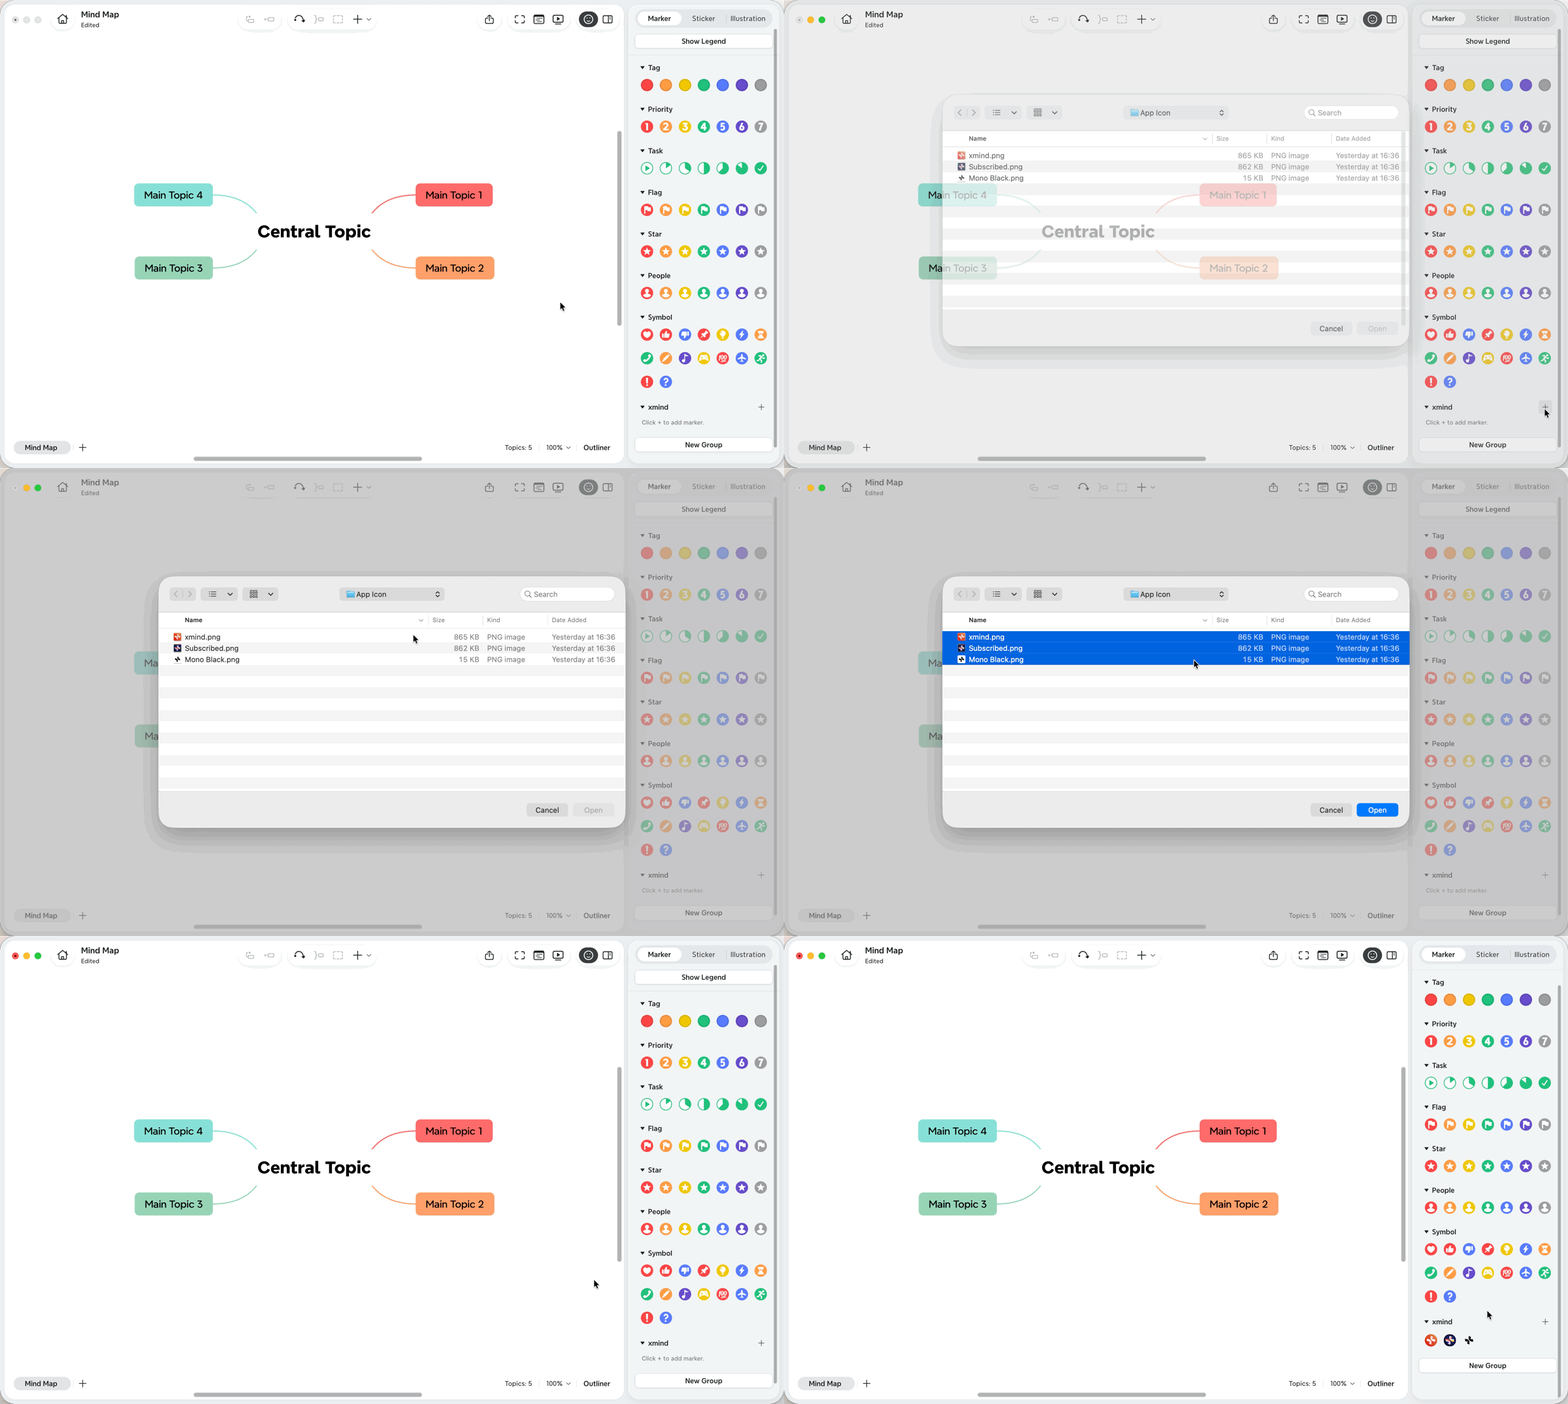
1️⃣ Go to the custom marker group.
2️⃣ Click the add (+) button.
3️⃣ Choose the files you want to import and confirm.
You can import multiple files at once. Each imported image will be added as a custom marker in the selected group.
Supported import sources include:
-
Local images: PNG, JPG, and SVG
-
Historical marker packages:
.xrbfiles
Rename a Custom Marker
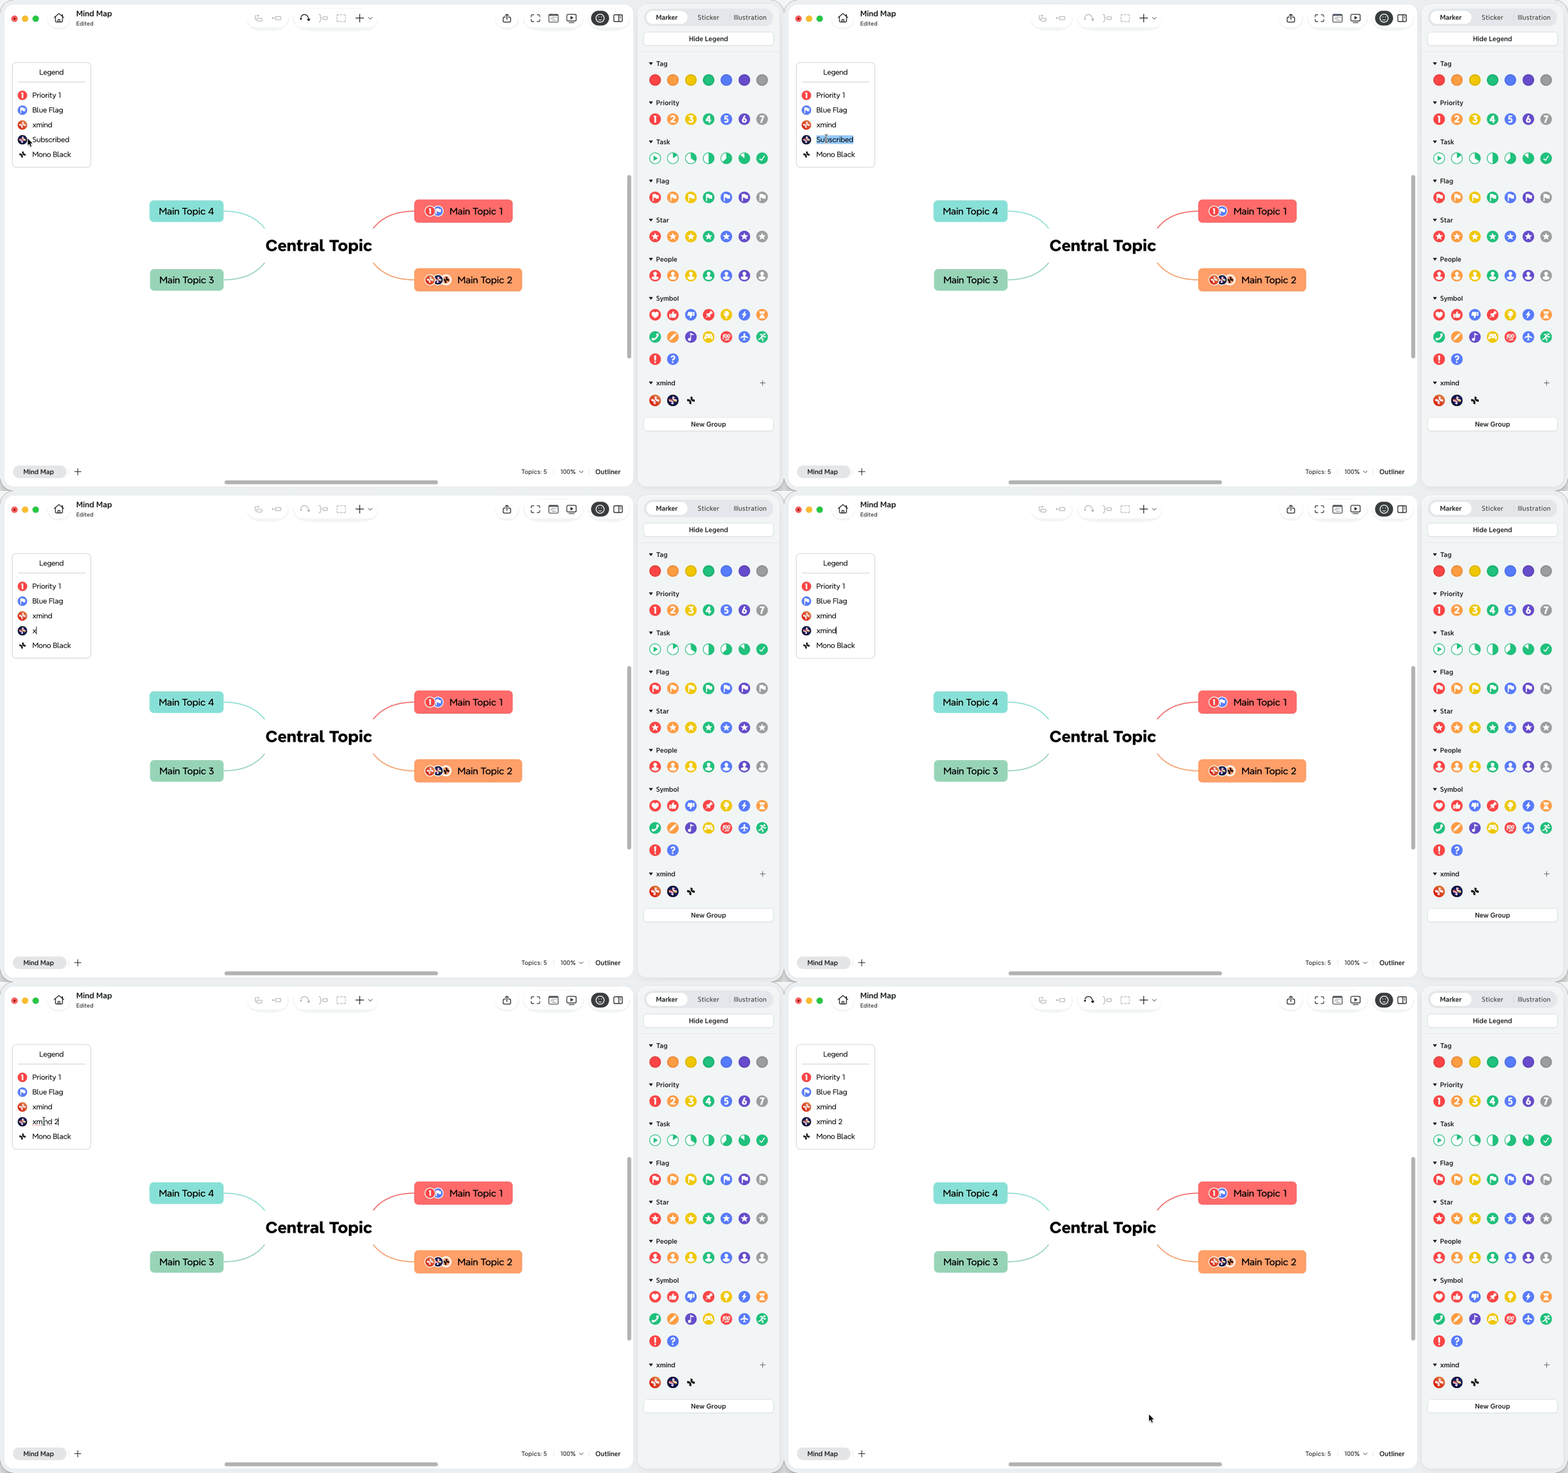
Custom markers can be renamed through the marker legend.
1️⃣ Insert the custom marker into the mind map.
2️⃣ Choose to Show the legend.
3️⃣ In the legend, double-click the marker text, then you can edit the name of the marker.
Manage the Custom Marker
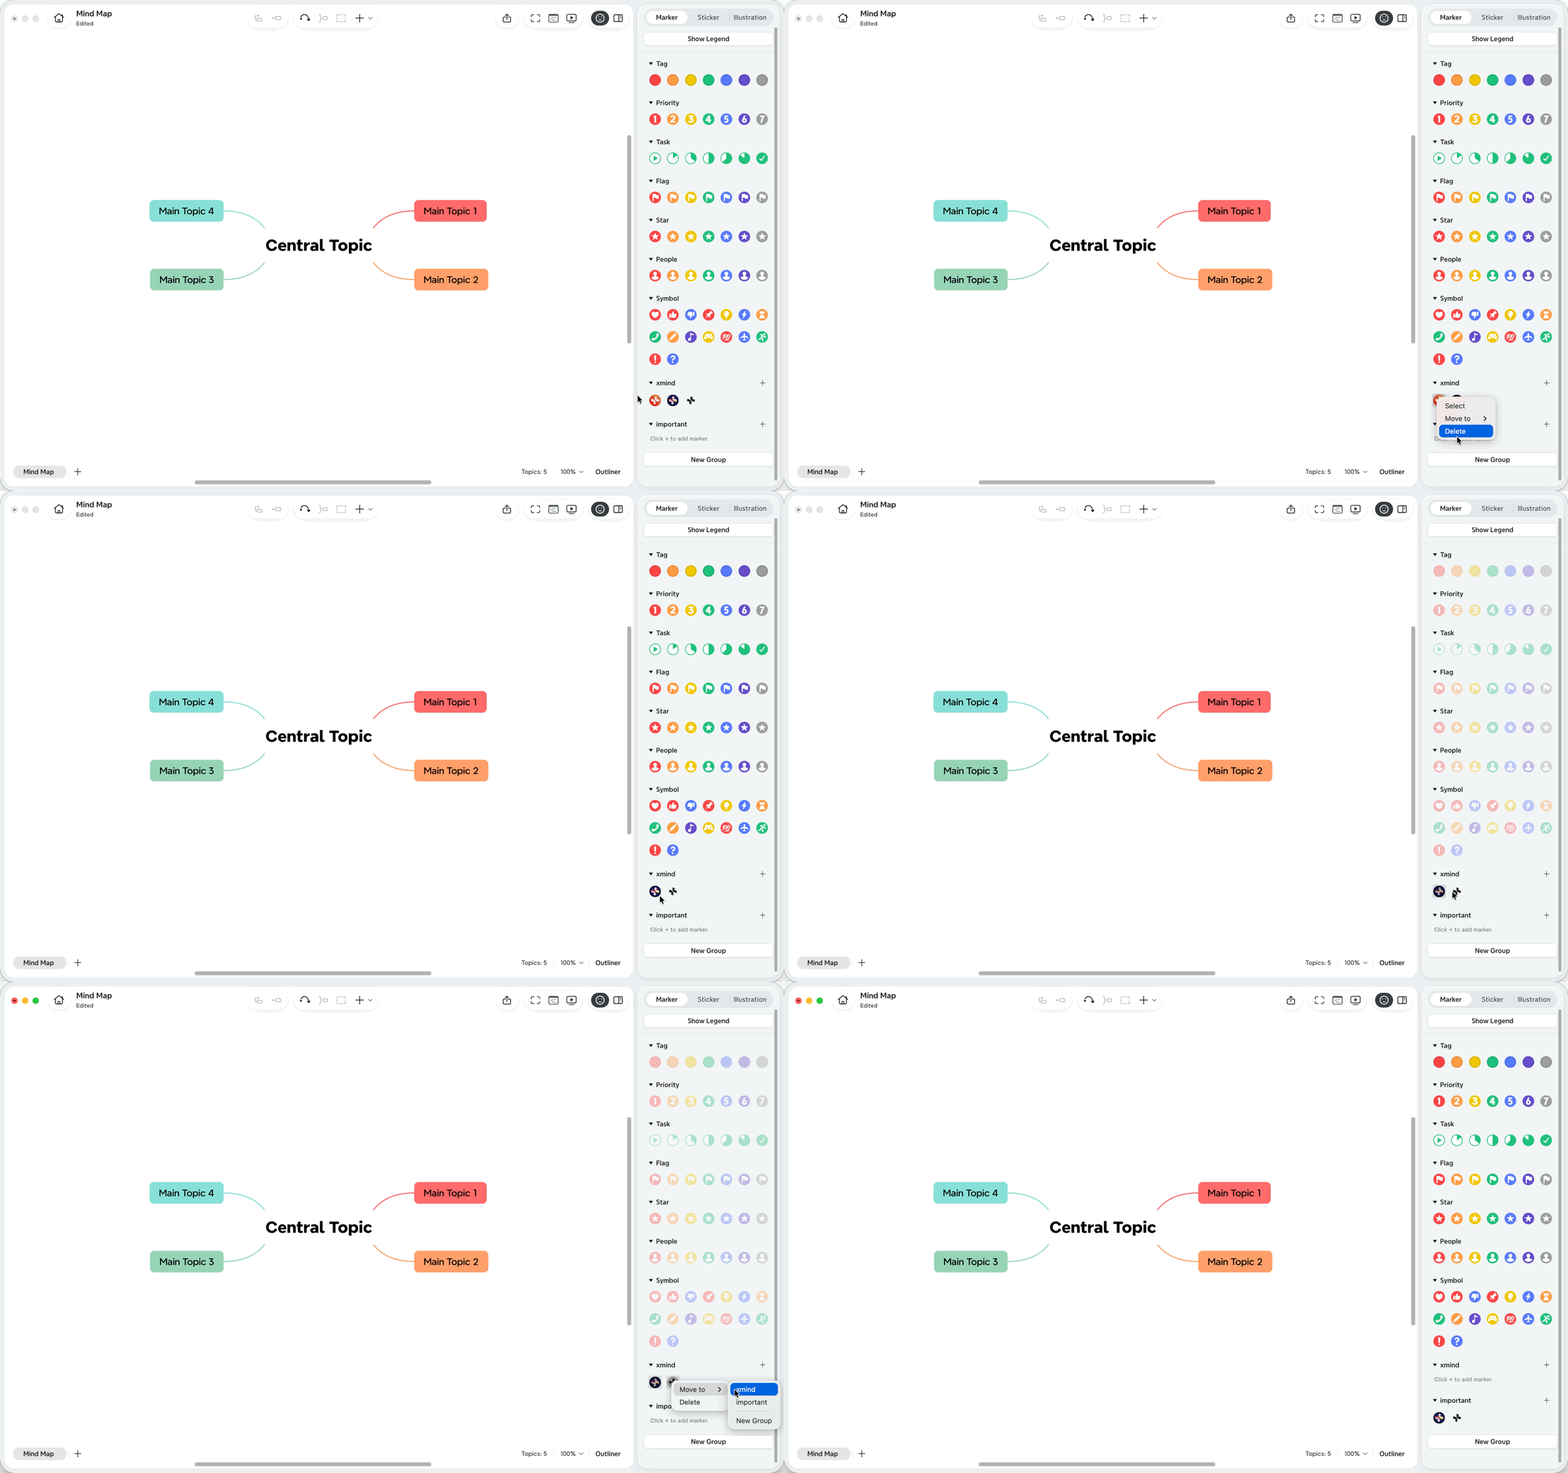
You can move custom markers to another group or delete custom markers:
1️⃣ Open the Marker panel.
2️⃣ Find the custom marker you want to move.
3️⃣ Right click, Choose Move to then Select the target group. Or choose Delete to delete the marker.
Attention: To manage multiple custom markers at once, click Select, choose the markers you want to edit, then move or delete them in bulk.
Availability of Custom Marker
-
Custom markers can only be created and managed in local files on Xmind Desktop with a Premium subscription.
-
When the local file is uploaded to the cloud, the custom markers will still be displayed in the mind map.
-
Other people can also see the custom markers when the file is shared.
-
Custom markers remain visible when the file is opened on other platforms.